Table of Contents Kenmore Limited Warranty IMPORTANT SAFETY INSTRUCTIONS Before Using Your Dishwasher Dishwasher Feature: Operating Instruction Preparing and Loading Dishes . Dishwasher Dispenser and Detergents Care & Cleaning Before You Call Solutions to common problems Protection Agreements Sears Service... Kenmore Limited Warranty When this appliance is installed, operated and maintained according to all supplied instructions, the following warranty coverage applies.
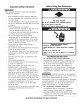
Important Safety Instructions A WARNING When using the dishwasher, follow basic precautions, including the following: Read all instructions before using the dishwasher, Use your dishwasher only as instructed in this Use and Care Guide. Use only detergents or rinse agents recommended for use in a dishwasher, and keep them out of reach of children. When loading items to be washed: Locate sharp items and knives so that they are not likely to damage the door seal or tub.
Product Record In this space below, record the date of purchase, model and serial number of your product. You will find the mode] and serial number printed an an identification plate. See Dishwasher Features below for serial label location. Model No. 587. Serial No.
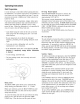
Operating Instructions Sonar. Delay | 2 pes tap | Ae | Dry Stan | LSE dic ei SARI Appearance may vary from your model. Cycle Chart * Includes dry time. Cycle | Description To Select Cycle Water Time* Washes/ (approx.) (approx.)| Rinses Pots & |For heavily sailed dishes | « Select POTS & PANS. 4.41 gal. 125 mind. 2 washes Pans and silverware. » Select desired OPTIONS. 16.7 liters 5 rinses Normal | For regularly soiled dishes | + Select NORMAL WASH. 35 gal 95 mind. 2 washes Wash | and silverware.
Operating Instructions Dish Preparation It is not necessary to rinse dishes before putting them into the dishwasher. Just remove large pieces and quantities of food, bones, pits, etc. Empty glasses and cups. It may be necessary to pres oak or lightly scour firmly cooked-on or baked-on foods. Food such as mustard, mayonnaise, vinegar, lemon juice and tomato-based products may cause discoloration of stainless steel and plastics if allowed to sit for a long period of time.
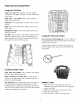
Preparing and Loading Dishes Loading the Top Rack Glasses and cups—Place glasses and cups against outside pins at an angle, Cups with a concave bottom will collect water. Small plates and saucers—Place dishes between middle two rows of pins. Plasterboard plastic ware in the top rack to avoid melting. Bowls—Place bowls between the middle 2 rows of pins facing down. Miscellaneous items—Place long handled knives and utensils in top rack. Cup Shelf—The cup shelf can be folded down over short . .
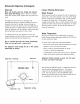
Dishwasher Dispenser & Detergents Filling the Detergent Dispenser The detergent dispenser has one main wash cup and one rewash cup. The covered cup opens automatically to release detergent. + Use only fresh automatic dish washing detergent, Other detergents will cause overdressing. + When using autocratic dish washing detergent tabs, place one tab in main wash cup and close. + Add detergent just before starting cycle. + Store detergent in a cool, dry location.
Dishwasher Dispenser & Detergents Rinse Aid Rinse aid greatly improves drying and reduces water spots and filming. Water “sheets” off dishes rather than forming water droplets that cling and leave spots. A dispenser, located next to the detergent cup, automatically releases a measured amount of rinse aid during the last rinse. If spotting and poor drying are problems, increase the amount of rinse aid dispensed by rotating the dial to a higher number. The dial is located under the dispenser cap.
Care & Cleaning CAUTION Property Damage Hazard Freezing temperatures may cause water lines to rupture, Be sure all supply lines to and circulating lines within dishwasher are protected. Failure to do so could result in property damage. Cleaning the Spray Arm The spray arm may need to be cleaned to insure that there are no clogs to the spray arm jets and bearings due to hard water chemicals.
Care & Cleaning WARNING Burn Hazard Allow heating element to cool before cleaning the interior. Failure to do so can result in burns. Unconstitutionally wipe with a mild nonabrasive detergent and water. Rinse and dry. Inside—The inside of the dishwasher is self-cleaning with normal use. To clean Stainless Steel wipe with the grain. NEVER use the products that contain Chlorine Bleach or Citric Acid. Important: The dishwasher motor is permanently lubricated at the factory and does not need to be oiled.
Connecting and Disconnecting Portable Dishwasher The portable dishwasher must be connected to a faucet and electrical outlet each time it is used. Follow directions on this page to properly connect dishwasher, Faucet Adapter Assembly {Figure A} Connecting the Portable Faucet Adapter Assembly {Figure B) IMPORTANT: Make sure door is latched before moving dishwasher. The power cord and faucet couplet with hoses are located in a compartment in back of dishwasher.
Solutions to Common Dish washing Problems Before calling for service, review this list. It may save you both time and expense. This list includes common experiences that are not the result of defective workmanship or material in your dishwasher. Dishes not clean—Check pages 4 to 8 for information on correct wash cycle, proper loading, water temperature, water pressure, hard water, amount of detergent, old and ineffective detergent, and dish placement.
Solutions to Common Dish washing Problems Pitting of stainless steel is caused by prolonged contact with detergent granules and foods like salt, mayonnaise, fruits, butter or milk. To prevent, rinse soon after use. Do not allow detergent to fall directly onto stainless steel items. Discoloration of aluminum—Anodized (colored) aluminum cannot withstand machine washing, Resulting lass of coral is permanent.
Master Protection Agreements Congratulations on making a smart purchase. Your new Kenmore product is designed and manufactured for years of dependable operation. But like all products, it may require preventive maintenance or repair from time to time, That's when having a Master Protection Agreement can save you money and aggravation. The Master Protection Agreement also helps extend the life of your new appliance.
Table des matières Caractéristiques .. Consignes de sécurité... Fonctionnement de T'appareil . Préparation et chargement de la vaisselle .. Distributeurs et de détergents Facteurs affectant le rendement... Entretien et nettoyage. Solutions aux problèmes d'utilisation courante.. Contrats de Protection Principaux Services Seras ..
Enregistrement du Produit Dans l'espace ci-dessous, inscrivez les numéros complets du modelé et de série, et la date d'achat. Vous pouvez trouver cette information sur Étiquette des numéros de modelé et de série, a I'emplacement indique dans la section Fonctionnement de l'appareil de ce livre. Munissez-vous de cette information pour obtenir de aide rapidement lorsque vous contactez Seras au sujet de votre électroménager.
Fonctionnement de l'appareil Comment Votre Lave-Vaisselle Nettoie-T-IL? Votre lave-vaisselle, illusoire ci-dessous, nettoie en arrosant les surfaces souillées de la vaisselle et des ustensiles avec un mélange d'eau propre et chaude et de détergent. Chaque cycle commence par un pré-drainage. Ensuite, le Jave-vaisselle se remplit jusqu’au niveau de I'élément chauffant.
Tableau des cycles * Comprend le temps de séchage Cycle Description Pour sélectionner le cycle Eau Durée” | Lavages/ P Y (approximer) | (approximer) Marnes Pots & casseroles | Pour la vaisselle elles |» Sélectionnez POTS & PANS. 16.7 litres | 125 mins | 2 lavages {Pots & Pans} ustensiles trais sales. » Sélectionnez les OPTIONS désirées. 5 rinçages Lavage normal Pour la vaisselle et « Sélectionnez NORMAL RASH.
Fonctionnement de l'appareil Préparation De La Vaisselle Enlevez les gros morceaux de nourriture, les os, les noyaux, les cure-dents, etc. Le système de lavage enlèvera les particules d’aliments restantes, Grattez doucement les aliments branlés avec un ustensile ne rayant pas ou faites tremper le plat avant de le laver (Voir Figure 1). Videz les liquides des verres et des tasses.
Préparation et chargement de la vaisselle Chargement du panier a ustensiles Placer les couteaux et ustensiles pointus manche vers le haut. S'assurer qu'aucun article ne passe a travers les trous du panier, ce qui pourrait arrêter (a rotation du bras gicleur. Mélanger les articles dans chaque section pour éviter qu'ils ne s’emboîtent. Le jet d'eau ne peut atteindre efficacement les articles emboîtes. Ajout d'un article a laver 1.
Distributeurs et détergents Guide d'utilisation de détergent Cycle Eau douce (0-3 grains) Eau moyennement dure (4-8 grains) Eau dure {9-12 grains) Eau très dure® {plus de 12 grains) Pots & Casseroles (Pots & Pans} Lavage normal {Normal Rash} 15¢cuillerées a the (chaque godet — rempli au 1/4) 4 cuillerées a the {chaque godet — rempli jusqu'au repère au-dessus de «Relarguer) 6 cuillerées a the (chaque godet — entièrement rempli) Chaque godet — entièrement rempli Lavage Rapide {FAST Rash } 1.
Facteurs affectant le rendement Pression de l'eau La pression de 'eau doit être entre kpa (15 et 120 livres par pouce carré). | se produit le plus souvent une baisse de pression d'eau lors des périodes de haute consommation, comme quand la machine a laver le linge ou les douches fonctionnent. Pour déterminer si la pression de 'eau est suffisante, mettre un contenant de 2 litres (2 pintes} sous Je robinet d'eau chaude le plus prés du lave-vaisselle cuver a fond.
Entretien Et Nettoyage Nettoyage du filtre cylindrique Le filtre cylindrique est congru pour recueillir de gros détritus comme du verre cassé, des os ete des noyaux. Ce filtre doit &tre nettoyé pour maximiser les performances de lavage. Enlevez le panier inférieur, tournez le filaire cylindrique comme indique sur l’illustration, puis retirez le filtre. Ensuite, videz et nettoyez ce dernier en le rinçant a 'eau courante, puis remettez-le en place.
Solutions aux problèmes d'utilisation courante Avant de faire appel a un technicien, consulter la liste qui suit. Cela peut épargner temps et argent. Cette liste porte sur des troubles communs qui ne sont pas causés par un défaut de fabrication ni par un matériau défectueux. Taches résiduelles d'aliments sur la vaisselle + Sélectionnez un autre cycle pour un lavage plus long, + Vérifiez la section chargement des paniers pour un chargement appropriatrice d’emboîter les articles.
Solutions aux problèmes d'utilisation courante (suite) Vaisselle tachée ou décolorée + Le thé et le café peuvent tacher les tasses. Enlevez les taches a la main avec une solution d'une 1/2 tasse de Jjavelisant {120 ml) et d'une pinte d'eau tiède. Rincez a fond. «+ Les dépôts de fer dans f'eau peuvent former une pellicule jaune ou brune. Un filtre spécial installé dans la conduite d’alimentation d'eau corrigera la situation. {Voir Enlever les taches et pellicule.
Solutions aux problèmes d'utilisation courante (suite) 1. Chargez la vaisselle et les verres propres comme d'habitude. Ne mettez aucun ustensile de métal ou d'argenterie. . N'ajoutez pas de détersif. . Sélectionnez l'option HEAVISIDE RASH. Fermez et verrouillez la porte, . Laissez le lave-vaisselle fonctionner pendant 25 minutes pour arriver au cycle de lavage principal. . Déverrouillez la porte, ouvrez-la et versez 2 tasses de vinaigre blanc au fond du lave-vaisselle. 6.
Get it fixed, at your home or ours! Your Home For troubleshooting, product manuals and expert advice: @ manageability www.managemylife.com For repair — in your home — of all major brand appliances, lawn and garden equipment, or heating and cooling systems, no matter who made it, no matter who sold it! For the replacement parts, accessories and owner's manuals that you need to do-it-yourself. For Sears professional installation of home appliances and items like garage door openers and water heaters.