INSTRUCTION MANUAL VHF FM TRANSCEIVER TK-2200 UHF FM TRANSCEIVER TK-3200 KENWOOD MASTER PROTALK DISTRIBUTOR PROGRAM e Commerce Supply Inc 21092 Bake Parkway #100 Lake Forest, CA 92630 © B62-1791-10 (K, K2) 949-305-5072 949-480-0039 FAX 09 08 07 06 05 04 03 02 01 www.KenwoodMPD.com radios@KenwoodMPD.com TK-2200/3200 E Cover-10 1 04.7.
THANK YOU We are grateful for your purchase of this KENWOOD product and welcome you to the Business Radio Service (BRS). Your KENWOOD 2-way Business Radio is called a “transceiver”, meaning “transmitter & receiver”. We believe this easy-to-use transceiver will provide you with dependable and reliable communications. This KENWOOD transceiver is a precision device. Treat it with care, and you will enjoy years of reliable operation.
OPERATING CONDITIONS Open locations (no obstructions) Up to 6 miles (approximately 9.6 km) Residential areas (near buildings) Up to 1.5 miles (approximately 2.4 km) In steel/ concrete reinforced buildings Up to 250,000 square feet (approximately 23,220 m2) In high rises Up to 20 floors Note: The listed ranges are based on field testing and may vary with your operating conditions and individual transceiver. i TK-2200/3200 E 00i-vi-10 1 04.7.
FCC LICENSE INFORMATION Your KENWOOD transceiver operates on communications frequencies which are subject to FCC (Federal Communications Commission) Rules & Regulations. FCC Rules require that all operators using Private Land Mobile radio frequencies obtain a radio license before operating their equipment. Application for license must be made on FCC form 601, schedules D and H, and Remittance form 159 FAX: Forms can be obtained by fax from the FCC Fax-OnDemand system.
PRECAUTIONS • • • • • • Refer service to qualified technicians only. Do not modify or attempt to adjust this transceiver for any reason. Do not expose the transceiver to long periods of direct sunlight, nor place it close to heating appliances. Do not place the transceiver in excessively dusty, humid, or wet areas, nor on unstable surfaces. Avoid extreme exposure to heat and cold. This transceiver can be used in mild weather conditions and is not waterproof.
One or more of the following statements may be applicable: FCC WARNING This equipment generates or uses radio frequency energy. Changes or modifications to this equipment may cause harmful interference unless the modifications are expressly approved in the instruction manual. The user could lose the authority to operate this equipment if an unauthorized change or modification is made.
ATTENTION (U.S.A. Only): The RBRC Recycle seal found on KENWOOD nickel metal hydride (Ni-MH) battery packs indicates KENWOOD’s voluntary participation in an industry program to collect and recycle Ni-MH batteries after their operating life has expired. The RBRC program is an alternative to disposing Ni-MH batteries with your regular refuse or in municipal waste streams, which is illegal in some areas. For information on Ni-MH battery recycling in your area, call (toll free) 1-800-8-BATTERY (1-800-822-8837).
CONTENTS UNPACKING AND CHECKING EQUIPMENT ................................... 1 SUPPLIED ACCESSORIES ......................................................... 1 ORIENTATION .................................................................... 3 PREPARATION ................................................................... 4 CHARGING THE Ni-MH BATTERY PACK .......................................... 4 INSTALLING/ REMOVING THE BATTERY PACK ......................................
UNPACKING AND CHECKING EQUIPMENT Carefully unpack the transceiver. We recommend you identify the items listed in the following table before discarding the packing material. If any items are missing or have been damaged during shipment, file a claim with the carrier immediately.
Rapid battery charger AC adaptor Ni-MH battery pack (KNB-29N) Speaker/ microphone jack cover Speaker/ microphone locking bracket Belt clip Screw set 2 TK-2200/3200 E 01-33-10 2 04.7.
ORIENTATION Antenna (optional) LED indicator Indicates the transceiver status. Lights red while transmitting, green while receiving, and flashes red while the battery power is low while transmitting. Channel selector Rotate to change the operating channel from 1 ~ 2 or 1 ~ 8. Power switch/ Volume control Turn clockwise to switch the power ON and counterclockwise to switch the power OFF. Rotate to adjust the volume. PTT (Push to Talk) switch Press and hold, then speak into the microphone to transmit.
PREPARATION CHARGING THE Ni-MH BATTERY PACK The initial charging of the battery pack after purchase or extended storage (greater than 2 months) will not bring the battery pack to its normal operating capacity. After repeating the charge/discharge cycle 2 or 3 times, the operating capacity should increase to normal. ◆ Do not recharge the battery pack if it is already fully charged. Doing so may cause the life of the battery pack to shorten or the battery pack may be damaged.
Plug the AC adaptor cable into the adaptor jack located at the rear of the charger. 1 2 Plug the AC adaptor into an AC outlet. Slide the Ni-MH battery pack or transceiver with a Ni-MH battery pack into the charger. Make sure the battery pack terminals are in contact with the charger terminals by aligning the grooves of the battery pack with the tabs of the charger. The charger LED lights red and charging begins. 3 When charging is completed, the indicator lights green.
INSTALLING/ REMOVING THE BATTERY PACK The battery pack is not charged at the factory; charge it before use {pages 5 and 6}. Average battery pack life (calculated using 5% transmit time, 5% receive time, and 90% standby time) is 18 hours when using the dealer set Battery Save function, and 14 hours when not using the Battery Save function. ◆ Do not short the battery terminals. ◆ Do not dispose of the battery by fire. ◆ Never attempt to remove the casing from the battery pack.
INSTALLING THE OPTIONAL ANTENNA Screw the antenna into the connector on the top of the transceiver by holding the antenna at its base and turning it clockwise until secure. Note: The antenna is neither a handle, a key ring retainer, nor a speaker/ microphone attachment point. Using the antenna in these ways may damage the antenna and degrade your transceiver’s performance. INSTALLING THE BELT CLIP If necessary, attach the belt clip using the two supplied 3 x 8 mm screws.
INSTALLING THE COVER OVER THE SPEAKER/ MICROPHONE JACKS If you are not using a speaker/ microphone, install the cover over the speaker/ microphone jacks using the supplied 3 x 6 mm screw. Note: To keep the transceiver water resistant, you must cover the speaker/ microphone jacks with the supplied cover. INSTALLING THE OPTIONAL SPEAKER/ MICROPHONE (OR HEADSET) Insert the speaker/ microphone (or headset) plugs into the speaker/ microphone jacks.
GETTING STARTED Turn the Power switch/ Volume control clockwise to switch the transceiver power ON. 1 A beep sounds. 1 Rotate the Channel selector to select your desired channel. When you receive an appropriate signal, you will hear audio from the speaker. Adjust the volume as necessary. 2 1 To make a call, press and hold the PTT switch, then speak into the microphone to transmit. Release the PTT switch to receive. 3 The LED lights red while transmitting.
VOICE OPERATED TRANSMISSION (VOX) Using the VOX feature, you can operate the transceiver hands-free. In order to use this feature, however, you must use an optional headset; VOX will not function with the built-in microphone. For best operating conditions, we recommend you use an optional headset with both an ear piece and a microphone on a boom that rests in front of your mouth. With VOX activated, your voice level will determine when the transceiver transmits.
Press the Lock key to increase the VOX Gain level and the Scan key to decrease the level. The VOX Gain can be adjusted from level 1 to level 10 and OFF. The transceiver announces the VOX Gain level as you adjust it. If OFF is selected, the transceiver announces “Off”. 3 Press the PTT switch within 5 seconds to save the setting, otherwise the operation will cancel. 4 A beep will sound and the transceiver will announce the new VOX Gain level.
VOX OPERATION 1 Set up a VOX Gain level from 1 to 10 {page 10}. To transmit, simply speak into the headset microphone. You do not need to press the PTT switch; the transceiver automatically detects your voice and begins transmitting. 2 To stop transmitting, stop speaking. Transmission will continue momentarily after you stop speaking, so ensure your transmission will not be cut off. 3 4 To exit VOX mode, set the VOX Gain level {page 10} to OFF.
KEY FUNCTIONS LOCK KEY The default function of the Lock key is Super Lock. Super Lock is designed to prevent accidental function changes on your transceiver, during operation. Press and hold the Lock key for 4 seconds to lock the transceiver keys. The following keys/ functions can still be used when Super Lock is active: Calling Alert, Monitor, Monitor Momentary, PTT, Squelch Off, Squelch Off Momentary, and Volume.
To start scanning, press the Scan key. • • • The LED indicator flashes green and scanning starts from the current channel and ascends through the channel numbers. When a signal is detected on a channel and the QT/ DQT matches, scan pauses at that channel and the LED indicator lights green. When the signal is no longer present, scanning continues after 3 seconds (default). To end Scan, press the Scan key again.
BACKGROUND OPERATIONS TIME-OUT TIMER (TOT) The purpose of the Time-out Timer is to prevent you from using a channel for an extended period of time. This function is useful, for example, when you accidentally keep the PTT switch pressed. Additionally, by limiting the amount of time you can continuously transmit, this feature helps you save on battery power consumption. If you continuously transmit for 60 seconds (default), the transceiver will stop transmitting and an alert tone will sound.
QUIET TALK (QT)/ DIGITAL QUIET TALK (DQT) Quiet Talk (QT) and Digital Quiet Talk (DQT) are functions that reject signals from undesired parties that are using the same channel as you. You will hear audio from the speaker only when you receive a signal that contains a QT tone or a DQT code that matches the one set up on the channel you are using. If a call containing a different tone or code is made on the same channel you are using, squelch will not open and you will not hear the call.
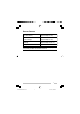
CHANNEL SETUP MODE This transceiver allows you to reprogram each of the channels with different frequencies and Quiet Talk/ Digital Quiet Talk settings. The table below lists the default channel frequencies. All channels are set with a 67.0 Hz QT tone by default. Channel Table Table Frequency (MHz) Frequency (MHz) Number Number Number 1 2 1 2 3 4 5 6 7 8 TK-2200 (K) 2-Channel Model 3 154.5700 4 154.6000 TK-2200 (K2) 8-Channel Model 3 154.5700 4 154.6000 5 151.7000 6 151.7600 7 151.8200 8 151.8800 9 151.
CHANNEL OPERATING FREQUENCIES To change the operating frequency of a channel: With the transceiver power OFF, press and hold the PTT switch and Lock key while turning the transceiver power ON. 1 Continue to hold the PTT switch and Lock key until the LED lights orange and the transceiver announces “Self”. 1 Release the PTT switch and Lock key. 2 The transceiver announces “Channel”. Pressing the Lock key or Scan key will toggle between QT, DQT, and Channel setup.
Press the PTT switch within 5 seconds to save the setting, otherwise the operation will cancel. 5 A beep will sound. Repeat steps 3 to 5 to set up another channel. Turn the transceiver power OFF and then ON again to activate the new settings. 6 1 Note: The transceiver will automatically return to normal operation if no action is performed for 5 seconds. TK-2200 Operating TK-2200 Operating Table Number Frequency (MHz) Table Number Frequency (MHz) 0 OFF 14 151.7450 1 151.6250 15 151.7750 2 151.
TK-3200 Operating TK-3200 Operating Table Number Frequency (MHz) Table Number Frequency (MHz) 0 OFF 1 464.5000 29 462.9125 2 464.5500 30 464.4875 3 467.7625 31 464.5125 4 467.8125 32 464.5375 5 467.8500 33 464.5625 6 467.8750 34 466.0375 7 467.9000 35 466.0625 8 467.9250 36 466.0875 9 461.0375 37 466.1125 10 461.0625 38 466.1375 11 461.0875 39 466.1625 12 461.1125 40 466.1875 13 461.1375 41 466.2125 14 461.1625 42 466.2375 15 461.1875 43 466.2625 16 461.2125 44 466.2875 17 461.2375 45 466.3125 18 461.
QUIET TALK (QT)/ DIGITAL QUIET TALK (DQT) SETTINGS To change the QT/ DQT settings of a channel: With the transceiver power OFF, press and hold the PTT switch and Lock key while turning the transceiver power ON. 1 Continue to hold the PTT switch and Lock key until the LED lights orange and the transceiver announces “Self”. 1 Release the PTT switch and Lock key. 2 The transceiver announces “Channel”. Pressing the Lock key or Scan key will toggle between QT, DQT, and Channel setup.
Press the Lock key to increment the Tone number or the Scan key to decrement the number, to select the new tone or code. Tone numbers and their corresponding tones/ codes are provided in the table on pages 23 and 24. Press and hold the Lock or Scan key to increment/ decrement the QT or DQT number by 5 at a time. A voice announcement will inform you of the currently selected QT or DQT number. 5 Press the PTT switch within 5 seconds to save the setting, otherwise the operation will cancel.
QT Channel Settings: QT QT QT QT QT QT Number Frequency Number Frequency Number Frequency 1 67.0 Hz 15 110.9 Hz 29 179.9 Hz 2 71.9 Hz 16 114.8 Hz 30 186.2 Hz 3 74.4 Hz 17 118.8 Hz 31 192.8 Hz 4 77.0 Hz 18 123.0 Hz 32 203.5 Hz 5 79.7 Hz 19 127.3 Hz 33 210.7 Hz 6 82.5 Hz 20 131.8 Hz 34 218.1 Hz 7 85.4 Hz 21 136.5 Hz 35 225.7 Hz 8 88.5 Hz 22 141.3 Hz 36 233.6 Hz 9 91.5 Hz 23 146.2 Hz 37 241.8 Hz 10 94.8 Hz 24 151.4 Hz 38 250.3 Hz 11 97.
DQT Channel Settings: DQT Number DQT Code DQT Number DQT Code DQT Number DQT Code 1 2 3 4 5 6 7 8 9 10 11 12 13 14 15 16 17 18 19 20 21 22 23 24 25 26 27 28 D023N D025N D026N D031N D032N D043N D047N D051N D054N D065N D071N D072N D073N D074N D114N D115N D116N D125N D131N D132N D134N D143N D152N D155N D156N D162N D165N D172N 29 30 31 32 33 34 35 36 37 38 39 40 41 42 43 44 45 46 47 48 49 50 51 52 53 54 55 56 D174N D205N D223N D226N D243N D244N D245N D251N D261N D263N D265N D271N D306N D311N D315N D33
KEY ASSIGNMENT MODE This transceiver allows you to reprogram the Lock and Scan keys with any of the functions listed in the table below. Explanations on the use of each function are provided on the following pages.
To change the functions of the Call and Monitor keys: With the transceiver power OFF, press and hold the Lock and Scan keys while turning the transceiver power ON. 1 Continue to hold the Lock and Scan keys until the LED lights orange and the transceiver announces “Setup”. 1 Continue to press and hold the key to be reprogrammed (either the Lock key or the Scan key), while releasing the remaining key. 2 3 The transceiver will announce “Table zero” {page 25}.
Press the PTT switch within 5 seconds to save the setting, otherwise the operation will cancel. 5 A beep will sound and the transceiver will announce the new Table number. Turn the transceiver power OFF and then ON again to activate the new settings. 6 1 Note: The transceiver will automatically return to normal operation if no action is performed for 5 seconds. 27 TK-2200/3200 E 01-33-10 27 04.7.
CALLING ALERT Calling alert tones are used to identify yourself to your party members and inform them that you are about to make a call. Your dealer can set up your transceiver with 1 of several different calling alert tones. If each party member uses a different calling alert tone, it is easy to know who is making the call To make a call using the calling alert tone, press and hold the PTT switch, then press the key programmed as Calling Alert.
MONITOR/ SQUELCH OFF You can use the key programmed as Monitor or Squelch Off to listen to weak signals that you cannot hear during normal operation, to deactivate channel signaling, and to adjust the volume when no signals are present on your selected channel. • • • • Monitor: Momentarily press to deactivate QT or DQT signaling. Press the key again to return to normal operation. Monitor Momentary: Press and hold to deactivate QT or DQT signaling. Release the key to return to normal operation.
■ Temporary Delete You can temporarily remove specific channels from the scanning sequence during Scan. When Scan pauses at a channel, you can remove that channel from the scanning sequence by pressing and holding the key programmed as Temporary Delete for 1 second or Scan + Temporary Delete for 3 seconds. • You cannot remove a channel if there will be less than 2 channels available for scanning remaining.
ALL RESET MODE At some point in time, you may desire to reset the transceiver settings to their default values. This function will reset all channels to their default frequencies and QT/ DQT, the VOX function to its default status, and all keys to their default functions. To reset the transceiver: With the transceiver power OFF, press and hold the PTT switch, the Lock key, and the Scan key while turning the transceiver power ON. 1 1 Continue to hold the keys for 2 seconds, until the LED lights orange.
OPTIONAL ACCESSORIES KMC-17 (Speaker/ microphone) KMC-21 (Speaker/ microphone) KHS-1 (Headset) KHS-22 (Headset) SE N PT S. T VOX PTT KWR-1 (Water resistant bag) 32 TK-2200/3200 E 01-33-10 32 04.7.
TROUBLESHOOTING GUIDE Problem Solution • Cannot turn the transceiver power ON. Battery power dies shortly after charging. Cannot talk to or hear other members in your group. Other voices (besides group members’) are present on the channel. • The battery pack may be dead. Recharge or replace the battery pack. The battery pack may not be installed correctly. Remove the battery pack and install again. • The battery pack life is finished. Replace the battery pack with a new one.