
Instructions / Assembly
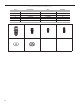


13
INST
ALLATION INSTRUCTIONS
Freestanding Outdoor Grill Installation
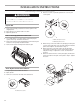
Unpa
ck Grill
1. R
emove all packaging materials and remove grill from the
shipping base.
2. Move grill close to desired outdoor location.
3. Open the grill hood.
Remo
ve Packaging Material Inside the Grill
1. Use a utility knife to cut yellow straps and packing tape to
open box from top and remove the boxes.
2. Remove the warming shelf and grill grates from inside the grill
and remove the package inside the firebox.
3. Remove foam block and wrap from inside the grill.
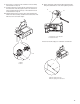
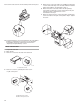
Att
ach Right Side Shelf with Side Burner
1. Unpack right side shelf with side burner.
2. Open grill lid.
3. Remove 2 screws from the side of the side burner.
4. Remove 2 screws on grill side panel and 1 screw on grill
control panel.
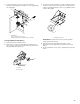
5.
6.
Attach the top of the side shelf to the grill (A) by inserting the
2 screws removed in Step 3 into the side shelf from inside the
grill hood and tighten. See illustration in Step 7.
Attach the bottom of the side shelf to the side panel (B)
of the grill by inserting the 2 screws removed from the grill
side panel in Step 4.
Tighten the screws. See illustration
in Step 7.
A. Side burner screws
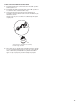
Excessive W eight Hazard
Use two or more people to move and install grill.
WARNING
Failure to do so can result in back or other injury.
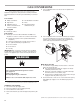
A
A.
Grill control panel screw
B. Grill side panel screws
A
B
7. Atta
ch the side shelf to the control panel (C) by inserting the
screw removed from the grill control panel in Step 4. Tighten
the screw.
A
B
C