ELECTRIC RANGE Use & Care Guide In the U.S.A, for questions about features, operation, performance, parts, accessories or service, call: 1-800-422-1230 In Canada, for product-related questions call: 1-800-461-5681, for parts, accessories, installation and service, call: 1-800-807-6777 or visit our website at... www.kitchenaid.com or www.KitchenAid.ca Table of Contents............................................................................................................
TABLE OF CONTENTS RANGE SAFETY ............................................................................ 3 The Anti-Tip Bracket ................................................................... 3 PARTS AND FEATURES............................................................... 6 COOKTOP USE ............................................................................. 7 Cooktop Controls........................................................................ 7 Ceramic Glass ..............................
RANGE SAFETY Your safety and the safety of others are very important. We have provided many important safety messages in this manual and on your appliance. Always read and obey all safety messages. This is the safety alert symbol. This symbol alerts you to potential hazards that can kill or hurt you and others. All safety messages will follow the safety alert symbol and either the word “DANGER” or “WARNING.
IMPORTANT SAFETY INSTRUCTIONS WARNING: To reduce the risk of fire, electrical shock, injury to persons, or damage when using the range, follow basic precautions, including the following: ■ WARNING: TO REDUCE THE RISK OF TIPPING OF THE RANGE, THE RANGE MUST BE SECURED BY PROPERLY INSTALLED ANTI-TIP DEVICES. TO CHECK IF THE DEVICES ARE INSTALLED PROPERLY, SLIDE RANGE FORWARD, LOOK FOR ANTI-TIP BRACKET SECURELY ATTACHED TO FLOOR, AND SLIDE RANGE BACK SO REAR RANGE FOOT IS UNDER ANTI-TIP BRACKET.
IMPORTANT SAFETY INSTRUCTIONS ■ ■ ■ Keep Oven Vent Ducts Unobstructed. Placement of Oven Racks – Always place oven racks in desired location while oven is cool. If rack must be moved while oven is hot, do not let potholder contact hot heating element in oven. DO NOT TOUCH HEATING ELEMENTS OR INTERIOR SURFACES OF OVEN – Heating elements may be hot even though they are dark in color. Interior surfaces of an oven become hot enough to cause burns.
PARTS AND FEATURES This manual covers several different models. The range you have purchased may have some or all of the items listed. The locations and appearances of the features shown here may not match those of your model. Control Panel 1. Warming Element Switch (on ceramic glass models) 2. Electronic Oven Display 3. Simmer Switch (on ceramic glass models) 4. Left Front Control (Dual Circuit Element on ceramic glass models) 5. Left Rear Control 6. Right Rear Control 7.
COOKTOP USE POWER ON Lights Cooktop Controls Each control knob has a POWER ON light. The light will glow when its control knob is on. 1 WARNING 1. POWER ON light Ceramic Glass Fire Hazard (on some models) Turn off all controls when done cooking. Failure to do so can result in death or fire. The cooktop controls can be set anywhere between HI and LO. Push in and turn to setting. Use the following chart as a guide when setting heat levels. SETTING RECOMMENDED USE HI or MAX ■ Start food cooking.
■ Use flat-bottomed cookware for best heat conduction and energy efficiency. Cookware with rounded, warped, ribbed or dented bottoms could cause uneven heating and poor cooking results. ■ Determine flatness by placing the straight edge of a ruler across the bottom of the cookware. While you rotate the ruler, no space or light should be visible between it and the cookware. ■ Cookware designed with slightly indented bottoms or small expansion channels can be used.
Coil Elements and Burner Bowls Lift-up Cooktop (on some models) Coil elements should be level for optimal cooking results. Burner bowls, when clean, reflect heat back to the cookware. They also help catch spills. Cookware should not extend more than 1 in. (2.5 cm) over the coil element. If cookware is uneven or too large, it can produce excess heat causing the burner bowl to change color. For more information, see the “General Cleaning” section.
Use the following chart as a guide for cookware material characteristics. Cookware IMPORTANT: Never leave empty cookware on a hot surface cooking area, element or surface burner. Ideal cookware should have a flat bottom, straight sides, a wellfitting lid and the material should be of medium-to-heavy thickness. Rough finishes may scratch the cooktop. Aluminum and copper may be used as a core or base in cookware. However, when used as a base they can leave permanent marks on the cooktop or grates.
Reminder Tones Only Displays When power is first supplied to the appliance, everything on the displays will light up for 5 seconds. Then, “PF” will appear. Press CANCEL OFF to clear displays. If “PF” appears at any other time, a power failure has occurred. Press CANCEL OFF and reset the clock if needed. Oven Display (on some models) When the oven is in use, this display shows the oven temperature, heat source(s) and start time. During Timed Cooking, this display also shows a timed countdown.
Oven Temperature Control Positioning Racks and Bakeware IMPORTANT: Do not use a thermometer to measure oven temperature because opening the oven door during cycling may give incorrect readings. The oven provides accurate temperatures; however, it may cook faster or slower than your previous oven, so the temperature calibration can be adjusted. It can be changed in Fahrenheit or Celsius. A minus sign means the oven will be cooler by the displayed amount.
Bakeware Oven Vent The bakeware material affects cooking results. Follow manufacturer’s recommendations and use the bakeware size recommended in the recipe. Use the following chart as a guide. BAKEWARE/ RESULTS RECOMMENDATIONS Light colored aluminum ■ Light golden crusts ■ ■ Use temperature and time recommended in recipe. 1.
To Bake or Roast: Before baking and roasting, position racks according to the “Positioning Racks and Bakeware” section. When roasting, it is not necessary to wait for the oven to preheat before putting food in, unless recommended in the recipe. 1. Press BAKE. Press the number pads to enter a temperature other than 350°F (177°C). The bake range can be set between 170°F and 500°F (77°C and 260°C). Before broiling, position rack according to Broiling Chart.
TOTAL TIME MIN. FOOD RACK POSITION Pork chops 1 in. (2.5 cm) thick 4 450°F (232°C) 25-28 Ham slice [precooked] ¹ ₂ in. (1.25 cm) thick 1 in. (2.5 cm) thick 4 4 500°F (260°C) 10-12 20-22 Frankfurters 4 500°F (260°C) 8 TEMP. (on some models) 1 1. Convection element heat and fan Lamb chops 1 in. (2.5 cm) thick 4 400°F (204°C) 18-20 Chicken bone-in pieces 3 500°F (260°C) 32 Fish ¹ ₂ in. (1.25 cm) thick 1 in. (2.
CONVECTION ROASTING CHART Convection Roast Food/Rack Position Cook Time (min. per 1 lb [454 g]) Oven Temp. Internal Food Temp. 1 Beef, Rack Position 2 2 3 1. Broil heat 2. Convection fan 3. Bake heat Convection roasting can be used for roasting meats and poultry, or for baking yeast breads and loaf cakes using a single rack. During convection roasting, the bake and broil elements will cycle on and off in intervals to maintain oven temperature, while the fan constantly circulates the hot air.
Food/Rack Position Cook Time (min. per 1 lb [454 g]) Oven Temp. Internal Food Temp. WARNING Turkey*, Rack Positions 1 or 2 13 lbs. (5.85 kg) and under (Over 13 lbs. (5.85 kg) 10-15 300°F (149°C) 180°F (82°C) 10-12 300°F (149°C) 180°F (82°C) 50-60 325°F (163°C) Food Poisoning Hazard Do not let food sit in oven more than one hour before or after cooking. Doing so can result in food poisoning or sickness. Cornish Game Hens*, Rack Position 2 or 3 1-1.5 lbs. (0.5-0.
6. Press START. The start time is automatically calculated and displayed. ■ Remove oven racks to keep them shiny and easy to slide. See “General Cleaning” section for more information. “DELAY” and the stop time will also appear on the oven display. ■ Hand clean inside door edge and the 1½ in. (3.8 cm) area around the inside oven cavity frame, being careful not to move or bend the gasket. This area does not get hot enough during self-cleaning to remove soil. Do not let water, cleaner, etc.
2. Press STOP TIME. On some models, press DELAY START. 3. Press the number pads to enter the time of day to stop. On some models, press the HR and MIN “up” or “down” arrow pads (buttons) until the correct time shows on the display. 4. Press START. The start time is automatically calculated and displayed. The door will automatically lock and “DOOR LOCKED” or “LOCKED” and “DELAY” and the stop time will also appear on the display (on some models). The door will not unlock until the oven cools.
BURNER BOWLS (on some models) Do not clean in the Self-Cleaning cycle. ■ Solution of ¹ ₂ cup (125 mL) ammonia to 1 gal. (3.75 L) water: BROILER PAN AND GRID Do not clean in the Self-Cleaning cycle (on some models). ■ Mildly abrasive cleanser: Soak for 20 minutes, then scrub with stainless steel wool pad. Oven cleaner: ■ Scrub with wet scouring pad. ■ Follow product label instructions. Soak for 20 minutes, then scrub with scouring or steel-wool pad.
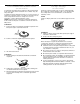
To Replace Starter: 2. Unscrew clips with a #2 square or Phillips screwdriver. 1. Unplug range or disconnect power. 2. Remove tube. 3. Push starter in and turn approximately 90° counterclockwise. 4. Pull starter out of recessed area. 5. Replace starter, tube and top of control panel. 6. Plug in range or reconnect power. Resetting Range Circuit Breakers (on Canadian models only) 3. Close oven door to the stop position (open about 4 in. [10 cm]). 4.
TROUBLESHOOTING Try the solutions suggested here first in order to avoid the cost of an unnecessary service call. Nothing will operate ■ Is the power supply cord unplugged? Plug into a grounded 3-prong outlet. ■ Has a household fuse been blown or has the circuit breaker been tripped? Replace the fuse or reset the circuit. Cooktop will not operate ■ Is the control knob set correctly? Push in knob before turning to a setting.
ASSISTANCE OR SERVICE Before calling for assistance or service, please check “Troubleshooting.” It may save you the cost of a service call. If you still need help, follow the instructions below. When calling, please know the purchase date and the complete model and serial number of your appliance. This information will help us to better respond to your request. Accessories U.S.A. To order accessories, call the KitchenAid Customer Interaction Center toll free at 1-800-442-9991 and follow the menu prompts.
KITCHENAID® COOKTOP, BUILT-IN OVEN AND RANGE WARRANTY ONE-YEAR FULL WARRANTY For one year from the date of purchase, when this appliance is operated and maintained according to instructions attached to or furnished with the product, KitchenAid will pay for factory specified parts and repair labor costs to correct defects in materials or workmanship. Service must be provided by a KitchenAid designated service company.