
Owner's manual

Kofax Document Exchange Server Administrator’s Guide for Fujitsu Network Scanners
4 Kofax, Inc.
Following the Installation of the Application
Before you begin using the Kofax Document Exchange Server application on the network scanner,
note the following procedures and information.
Manually Adding the Network Scanner for Kofax Document Exchange Server
Once you have installed the Kofax Document Exchange Server application on the network
scanner, manually add the network scanner as a device in Kofax Administration Console. For
instructions, see the Kofax Administration Console Help.
Add the device with the IP address, the MAC address, the device model (Fujitsu fi-6000NS or
Fujitsu fi-6010N), and the host name for the network scanner.
When Deploying Profiles
If the network scanner is not on when profiles are deployed in Kofax Administration Console, the
deployment occurs as soon as the network scanner is turned on again, when the network scanner
polls Kofax Document Exchange Server for deployed profiles. You may observe a delay in the
shortcuts appearing on the Kofax Main Menu. It may take several seconds for the shortcuts to
appear following the deployment of profiles.
Starting the Kofax Document Exchange Server Application
The first time you start the application on the touch panel of the network scanner, you need to
specify the server on which Kofax Document Exchange Server is located. To do so, have the server
name or IP address ready. This information does not need to be specified again, unless the
information changes.
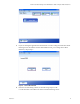
X To start the Kofax Document Exchange Server application
1 On the touch panel of the network scanner, enter the user name and password to log onto
the network scanner as a user.
2 On the network scanner Main Menu, press Kofax DES.