Installation and Care Guide Guide d’installation et d’entretien Guía de instalación y cuidado Petite Vanity Petit meuble Tocador pequeño K-2515 M product numbers are for Mexico (i.e. K-12345M) Los números de productos seguidos de M corresponden a México (Ej. K-12345M) USA/Canada: 1-800-4KOHLER México: 001-800-456-4537 kohler.com 1105377-2-B ©2009 Kohler Co.
Thank You For Choosing Kohler Company Thank you for choosing Kohler Co. Your Kohler Co. product reflects the true passion for design, craftsmanship, artistry, and innovation Kohler Co. stands for. We are confident its dependability and beauty will surpass your highest expectations, satisfying you for years to come. All the information in this guide is based upon the latest product information available at the time of publication. At Kohler Co.
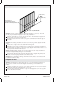
Tools/Outils/Herramientas Siliconized Acrylic Caulk Mastic acrylique siliconé Sellador de acrílico siliconado Plus/Plus/Más: • Fasteners [Min 50 lb (22.
Avant de commencer (cont.) Ce meuble est conçu pour permettre à la plupart des moulures de base de passer derrière le meuble. Retirer tout moulage risquant de prévenir le meuble d’être nivelé contre le mur fini. Retirer les tiroirs du meuble avant de commencer l’installation du meuble. Ceci facilitera le processus d’installation. Se référer à la section « Dépanner le tiroir » contenue dans ce guide pour un bon démontage.
1. Prepare the Wall 9" (22.9 cm) 33" (83.8 cm) 3/4" Plywood Contreplaqué de 3/4" Madera contrachapada de 3/4" 30" (76.2 cm) Min/Min/Mín NOTICE: Select 3/4″ plywood with a maximum height of 9″ (22.9 cm). This will provide proper structural integrity for the vanity installation. Measure and mark 33″ (83.8 cm) up from the floor. This will be the height from the top of the 3/4″ plywood to the floor. Notch the studs so the front of the 3/4″ plywood will be flush with the edge of the studs.
Préparer le mur (cont.) NOTICE: Le renfort devrait être d’au-moins 30″ (76,2 cm) de long et aligné avec le meuble. Sécuriser le contre-plaqué de 3/4″ aux montants avec des clous de cadrage. Installer les lignes d’alimentation et d’évacuation selon l’information du plan de raccordement fournie avec le lavabo. Les mamelons d’alimentation d’eau doivent se prolonger d’au moins 3″ (7,6 cm) au-delà du matériau du mur fini.
2. Install the Legs Leg Pied Pata Pin Tige Clavija Back Rail Rail arrière Riel posterior 1 2 Front Rail/Rail avant/Riel frontal Remove the drawer from the lower vanity section. Refer to the ″Service the Drawers″ section for proper removal. Back Rail Position the two leg assemblies on each side of the drawer assembly with the pins facing each other. Slide one set of pins on the leg into the back rail. Repeat with the other side. Front Rail Slide one set of pins on the leg into the front rail.
Installer les pieds (cont.) Glissière avant Glisser un jeu de tiges sur le pied dans le rail avant. Faire de même avec le deuxième côté. (1) Pivoter le rail avant vers soi. (2) Pousser fermement le rail avant et arrière vers le bas. Instale las patas Saque el cajón de la sección inferior del tocador. Consulte la sección ″Dé servicio a los cajones″ para sacar correctamente los cajones. Riel posterior Coloque los dos ensambles de patas a cada lado del montaje del cajón con las clavijas una hacia la otra.
3. Install the Legs Lock Washer Contre-écrou Arandela de fijación Washer Rondelle Arandela Bolt Boulon Perno Drawer Assembly Ensemble tiroir Montaje del cajón Carefully slide the drawer assembly up until the bolt holes in the drawer and legs are aligned. Slide a lock washer and washer onto each bolt. Thread the bolts into the legs. Firmly tighten the bolts using the supplied hex wrench.
4. Position the Cabinet/Vanity Finished Wall Mur fini Pared acabada Vanity Meuble Tocador Mounting Rail Rail de montage Riel de montaje Fastener Fixation Herraje Leveler Mise à niveau Nivelador Position the vanity against the finished wall. Verify the vanity is level and plumb. NOTE: If the vanity is not level, tip the vanity to allow access to the appropriate leveler(s) and turn the leveler(s) counterclockwise to raise the vanity, or clockwise to lower it.
Coloque el gabinete/tocador Coloque el tocador contra la pared acabada. Verifique que el tocador esté a nivel y a plomo. NOTA: Si el tocador no está a nivel, levante un lado del tocador para alcanzar los niveladores correspondientes y gírelos hacia la izquierda para elevar el tocador o hacia la derecha para bajarlo. Marque dos orificios guía a la misma distancia desde el punto central del riel de montaje. Taladre dos orificios guía a través del riel de montaje en los lugares marcados.
Install the Lavatory (cont.) Apply a 1/8″ (3 mm) thick bead of siliconized acrylic caulk to each corner of the vanity and the side rails of the vanity where the lavatory will make contact. Do not apply siliconized acrylic caulk to the front of the vanity. Carefully position the lavatory on top of the vanity. Apply a small bead of siliconized acrylic caulk to the top edge where the lavatory contacts the wall. Allow the caulk to dry before proceeding.
Instale el lavabo (cont.) Aplique una tira de 1/8″ (3 mm) de sellador acrílico siliconado en cada esquina del tocador y en los rieles laterales del tocador donde hará contacto con el lavabo. No aplique sellador acrílico siliconado al frente del tocador. Con cuidado coloque el lavabo sobre el tocador. Aplique una tira de sellador acrílico siliconado en el filo superior donde el lavabo hace contacto con la pared. Deje que el sellador seque antes de continuar.
Service the Drawer (cont.) Pull the right side release latch down, and push the left side release latch toward you. Pull the drawer toward you until the slides separate. Reinstall the Drawer Fully extend the slides. Align both slides on the drawer with both carriages on the vanity. Slide the drawer to the closed position. Open and close the drawer several times to verify smooth operation. Dépanner le tiroir Installer la poignée De l’intérieur du tiroir, insérer le boulon à travers l’orifice de la poignée.
Dé servicio al cajón (cont.) Abra y cierre el cajón varias veces para asegurarse que funcione con suavidad. Care and Cleaning Wood Surfaces • As with any smooth surface, avoid using abrasive cleaners as they will scratch the surface. Wipe the wood surface regularly to prevent buildup of soap and scum. • To protect against scratches, use felt, leather, or cork under all items placed on the wood surface. Do not expose wood furniture to direct sunlight, drying heat sources, or dampness.
Cuidado y limpieza (cont.) • Elimine la acumulación de suciedad cada seis meses frotando con un paño suave humedecido en una solución 50/50 de agua tibia y un detergente sin amoniaco. Limpie con un paño humedecido en agua tibia y luego seque con un paño. Para obtener información detallada de limpieza y los limpiadores a considerar, visite www.kohler.com/clean. Para solicitar información sobre el cuidado y la limpieza, llame al 1-800-456-4537.
Garantie (cont.) LA DURÉE DES GARANTIES TACITES, Y COMPRIS CELLES DE QUALITÉ MARCHANDE ET D’APTITUDE À UN EMPLOI PARTICULIER, SE LIMITE EXPRESSÉMENT À LA DURÉE DE LA PRÉSENTE GARANTIE. KOHLER CO. ET/OU LE REVENDEUR DÉCLINENT TOUTE RESPONSABILITÉ CONTRE LES DOMMAGES PARTICULIERS, IMPRÉVUS OU DE CIRCONSTANCE.
Service Parts/Pièces de rechange/Piezas de repuesto 1082744** Hardware Boulonnerie Herrajes 1059560** Touch-Up Marker Marqueur à retouches Plumón para retocar 1061206 Leveler Mise à niveau Nivelador 1082747** Drawer Tiroir Cajón 1061206 Leveler Mise à niveau Nivelador 1082749** Drawer Tiroir Cajón 1082748 (Pair/Paire/Par) Drawer Slide Glissière de tiroir Corredera del cajón **Finish/color code must be specified when ordering.
Kohler Co.
1105377-2-B