
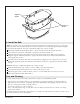
Installation Guide
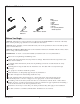

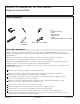

Tools and Materials
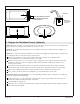
Before You Begin
NOTICE: Adequate floor support must be provided. Note the model number on the back of the bath,
then visit the product page at kohler.com for additional information.
NOTICE: Before installing a rim-mount bath faucet, refer to the specification sheet on the bath product
page at www.kohler.com.
NOTICE: For Wireless Music Kit: Refer to the installation instructions included with the wireless music
kit for wiring and installation details.
IMPORTANT! To ensure a successful installation, install the bath on a level, finished floor.
Observe all local plumbing and building codes.
Unpack and inspect the bath and components for damage. Return the bath and components to the
carton until installation.
To simplify future maintenance, make sure all plumbing connections around the bath are easily
accessible.
Carefully plan moving the bath into the installation area. This bath will not easily fit through
doorways.
Two people are needed to install this product.
Install the bath to an adequately supported, level, finished floor.
This bath is designed for freestanding installation only.
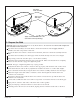
Provide adequate backer board support for a rim-mount faucet; large faucets that may be
inadvertently used as a means of support are not appropriate or safe for this installation.
If installing a rim-mount faucet, make sure there is no interference with the drain overflow before
drilling any holes. Consult local and national codes for minimum air gap requirements if installing a
spout on the rim. Refer to the faucet specification sheet.
Illustrations shown may not look like your actual product but they still apply to this installation.
This bath conforms to CSA B45.5/IAPMO Z124. All dimensions are nominal.
Plus:
• Drop Cloth
• Shims
• 2x4s
• Wood Blocks
• Gloves
• 1/2" (13 mm) Exterior
Grade Plywood
Construction
Adhesive
100% Silicone Sealant
1237787-2-G 2 Kohler Co.