
Installation Guide


Tools and Materials
Before You Begin
NOTICE: Choose an automatic compensating valve with the appropriate minimum flow rating to ensure
your valve will provide safety at the lowest flow rates.
•
For a showerhead rated at 2.5 gal/min (9.5 l/min) maximum, use with an automatic compensating
valve rated at 2.0 gal/min (7.6 l/min) or less.
CAUTION: Risk of personal injury. If the rain panel is not securely held in place during
installation, the product may fall. Get help installing the light panel assembly and waterways.
Read these instructions and determine the locations of all required components before beginning
installation.
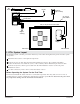
This product is designed for ceiling-mount installation only. Do not install to a shower wall.
This manual covers vertical installation of the Power Data Supply (PDS) in a service closet or 2x6
stud pocket. If the wall is enclosed, an access panel must be provided for servicing.
The PDS may be mounted under floor joists. If mounting under the floor, the unit must not be
enclosed.
The PDS must be located within 30’ (9.14 m) of the rain panel.
If possible, locate the PDS within 25’ (7.62 m) of the system controller.
Inspect the supply piping for damage. Replace as necessary.
The PDS is intended for hardwire installation. Make sure electrical power can be provided to a
service closet or 2x6 stud framing with access panel, not more than 2’ (0.61 m) from the intended
PDS location.
To reduce the risk of electric shock, locate the PDS and overhead rain panel within proximity to
each other to allow each cable to have a drip loop.
Socket Wrench &
11 mm or 7/16"
Socket and Extension
5/64", 5/32" Masking
Tape
Sealant
Tape
Soldering
Supplies
Plus:
Note: All nipples & fittings 1/2" NPT
• (4) 2-1/2" nipples
• Female fittings
• 1/2" copper tubing
• 2x4s and 2x6s
• Conventional woodworking tools and materials
• #8 x 1-1/2" drywall screws
• Standard wood or drywall screws
• Electrical Wire
• Wire Cutters/Strippers
Kohler Co. 3 1235394-2-A