Installation Guide Single-Control Lavatory Faucet K-12183 M product numbers are for Mexico (i.e. K-12345M) Los números de productos seguidos de M corresponden a México (Ej.
Tools and Materials Adjustable Wrench Plumbers Putty Sealant Tape Before You Begin Observe all local plumbing and building codes. Shut off the main water supply. Carefully inspect the waste and supply tubing for any sign of damage. If possible, install this faucet to the lavatory before installing the lavatory. Kohler Co. reserves the right to make revisions in the design of faucets without notice, as specified in the Price Book. 1011034-2-F 2 Kohler Co.
Escutcheon Stud Apply Plumbers Putty Lavatory Supply Inlet Bracket Washer Nut 1. Install the Faucet Apply plumbers putty or other sealant to the underside of the escutcheon according to the manufacturer’s instructions. Feed the faucet supply inlets through the faucet hole of the lavatory, then position the faucet. Slide the bracket and washer over the stud and tighten the nut to secure. Kohler Co.
Flange Drain Body Thick Tapered Gasket (for thin-walled vessel style lavatory installations) Tapered Gasket Nut Washer 2. Install the Drain If present, remove the protective plastic cap from the drain and discard. Remove the nut, washer, and gasket from the drain body. Apply a bead of plumbers putty or other sealant around the underside of the flange according to the sealant manufacturer’s instructions.
Supply Inlet Adapter (Mexico only) Supply Stop 3. Connect the Supplies CAUTION: Risk of restricted water flow and product damage. Use extreme care when bending the supplies to avoid kinking. CAUTION: Risk of product damage. Do not overtighten the connections. If the lavatory is not installed, install it at this time. Follow the lavatory manufacturer’s instructions. For Mexico only installations: Install the adapter. Connect the supply tubes to the faucet supplies and supply stops.
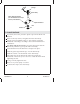
Aerator 4. Installation Checkout Connect the tailpiece and P-trap. Make sure all connections are tight. Remove the aerator by turning it counterclockwise. Turn on the main water supply and check for leaks. Make any adjustments as needed. Turn the faucet handle to the cold side and open to the ″ON″ position. Run cold water through spout for about a minute to remove any debris. With water still running, rotate the faucet handle to the ″HOT″ side.
Cap Screw Handle Bonnet Valve Stem Stop Tab Top Disc Mounting Nut Splines 5. Optional Temperature Limiting Adjustment NOTE: Prior to adjustment, make sure the handle is in the maximum hot position. Remove the cap, handle and bonnet. Turn on the water to the maximum hot water temperature by pushing the valve stem up, and turning it fully clockwise. Use a pencil or marker to mark the current position of the temperature stop tab (top edge) on the mounting nut.
Guide d’installation Robinet de lavabo mono-contrôle Outils et matériels Clé à molette Mastic de plombier Ruban d'étanchéité pour filets Avant de commencer Respecter tous les codes de plomberie et de bâtiment locaux. Couper l’alimentation d’eau principale. Vérifier avec soin si les tubes d’évacuation ou d’alimentation d’eau sont endommagés. Si possible, installer le robinet au lavabo avant d’installer ce dernier. Kohler Co.
Applique Montant Appliquer du mastic de plomberie Lavabo Entrée d'alimentation Support Rondelle Écrou 1. Installer le robinet Appliquer du mastic de plombier ou un produit d’étanchéité semblable au-dessous de l’applique selon les instructions du fabricant. Alimenter les entrées d’alimentation du robinet dans l’orifice du robinet du lavabo, puis positionner proprement le robinet. Glisser le support et la rondelle sur le montant et bien visser l’écrou pour sécuriser. Kohler Co.
Bride Corps du drain Joint biseauté épais (pour installations de lavabo avec vasque à parois fines) Joint biseauté Écrou Rondelle 2. Installer le drain Si présent, retirer le capuchon de protection en plastique du drain et jeter. Retirer l’écrou, la rondelle et le joint d’étanchéité du corps du drain. Appliquer du mastic d’étanchéité ou un produit semblable sur le dessous de la bride selon les instructions du fabricant.
Entrée d'alimentation Adaptateur (Méxique uniquement) Arrêt d'alimentation 3. Connecter les alimentations ATTENTION : Risque de limitation de débit d’eau et d’endommagement du produit. Faire très attention en pliant les alimentations pour éviter de les pincer. ATTENTION : Risque d’endommagement du produit. Ne pas trop serrer les raccords. Installer le lavabo à cet instant, s’il ne l’est pas déjà. Suivre les instructions du fabricant. Installations pour le Mexique uniquement: Installer l’adaptateur.
Aérateur 4. Vérification de l’installation Connecter la pièce de raccordement et le siphon en P. S’assurer que toutes les connexions soient serrées. Retirer l’aérateur en le tournant vers la gauche. Ouvrir l’alimentation d’eau principale et vérifier s’il y a des fuites. Faire les réglages si nécessaire. Tourner la poignée du robinet vers le côté eau froide et ouvrir à la position ″ON″. Faire couler l’eau froide à travers le bec pendant à peu près une minute pour chasser tous les débris.
Capuchon Vis Poignée Chapeau Languette d'arrêt Écrou de fixation Tige de la valve Disque supérieur Cannelures 5. Réglage optionnel de limitation de température REMARQUE : Avant le réglage, s’assurer que la poignée soit à la position maximale d’eau chaude. Retirer le bouchon, le levier et le chapeau. Porter la température d’eau chaude à sa valeur maximale en poussant sur la tige de la valve vers le haut et en tournant complètement à droite.
Guía de instalación Grifería monomando de lavabo Herramientas y materiales Llave ajustable Masilla de plomería Cinta selladora para rosca Antes de comenzar Cumpla con todos los códigos locales de plomería y construcción. Cierre el suministro principal de agua. Revise atentamente los tubos de suministro y de desagüe para asegurarse que no estén dañados. De ser posible, instale esta grifería en el lavabo antes de instalar el lavabo. Kohler Co.
Chapetón Varilla roscada Aplique masilla de plomería Entrada del suministro Lavabo Soporte Arandela Tuerca 1. Instale la grifería Aplique masilla de plomería u otro sellador en el dorso del chapetón según las instrucciones de fabricante. Introduzca las entradas de los suministros de la grifería a través del orificio para grifería del lavabo, luego coloque la grifería. Deslice el soporte y la arandela en la varilla roscada y apriete la tuerca para asegurar. Kohler Co.
Brida Cuerpo del desagüe Empaque cónico grueso (para instalaciones en lavabo estilo vessel de pared delgada) Empaque cónico Tuerca Arandela 2. Instale el desagüe Si existe, retire y deseche el tapón plástico de protección del desagüe. Retire la tuerca, la arandela y el empaque del cuerpo del desagüe. Aplique una tira de masilla de plomería u otro sellador en el lado inferior de la brida según las instrucciones del fabricante del sellador.
Entrada de suministro Adaptador (Sólo México) Llave de paso 3. Conecte los suministros PRECAUCIÓN: Riesgo de flujo limitado del agua y de daños al producto. Tenga cuidado al arquear los tubos de suministro para evitar que se doblen. PRECAUCIÓN: Riesgo de daños al producto. No apriete demasiado las conexiones. Si el lavabo no está instalado, instálelo en este momento. Siga las instrucciones del fabricante del lavabo. Sólo para instalaciones en México: Instale el adaptador.
Aireador 4. Verificación de la instalación Conecte el tubo de desagüe y la trampa en P. Verifique que todas las conexiones estén apretadas. Quite el aireador girándolo hacia la izquierda. Abra el suministro principal de agua y verifique que no haya fugas. Haga los ajustes necesarios. Gire la manija de la grifería hacia el lado del agua fría y abra a la posición abierta. Deje correr agua fría por el surtidor durante aproximadamente un minuto para eliminar los residuos.
Tapón Tornillo Manija Bonete Lengüeta limitadora Espiga de válvula Disco superior Tuerca de montaje Ranuras 5. Ajuste opcional del límite de temperatura NOTA: Antes de ajustar la temperatura, asegúrese de que la manija esté colocada en la posición máxima del agua caliente. Retire el tapón, la manija y el bonete. Levante la espiga de la válvula y gírela completamente hacia la derecha para abrir el suministro del agua caliente a la temperatura máxima.
USA: 1-800-4-KOHLER Canada: 1-800-964-5590 México: 001-877-680-1310 kohler.com ©2007 Kohler Co.