
Installation Guide


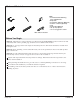

Tools and Materials
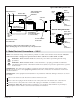
Before You Begin
NOTICE: Adequate floor support must be provided. Note the model number located on the heater side
of the bath, then visit the product page at kohler.com for additional information.
NOTICE: Do not support the load weight of the bath by the rim. Shim under the bath as needed when
leveling the bath.
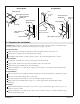
NOTICE: Before installing a rim-mount bath faucet, refer to the specification sheet on the bath product
page at kohler.com.
NOTICE: Provide adequate backer board support for a rim-mount faucet; large faucets that may be
inadvertently used as a means of support are not safe for this installation.
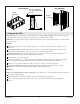
Unpack and inspect the bath and components for damage. Return the bath and components to the
carton until installation.
When planning the installation area, provide access to all final plumbing connections for servicing.
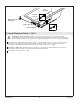
For under-mount installations, an under-mount kit is required.
If installing a rim-mount faucet, make sure there is no interference above or below the rim before
drilling any holes.
100% Silicone Sealant
Plus:
• Conventional Woodworking
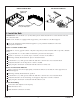
Tools and Materials
• Drop Cloth
• Construction Adhesive (Optional)
• Cement* or Mortar (Optional)
• 2x4s
• Plastic Film (Optional)
• 1/8" (3 mm) Spacers
* Do not use gypsum cement.
Kohler Co. 3 1196030-2-E