DUROMATIC Contents 1. The advantages of your DUROMATIC pressure cooker at a glance 2. Directions for proper use 3. Safety 4. Using the pressure cooker for the first time 5. Filling 6. Checking the valve 7. Closing 8. Cooking under pressure 9. Reducing steam pressure and opening 10. Cleaning and care instructions for the DUROMATIC 11. Troubleshooting the DUROMATIC 12. Guarantee 13. Repair and service addresses 14. Environmental protection/disposal 15. Table of cooking times 71 16.
1. The advantages of your DUROMATIC pressure cooker at a glance • Preserves vitamins (for your health) • Saves energy and time (approx.
The pressure cooker cooks under pressure. Although the pressure cooker is characterized by a level of quality and safety, injury (by scalding) or material damage resulting from misuse or improper use cannot be ruled out. For this reason, take careful note of the safety instructions marked in red. 3. Safety Read the operating instructions thoroughly before using your pressure cooker. Pay special attention to the sections on testing, cleaning and caring for the safety devices.
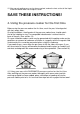
15. After normal cooking pressure has been reached, reduce the heat so that all the liquid inside the cooker does not escape as steam. SAVE THESE INSTRUCTIONS! 4. Using the pressure cooker for the first time Before using the pressure cooker the first time, wash the pan, lid and gasket with hot, soapy water. On electric cookers, the diameter of the pressure cooker base should match that of the hotplate or ring. The compatible hob diameter is etched into the base of the pan.
. Filling Never fill the pan more than two-thirds full including the liquid you have added (see the two-thirds mark on the inside of the pan). Never fill the cooker beyond half full if you are preparing soup, certain cereals, dried pulses (see page 89) or dried beans. If overfilled, the safety elements may become impaired (risk of scalding). Never forget to add liquid (see the table of cooking times in section 15), as complete evaporation will spoil food and overheat the cooker.
1 Safety bolt and spring (built into handle) 2 The gasket shape illustrated occurs only when the lid is not in use 3 Lid handle Long handle model: Place the lid on the pan as shown. The positioning triangle on the lid must be aligned with the triangle on the pan handle. Turn the lid in a clockwise direction until the handle of the lid is over the handle of the pan. Check: The pressure cooker is correctly closed if the handle on the lid is positioned directly over the handle on the pan.
This cooker is not suitable for the preparation of apple compote, cranberries, porridge (oat flakes), barley or other cereals (except those listed on page 89), peas, pasta, macaroni or rhubarb. These foods tend to foam and froth and could block the valve. In the case of problems during cooking: remove the pressure cooker from the heat source and allow it to cool. Place the properly closed cooker on a heat source commensurate with the size of the pressure cooker base.
Vegetables are cooked especially gently in the steamer insert or on the trivet. Colour, flavour, vitamins and nutrients are retained. 8.1 Frying with the DUROMATIC non-stick Only use oils or vegetable fats suitable for frying (refer to the usage information on the oil container) when searing meats prior to the completion of cooking under pressure. We recommend the use of plastic or wooden turners in spite of the hard and very resistant titanium base coating. 9.
Some models also have an automatic pressure reduction function. 9.4 Normal automatic pressure reduction Lift the valve cap slightly and rotate by 75° clockwise until it engages the first time (stage 1). 9.5 Rapid automatic pressure reduction Lift the valve cap slightly and rotate by 90° clockwise until it engages the second time (stage 2). 9.6 Completed Pressure Reduction There is no more pressure in the cooker when the pressure indicator stem remains in its lowest position.
Meat / vegetables / frozen vegetables / fresh fruits / dried foods (excluding pulses): Use normal or fast pressure reduction (for ready-prepared meals, allow the pressure cooker to stand beside the heat source for one minute before reducing pressure). Fish / risotto: Use fast pressure reduction. Foods with a high fat content or mash-type foods (e.g. dried pulses): Use slow pressure reduction and gently shake the cooker before opening the lid to prevent the contents from spitting when the lid is opened.
The printed protection cap in particular should only ever be cleaned with a damp cloth (never use abrasive cleaners, bleach or SWISS CLEANER). Do not use any corrosive agents like Javel water for cleaning. Remove obstinate calcium stains (white spots) with a few drops of vinegar, lemon juice or SWISS CLEANER. (See section 16) If the pan has become discoloured from overheating, then we recommend the use of SWISS CLEANER.
10.1.3 Dismantling the Top valve To dismantle this valve, undo the valve screw with integral pressure indicator (2) on the lid indside using a screwdriver. 1 Counter nut 2 Pressure indicator 3 Valve spring 4 Valve seal 5 Valve socket 6 Valve cap with integral pressure indicator 10.1.4 Cleaning and re-assembling the valve 1. Disassemble the valve and clean it. Never use any abrasive cleaners. 2.
11. Troubleshooting the DUROMATIC If you are unsure about using your pressure cooker or the safety devices, do not use it and contact your retailer or KUHN RIKON. (See section 13) Is the pressure cooker leaking? - Check that the rubber gasket is properly located (see section 7); - Lubricate the gasket lightly with cooking/vegetable oil or moisten with a little water; - Or, if necessary, replace.
For repairs, original spare parts and information, contact your dealer or a KUHN RIKON Service Centre: Switzerland and overseas: KUHN RIKON AG Service Center CH-8486 Rikon Tel. +41 52 396 03 50 Fax +41 52 396 02 02 service@kuhnrikon.ch Singapore: KUHN RIKON ASIA Tel. +65 6294 0495 Fax +65 6295 0756 kuhnrikon@pacific.net.sg Great Britain: KUHN RIKON (UK) LTD. Landport Road Wolverhampton WV2 2QJ Great Britain Tel. 01902 458410 Fax 01902 458160 sales@kuhnrikon.co.
. Table of cooking times The cooking times listed in the following tables may vary slightly according to food type, storage and quality. Food Cooking time (min.
Poultry Poultry in pieces Whole chicken 8 15 2 2 acc. to recipe, at least 50 ml / 2 oz acc. to recipe, at least 50 ml / 2 oz Game Hare joint Deer joint Jugged game Sliced game 30 30 18 20 2 2 2 2 acc. to recipe, at least 50 ml / 2 oz acc. to recipe, at least 50 ml / 2 oz acc. to recipe, at least 50 ml / 2 oz acc. to recipe, at least 50 ml / 2 oz Miscellaneous Minced meat (pork, lamb or beef) 8 2 acc. to recipe, at least 50 ml / 2 oz Rabbit (joint, pieces) 30 2 acc.
Celery halves, sliced Asparagus Tomatoes for sauces (Sugo) Savoy (cabbage), halved 6/2 5-10 6 8 2 2 2 2 up to trivet (at least 100 ml / 4 oz) up to trivet (at least 100 ml / 4 oz)* up to trivet (at least 100 ml / 4 oz) up to trivet (at least 100 ml / 4 oz) * The pressure cooker should be cooled under cold running water.
Frozen vegetables, not thawed (with trivet) Spinach leaves (pack of 500 g) 10 Cauliflower, in florets 6 Beans 5 Broccoli, in florets 5 Sugar peas 4 Brussels sprouts 3 Red cabbage, cooked (500 g red cabbage) 12 Spinach, chopped (500 g package) (without trivet) 10 2 2 2 2 2 2 only to trivet only to trivet only to trivet only to trivet only to trivet only to trivet 2 only to trivet 2 Preparation time for ready-to-serve frozen meals In plastic packs: Meat, whole meals, small packs 10 2 Meat, whole meals,
16. Accessoires DUROMATIC Description Ref. no.
17. DUROMATIC spare parts We have selected the most important spare parts for you from a multitude of spare parts. All other spare parts are available via specialist retailers. To ensure you receive the correct spare part, please notify us of the article number and the production date of your pressure cooker (see section 13), or send the defective part to one of the KUHN RIKON Service Centers. Description Ref. no.
Valve housing cap 1752 TOP Rubber seal (gasket) black 1540 Ø 20 cm (3026) All models Ø 20 cm Rubber seal (gasket) black 1541 Ø 22 cm (3034) All models Ø 22 cm Rubber seal (gasket) black 1542 Ø 24 cm (3009) All models Ø 24 cm Rubber seal (gasket) black 1503 Ø 28 cm HOTEL Ø 28 cm Rubber seal (gasket), blue 1657 silicon, Ø 20 cm (3026) All models Ø 20 cm Rubber seal (gasket), blue 1501 silicon, Ø 22 cm All models Ø 22 cm Rubber seal (gasket), blue 1502 silicon, Ø 24 cm All models Ø 24 cm Trive
Spring for indicator 1553 Automatic module letters gold 1557 Automatic module letters silver 1581 TIMAX DUROTHERM DUROTHERM Battery 1558 Battery lid 1549 Underplate Underplate 1410 DUROTHERM TIMAX Ø 18 cm 1411 DUROTHERM TIMAX Ø 22 cm Trivet Inox Ø 18 cm, inside Ø pot 1403 DUROTHERM TIMAX 2 L Trivet Inox Ø 20 cm, inside Ø pot 1402 DUROTHERM TIMAX 3-5 L