
Operation Manual
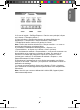

16
17
ENGLISH
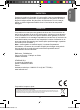
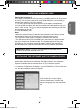
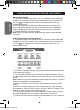
SELECTING THE PHOTO RESOLUTION
1. In camera mode, press the Power/Menu button (6) to enter the settings
menu (the number of photos/videos stored in memory, the battery level, the
photo resolution and quality are displayed on screen), then press the Flash/
SET (4) button. The “Resolution” icon appears on the LCD screen.
2. Use the Up (8) or the Down (9) buttons to select the desired resolution,
then press the Flash/SET (4) within 5 seconds to conrm your choice.
There are 3 resolution modes:
High resolution (2048x1536 pixels).
Normal resolution (1600x1200 pixels).
Low resolution (640x480 pixels).
Note : The camera automatically goes back to camera mode after a few
seconds of inactivity.
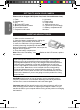
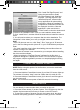
FLASH FUNCTION
Switch on the camera:
1. Flash on
In camera mode, press the Flash/SET (4) button repeatedly until the icon
appears on the lower left corner of the LCD screen. The ash function will be
activated.
2. Auto Flash
In camera mode, press the Flash/SET (4) button repeatedly until the icon
appears on the lower left corner of the LCD screen. The auto ash function
will be activated.
3. Flash off
In camera mode, press the Flash/SET (4) button repeatedly until the ash
icon disappears from the lower left corner of the LCD screen. The ash
function will be disabled.
mode. Press the Up button (8) or wait a few seconds to go back
automatically to the camera mode.
Note:
• When the camera’s built-in memory is full, if you try to take a photo, the
LCD screen will display a warning message.
• When the SD card inserted in the camera is full, if you try to take a photo,
the camera will beep twice. Make sure you transfer your photos to your
computer.
DJ040seriesIM0119.indd 17 16/3/09 10:47:00