
Operation Manual

18
ENGLISH
19
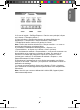
SELECTING THE PHOTO QUALITY
1. In camera mode, press the Power/Menu button (6) to enter the settings
menu then press the Flash/SET (4) button. The “Resolution” icon
appears on the LCD screen.
2. Press the Power/Menu button (6) once again: the “Quality” icon is
displayed on the LCD screen.
3. Use the Up (8) or the Down (9) buttons to select the desired quality, then
press the Flash/SET (4) within 5 seconds to conrm your choice.
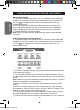
There are 2 quality levels:
High quality
Standard
Note: The camera automatically goes back to camera mode after a few
seconds of inactivity.
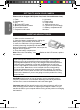
SELF-TIMER (CAMERA MODE ONLY)
1. In camera mode, press the Power/Menu button (6) repeatedly until the
“Self-timer” icon appears.
2. Press the Shutter button (5) within 5 seconds to turn on the self-timer
function.
3. The digital camera will take a picture 10 seconds later.
Note:
• The self-timer feature is automatically turned off after the picture has been
taken.
• If you don’t press the Shutter button (5) to conrm the activation of the
self-timer function, the camera will automatically go back to photo mode.
• The camera automatically goes back to camera mode after a few seconds
of inactivity.
CAPTURING VIDEO CLIPS
1. In camera mode, press the Power/Menu button (6) repeatedly until the
“Video” icon appears,
2. Press the Shutter button (5) within 5 seconds to start the video capture.
The recording length is displayed on the LCD screen.
3. Press the Shutter button (5) again to stop the video capture and save it in
AVI format.
Note:
• The ash function is disabled in video mode.
• To watch the videos, you must transfer them to your computer (see the
“Downloading your photos and your videos” section, p.20).
DJ040seriesIM0119.indd 18 16/3/09 10:47:01