
Operation Manual

20
ENGLISH
21
2. Launch the “PhoTags Express” program and click the “Get Photos” button
on the main menu screen.
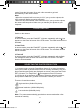
3. The “Get Photos Wizard - Device Selection” window will appear. Select
the “Removable disk” driver from the “Active Devices” list of on the left of the
screen.
Note: Make sure you have selected the “Removable disk” driver or you won’t
be able to download your pictures/videos.
4. Select the “Custom” or the “Express” copy method and click the “Next”
button.
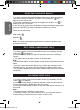
5. With the “Custom” method, you can sort the photos by name, keyword
and categories. Click the “Next” button to continue. With the “Express” copy
method, you will go directly to the following step.
6. Choose where to place your photos. Click the “Browse” button to select
the destination folder where you want all your photos to be saved.
7. Click the “Finish” button to transfer the photos/videos from your camera to
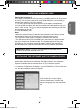
DOWNLOADING YOUR PHOTOS AND YOUR VIDEOS
Manual downloading
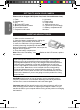
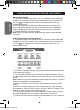
1. Turn off the camera, then connect it to your computer via the USB cable
provided. You will hear a small “beep” sound and the LCD screen will turn
on. The icon appears on the screen to indicate that the unit is in
“Downloading” mode.
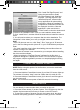
2. Click the “Start” button, then select “My computer” and double-click
“Removable Disk”. Double-click the “DCIM” folder then the “100IMAGE”
folder to display the photos and the videos stored on the memory card.
3. Transfer the les to the desired folder.
Note: When you disconnect the USB cable, the camera is automatically
turned off.
Downloading using “PhoTags Express”
1. Turn off the camera, then connect it to your computer via the USB cable
provided. You will hear a small “beep” sound and the LCD screen will turn
on. The icon appears on the screen to indicate that the unit is in
“Downloading” mode.
DJ040seriesIM0119.indd 20 16/3/09 10:47:01