DLP Projector BE320-SD Owner's Manual P/N: SAC30190915 Rev. A www.lg.
Table of Contents Table of Contents Usage Notice Safety Instructions.................................................. 2 Introduction Product Features.................................................... 5 Package Overview.................................................. 6 Product Overview................................................... 7 Connection Ports................................................. 8 Control Panel.......................................................
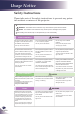
Usage Notice Safety Instructions Please take note of the safety instructions to prevent any potential accident or misuse of the projector. Safety Instructions are given in two forms as detailed below. WARNING : The violation of this instruction may cause serious injuries and even death. NOTES : The violation of this instruction may cause injuries or damage to the projector. After reading this manual, keep it in the place that you can access easily.
Usage Notice Power WARNING Never touch the power plug with a wet hand Do not plug-in too many items into one power outlet. Prevent dust from collecting on the power plug pins or outlet. This may cause an electric shockhazard! It may result in overheating of the outlet and create a fire hazard! This may cause a fire hazard! Power NOTES Hold the plug firmly when unplugging. If you pull the cord, it may be damaged.
Usage Notice Using WARNING If the projector is in a room that experiences a gas leak, do not touch the projector. Don’t look at laser beam directly as it can cause eye damage! Always open the lens door or remove the lens cap when the projector lamp is on. It can cause a fire or a burn by a spark. Using NOTES Do not place heavy objects on top of projector. This may cause mechanical failure orpersonal injury! Do not use any sharp tools on the projector as this will damage the casing.
Introduction Product Features ■ SVGA (800x600) Native resolution ■ RGB monitor Loop Thru (works on standby mode > 0.5 W) ■ BrilliantColorTM Technology ■ RS232C control ■ Rapid shutdown This device meets the EMC requirements ments for home applicaces (Class B) and is intended for home usage. This device can be used in all regions.
Introduction Package Overview This projector comes with all the items shown below. Check to make sure your unit is complete. Contact your dealer immediately if anything is missing. CR 202 5 Lithium Cell 3V N ot e Due to the difference in applications for each country, some regions may have different accessories. Projector Wireless Remote Control Power Cable RGB Cable Battery is included inside the remote control. OWNER’S MANUAL PROJECTOR BE320-SD http://www.lg.com P/N 36.
Introduction Product Overview 4 Air Flow 3 2 1 9 10 9 5 10 8 6 7 1. 2. 3. 4. 5. 6. 7. 8. 9. 10.
Introduction Connection Ports 1 2 5 1. VIDEO Connector 2. RGB OUT Connector 3. RGB IN Connector 3 4 6 4. RS232C Control Port 5. AC IN 6. KensingtonTM Lock Kensington Security System This projector has a Kensington Security System Connector on the back panel. Connect the Kensington Security System cable as below. For the detailed installation and use of the Kensington Security System, refer to the user’s guide included with the Kensington Security System set.
Introduction Control Panel 7 8 9 1 4 2 5 3 6 1 POWER Refer to the “Power On/Off the Projector” section on pages 16~17. 2 AUTO Automatically synchronize the projector to the VGA(RGB) and Video signal input sources. 3 OK Confirm your item selection. 4 MENU Press “MENU” to launch the onscreen display (OSD) menu. To exit OSD, press “MENU” again. 5 SOURCE Press “SOURCE” to select an input signal.
Introduction 1 3V iu 3V m C el l Procedure 1. Remove the battery holder by holding down the side release firmly and pulling out the battery holder. 2. Insert a CR2025 coin cell battery and align the polarity correctly according to the marking in the battery holder. Ensure that the side with a “+” is facing up. 3. Replace the battery holder. th When you use the remote control for the first time, there is a plastic sheet between the battery and its contact. Remove the sheet before use.
Introduction Remote Control 1 2 3 4 5 6 7 8 9 10 11 N ot e You can only turn the projector on/off with POWER button on the projector. 12 13 14 15 16 You can operate all of the functions of the projector via the remote control. Make sure not to lose the remote control. 1 Infrared transmitter Sends signals to the projector. 2 RGB Press “RGB” to choose RGB connector. 3 Power Refer to the “Power On/Off the Projector” section.
Introduction 12 English 5 Sleep Press “Sleep” to set the countdown timer interval. The projector will automatically power off when the countdown has finished. (in minutes) 6 Still Pause the screen image. Press again to resume the screen image. 7 Blank Use this function to choose blank color. 8 Menu Press “Menu” to launch the Onscreen display (OSD), back to the top level of OSD for the OSD main menu operation 9 Ratio Use this function to choose your desired aspect ratio.
Introduction Remote Control Operating Range 23.0’ (7m) Approx.15° Point the remote control toward the projector (Infrared Remote Receiver) when pressing any button. Maximum operating range for the remote control is about 23.0’ (7m) and 30° in front of the projector.
Installation Connecting the Projector Connect to Computer/Notebook 3 4 N ot e 1 R Due to the difference in applications for each country, some regions may have different accessories. PS50426E 2 1............................................................................................................... Power cable 2...................................................................................Monitor out cable (optional) 3......................................................................
Installation Connect to Video DVD player, Set-top Box HDTV receiver Video Output 4 N ot e 2 Due to the difference in applications for each country, some regions may have different accessories. 1 R PS50426E (*) If you want to connect the HDTV, it is recommended to buy the “RGB to RCA adaptor”. 3 1............................................................................................................... Power cable 2..........................................................................
Installation Powering On/Off the Projector Powering On the Projector 1. Ensure that the power cable and signal cable are securely connected. The POWER LED will turn orange. 2. Turn on the lamp by pressing “POWER ” on the remote control or the control panel . The POWER LED will flash green. When disappear startup screen, the POWER LED will turn green. 3. Turn on your source (computer, notebook, video player, etc.) The projector will detect your source automatically.
Installation Powering Off the Projector 1. P ress the “POWER ” to turn off the projector, you will see a message as below on the on-screen display. 2. Press the “POWER ” again to confirm. 3. The cooling fan continues to operate for cooling cycle and the POWER LED will flash orange. When the POWER LED is orange, the projector has entered standby mode. If you wish to turn the projector back on, you must wait until the projector has completed the cooling cycle and has enter standby mode.
Installation Adjusting the Projected Image Adjusting the Height of Projector Image The projector is equipped with adjustable feet to raise and lower the image to fill the screen. To raise/lower the image: Use “Adjustable feet” to fine-tune the display angle. N ot e You can raise the projector front up by rotating the adjustable feet.
Installation Adjusting the Projector’s Zoom and Focus To focus the image, rotate the focus ring until the image is clear. The projector will focus at distances from 3.28 to 39.37 feet (1.0 to 12.0 meters) with mechanical travel. To turn the zoom lever to zoom in or out. Zoom Lever Focus Ring Adjusting Projection Image Size Projection Image Size from 22.9” to 255.0” (0.6 to 6.48 meters).
Installation Diagonal length (inch) size of 4:3 Screen Screen Size W x H (meter) Projection Distance (D) (inch) (meter) Width Height Width Height wide tele wide tele (m) (feet) 30 0.610 0.457 24 18 1.183 1.301 3.880 4.268 0.069 0.225 40 0.813 0.610 32 24 1.577 1.735 5.173 5.691 0.091 0.300 60 1.219 0.914 48 36 2.365 2.602 7.760 8.536 0.137 0.450 70 1.422 1.067 56 42 2.759 3.035 9.053 9.959 0.160 0.525 80 1.626 1.219 64 48 3.154 3.469 10.
User Controls On Screen Display The Projector has multilingual On-screen Display menus that allow you to make image adjustments and change a variety of settings. The projector will automatically detect the source. How to operate 1. To open the OSD, press “MENU” on the Remote Control or Control Panel. 2. W hen OSD is displayed, use keys to select any item in the main menu. While making a selection on a particular page, press or 3. Use key to enter sub menu.
User Controls IMAGE Picture Mode T here are many factory presets optimized for various types of images. Use the or to select the item. Presentation: This mode is suitable for showing in front of public N ot e When you change the items, the picture mode will be set “User1”. in connection to the PC. High-Bright: This mode is recommended when you want maximum brightness. Classroom: This mode is recommended for projecting in a classroom. Movie: This mode is suitable for watching video.
User Controls Press the Press the N ot e “Sharpness”, “Saturation” and “Hue” functions are only supported under Video mode. to decrease the contrast. to increase the contrast. Sharpness Adjust the sharpness of the image. (range: 0~31) Press the Press the to decrease the sharpness. to increase the sharpness. Saturation Adjust a video image from black and white to fully saturated color. (range: 0~100) Press the Press the to decrease the amount of color in the image.
User Controls IMAGE | Advanced Gamma T his allows you to choose a gamma table that has been fine-tuned to bring out the best image quality for the input. Film: This mode is recommended for movie Video: This mode is recommended for video or TV. Graphics: This mode is recommended for image. PC: This mode is recommended for presentation. Blackboard: This mode is recommended for using blackboard (green).
User Controls IMAGE | Advanced | Color Color R ed Gain/Green Gain/Blue Gain/Cyan Gain/Magenta Gain/Yelor button low Gain/Red Bias/Green Bias/Blue Bias: Use the to select Red, Green, Blue, Cyan, Magenta and Yellow Colors. Then use the or button to adjust the setting. (range: -50~50) Reset Choose “Yes” to return the factory default settings for “Color”. Exit Return to previous menu. IMAGE | Advanced | Input Input Use this option to enable / disable input sources.
User Controls SCREEN Aspect Ratio Use this function to choose your desired aspect ratio. 4:3: This format is for 4×3 input sources. 16:9: This format is for 16×9 input sources, like HDTV and DVD enhanced for Wide screen TV. 16:10: This format is for 16×10 input sources, like widescreen laptops. 15:9: This format is for non-16×9, letterbox sources and for users who use external 16×9 lens to display 1.67:1 aspect ratio using full resolution. 5:4: This format is for 5×4 input sources.
User Controls H Image Shift Shift the projected image position horizontally. (range: -50~50) V Image Shift Shift the projected image position vertically. (range: -50~50) V Keystone Press the or to adjust image distortion vertically and makes a rectangular image.
User Controls SETTING Language hoose the multilingual OSD. Press C or button into the sub menu and then use or or or button to select your preferred language. Press “OK” to finalize the selection. Orientation Front-Desktop he factory default setting. The image is projected straight on the T screen. 28 English Rear-Desktop hen you select this function, the projector reverses the image W so you can project behind a translucent screen.
User Controls Rear-Ceiling hen you select this function, the projector reverses and turns W the image upside down at same time. You can project from behind a translucent screen with ceiling mounted projection. Menu Location Choose the menu location on the display screen. Projector ID ID definition can be set up by menu (range 0~99), and allow user control an individual projector by RS232C.
User Controls SETTING | Signal Phase N ot e “Signal” is only supported in Analog VGA (RGB) signal. Synchronize the signal timing of the display with the graphic card. If the image appears to be unstable or flickers, use this function to correct it. (range: 0~31) Clock Change the display data frequency to match the frequency of your computer’s graphic card. Use this function only if the image appears to flicker vertically. (range: -5~5) H.
User Controls SETTING | Advanced Logo Use this function to set the desired startup screen. If changes are made they will take effect the next time the projector is powered on. On: LG startup screen. (default) Off: No logo is displayed. Exit Return to previous menu.
User Controls OPTIONS Input Search When “On” is selected, the projector will search for other signals if the current input signal is lost. When “Off” is selected, the projector will only search a specified connection port. Fan Mode AUTO: The built-in fans automatically run at a variable speed according to the internal temperature. High Speed: The built-in fans run at high speed. Information Hide On: Choose “On” to hide the “searching” message.
User Controls OPTIONS | Lamp Settings Lamp Hours Used (Normal) Display the projection time of normal mode. Lamp Hours Used (ECO) Display the projection time of ECO mode. Lamp Life Reminder On: Choose “On” to show the lamp end of life warning message. Off: Choose “Off” to hide the lamp end of life warning message. ECO Mode On: Choose “On” to dim the projector lamp which will lower power consumption and extend the lamp life. Off: Choose “Off” to increase the brightness.
User Controls OPTIONS | Information Source N ot e All functions in Information display the status of the projector only. Display the input connector type. Resolution (Resolution or Video) Display the current display resolution. ECO Mode Display the ECO mode. Sleep Countdown Display the countdown timer interval. Exit Return to previous menu.
User Controls OPTIONS | Advanced Standby Mode Power-Saving: Choose “Standby” to save power dissipation further < 0.5 W. Normal: Choose “Normal” to return to normal standby mode and the “MONITOR OUT” port will be enabled. Direct Power On hoose “On” to activate Direct Power mode. The projector will C automatically power on when AC power is supplied, without pressing the “POWER ” key on the projector control panel or “POWER ” key on the remote control.
User Controls Control Panel Lock When the control panel lock function is “On”, the control panel will be locked however, the projector can be operated by the remote control. By selecting “Off”, you will be able to reuse the control panel. Press and hold the “OK” button on the projector to turn off “Control Panel Lock”. Exit Return to previous menu.
Appendices Troubleshooting If you experience trouble with the projector, refer to the following information. If the problem persists, please contact your local dealer or service center. Problem: No image appears on screen Ensure all the cables and power connections are correctly and securely connected as described in the “Installation” section. Ensure the pins of connectors are not crooked or broken. Check if the projection lamp has been securely installed.
Appendices Problem: The screen of the Notebook or PowerBook computer is not displaying a presentation If you are using a Notebook PC: Some Notebook PCs may deactivate their own screens when a second display device is in use. Each has a different way to be reactivated. Refer to your computer’s documentation for detailed information. Problem: Image is unstable or flickering Adjust the “Phase” to correct it. Refer to the “SETTING|signal” section for more information.
Appendices Problem: The image is stretched when displaying 16:9 DVD The projector automatically detects 16:9 DVD and adjusts the aspect ratio by digitizing to full screen with 4:3 default setting. If the image is still stretched, you will also need to adjust the aspect ratio by referring to the following: Please select 4:3 aspect ratio type on your DVD player if you are playing a 16:9 DVD.
Appendices Problem: LED lighting message Message POWER-LED (Green) (Orange) LAMP-LED TEMP-LED (Red) (Red) Standby (Input power cable) Normal (Power on) Powering up (Warming up) Power off (Cooling: It can’t accept any key at this status) Flashing Flashing Error (Lamp failed) Error (Fan lock) Flashing Error (Over temp.
Appendices Problem: Message Reminders Over temperature - the projector has exceeded its recommended operating temperature and must be allowed to cool down before it may be used. Replacing the lamp - the lamp is about to reach its maximum lifetime. Prepare to replace it soon. If this happens, after replacing the lamp, connect the power cord and then press the “POWER ” button on the remote control. This will allow you to turn on the projector.
Appendices Replacing the lamp The projector will detect the lamp life itself. It will show you a warning message When you see this message, please contact your local reseller or service center to change the lamp as soon as possible. Make sure the projector has been cooled down for at least 45 minutes before changing the lamp.
Appendices 2 N ot e The screws on the lamp cover and the lamp cannot be removed. 1 Do not touch the glass area of the lamp. Hand oil can cause the lamp to shatter. Use a dry cloth to clean the lamp module if it was accidentally touched. 4 3 5 6 Lamp Replacing Procedure: 1. 2. 3. 4. 5. 6. 7. 8. 9. Switch off the power to the projector by pressing the “POWER ”. Allow the projector to cool down at least 45 minutes. Disconnect the power cable. Unscrew the one screw on the front cover.
Appendices Compatibility Mode Computer Compatibility (Analog, PC) Modes Resolution V-Sync (Hz) H-Sync (kHz) VGA 640 x 350 70 31.50 640 x 480 60 31.50 640 x 480 72 37.90 640 x 480 75 37.50 720 x 400 70 31.50 800 x 600 56 35.20 800 x 600 60 37.90 800 x 600 72 48.10 800 x 600 75 46.90 1024 x 768 60 48.40 1024 x 768 70 56.50 1024 x 768 75 60.00 1280 x 768 60 47.40 1280 x 720 60 45.00 1280 x 800 60 49.
Appendices Configurations of Terminals Terminal: RS232 Pin Assignments 9 5 Pin no. 8 4 7 3 6 2 1 Spec.
Appendices RS232 Protocol Function List N ot e 1. There is a after all ASCII commands. 2. 0D is the HEX code for in ASCII code.
Appendices ~XX6 n ~XX6 n ~XX63 n ~XX6 n ~XX66 n 7E 30 30 36 3 0 a 0D 7E 30 30 36 3 0 a 0D 7E 30 30 36 33 0 a 0D 7E 30 30 36 3 0 a 0D 7E 30 30 36 36 0 a 0D Overscan Digital Zoom H Image Shift V Image Shift V Keystone n = 0 (a=30) ~ 3 (a=33) n = - 0 (a= D 3 30) ~ 00 (a=3 30 30) n = - 0 (a= D 3 30) ~ + 0 (a=3 30) n = - 0 (a= D 3 30) ~ + 0 (a=3 30) n = - 0 (a= D 3 30) ~ 0 (a=3 30) ~XX70 ~XX70 ~XX70 3 ~XX70 ~XX70 ~XX70 6 ~XX70 7 ~XX70 8 ~XX70 9 ~XX70 0 ~XX70 ~XX70 ~XX70 13
Appendices SEND from projector automatically ------------------------------------------------------------------------------------------------------------------------------------------------------------------ASCII Code HEX Code Function when Standby/Warming/Cooling/Out of Range/Lamp fail/ Fan Lock/Over Temperature/Lamp Hours Running Out Projector Return Description INFOn n : 0/ / /3/ / /6/7 = Standby/Warming/Cooling/Out of Range/Lamp fail/ Fan Lock/Over Temperature/Lamp Hours Running Out -------------
Appendices 206.00 2.7。 77.00 51.77 46.77 42.77 Lens center 9.00 19.00 Dimensions 96.15 29.00 9.00 6.5。 220.00 231.56 175.00 FOCUS 288.00 Screw holes for ceiling mount Screw: M3 Depth: 7.0 mm 55.00 62.56 82.30 55.00 70.80 134.80 153.
Appendices Specifications Rsolution (Pixel) 800 x 600 Aspect ratio 4:3 Panel size 0.55” SVGA DMD Projection distance 1.0~12.0 m (Mechanical travel) Throw ratio 1.93~2.15, w/Zoom 1.1x Power supply AC 100 ~ 240 V @ 50/60 Hz • 180W Lamp @ Normal operation • 160W Lamp @ ECO operation Dimension (L x W x H) 220 mm x 288 mm x 77 mm Weight 2.2 kg Operation environment Temperature • Operating: 5°C ~ 40°C N ot e The specifications listed are subject to change without notice.
Appendices Regulation & Safety Notices This appendix lists the general notices of your projector. FCC notice This device has been tested and found to comply with the limits for a Class B digital device pursuant to Part 15 of the FCC rules. These limits are designed to provide reasonable protection against harmful interference in a residential installation.
Appendices Operation conditions This device complies with Part 15 of the FCC Rules. Operation is subject to the following two conditions: 1. This device may not cause harmful interference and 2. This device must accept any interference received, including interference that may cause undesired operation. Notice: Canadian users This Class B digital apparatus complies with Canadian ICES-003.