ENGLISH User Guide GT540 P/N : MMBB0381516 (1.0) WR GT540_OPT_Australia_Cover_1.0_101 1 www.lg.com 2010.10.
WiFi (WLAN) This device uses non-harmonised frequency and is intended for use in all European countries. The WLAN can be operated in the EU without restriction indoors, but cannot be operated outdoors in France. Bluetooth QD ID B016480 GT540_OPT_Australia_Cover_1.0_102 2 2010.10.
GT540 User Guide Some of the contents of this manual may not apply to your phone depending on your phone’s software or your service provider. • This handset is not recommended for the visually impaired because of its touch-screen keypad. • Copyright ©2010 LG Electronics, Inc. All rights reserved. LG and the LG logo are registered trademarks of LG Group and its related entities. All other trademarks are the property of their respective owners.
Congratulations on your purchase of the advanced and compact GT540 phone by LG, designed to operate with the latest digital mobile communication technology. T540_OPT_Australia Optus_1.0_102 2 2010.10.
Contents Guidelines for safe and efficient use...........................................7 Important notice....................14 1. Phone memory.................14 2. Optimising Battery Life......14 3. Installing an Open Source OS15 4. Using Unlock pattern ........15 5. U sing Safe Mode and Hard Reset............................... 16 6. Connecting to Wi-Fi networks16 7. Using a microSD card........17 8. O pening and Switching Applications..................... 18 9.
Contents Creating a group...................42 Messaging/E-mail..................43 Messaging............................43 Sending a message...............43 Entering text.........................44 T9 mode..............................44 Abc mode.............................44 123 Mode............................45 Entering accented letters.......45 Example...............................45 Setting up your email............45 Sending an email using your new account.........................
Adding frames......................60 Adding clipart.......................60 Using the drawpad................61 Adding stamps......................61 Resizing...............................61 Editing your videos................61 Trimming the length of the video..............................61 Selecting transition style........61 Adding subtitles....................62 Adding edit effects................62 Grabbing a frame..................62 Adding dubbing to your video 63 Multimedia......................
Contents Using the Web tool bar..........76 Using options........................76 Adding and accessing bookmarks...........................77 Changing Web browser settings................................77 Software update....................84 Phone Software update.........84 DivX Mobile .........................84 Settings.................................78 Wireless controls..................78 Sound & display....................78 Data synchronization ............79 Security & location ...............
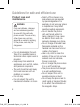
Guidelines for safe and efficient use Please read these simple guidelines. • While there may be differences Not following these guidelines may between the SAR levels of be dangerous or illegal. various LG phone models, they are all designed to meet Exposure to radio the relevant guidelines for frequency energy exposure to radio waves. Radio wave exposure and • The SAR limit recommended Specific Absorption Rate (SAR) by the International information.
Guidelines for safe and efficient use Product care and maintenance • Switch off the phone in any area where you are required by special regulations. For example, do not use your phone WARNING: in hospitals as it may affect Only use batteries, chargers sensitive medical equipment. and accessories approved • Do not handle the phone for use with this particular with wet hands while it is phone model. The use of any being charged.
• Do not tap the screen with a sharp object as it may damage the phone. • Do not expose the phone to liquid or moisture. • Use the accessories like earphones cautiously. Do not touch the antenna unnecessarily. Efficient phone operation Electronics devices All mobile phones may get interference, which could affect performance. • Do not use your mobile phone near medical equipment without requesting permission. Avoid placing the phone over pacemakers, for example, in your breast pocket.
Guidelines for safe and efficient use Avoid damage to your hearing Damage to your hearing can occur if you are exposed to loud sound for long periods of time. We therefore recommend that you do not turn on or off the handset close to your ear. We also recommend that music and call volumes are set to a reasonable level. NOTE! Excessive sound pressure from earphones can cause hearing loss. Blasting area Do not use the phone where blasting is in progress.
Use your wireless phone to call emergency services for yourself or others in the case of fire, traffic accident or medical emergencies; - Australia Dial (0-0-0) - New Zealand Dial (1-1-1) - International Dial (1-1-2) - other local emergency number. Remember, it is a free call on your wireless phone for emergency services. • Replace the battery when it no longer provides acceptable performance. The battery pack maybe recharged hundreds of times until it needs replacing.
Guidelines for safe and efficient use • Always unplug the charger from the wall socket after the phone is fully charged to save unnecessary power consumption of the charger. • Actual battery life will depend on network configuration, product settings, usage patterns, battery and environmental conditions. Driver Safety Tips Your wireless telephone gives you the powerful ability to communicate by voice - almost anywhere, anytime.
• Use your wireless phone to call emergency services for yourself or others. Dial 0-0-0 for local emergency services in the case of fire, traffic accident or medical emergencies in Australia. Dial 1-1-1 for local emergency number in New Zealand. Dial 1-1-2 any where in the world to reach emergency services. Remember, it is a free call on your wireless phone! • Call roadside assistance or a special nonemergency wireless assistance number when necessary.
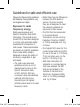
Important notice Please check to see if any problems you have encountered with your phone are described in this section, before taking the phone in for service or calling a service representative. 1. Phone memory When available space on your phone memory is less than 10%, your phone can not receive a new message. You need to check your phone memory and delete some data such as applications or messages to make more memory available. To manage the application 1.
To monitor and control what uses the battery 1. On the home screen, touch Applications tab and select Settings> About phone> Battery use. 2. The top of the screen displays battery usage time. Either how long since last connected to a power source or, if connected to a power source, how long you were last running on battery power. The body of the screen lists applications or services using battery power from greatest amount to least. 3.
Important notice If you do not have Google account, you don't create the Google account on the phone, or you forget it, you can use Hard Reset. 5. Using Safe Mode and Hard Reset Using Safe mode * To recover from malfunction state of your phone 1. Turn off your phone and reboot. While your phone is powering back on, press and hold the Home key during Android Logo is displayed. Your phone will boot all the way to the main screen and display "safe mode" in lower left corner. 2.
are hidden or implement other security features, so you must configure your phone so it can connect to them. Turn off Wi-Fi when you're not using it, to extend the life of your battery. To turn Wi-Fi on and connect to a Wi-Fi network 1. On the home screen, touch Applications tab and select Settings> Wireless controls> Wi-Fi settings. 2. Touch Wi-Fi to turn it on and begin scan for available Wi-Fi networks. - List of available Wi-Fi networks is displayed. Secured networks are indicated by a lock icon. 3.
Important notice 8. Opening and Switching 9. C onnecting your phone Applications to a computer via USB Multi-tasking is easy with Android because open applications keep running even when you open another application. There’s no need to quit an application before opening another. Use and switch among several open applications. Android manages each application, stopping and starting them as needed, to ensure that idle applications don’t consume resources unnecessarily. To stop the application you use 1.
- Synchronise data from a PC & phone (contacts, calendar/task) - Transfer multimedia files (photo, video, music) conveniently with a simple drag & drop between a PC and phone - Transfer the messages from a phone to a PC - Use your phone as a Modem - S/W update without loosing your data GT540 does not support: - PC connection via Bluetooth - LG Air Sync (Web Sync, R-Click) - OSP (On Screen Phone) - To-do in Calendar - Memo - E-mail - Java Application User’s guide for PC Suite IV is in Help menu after in
Important notice When the phone is connected as USB storage, you receive a notification. You phone’s microSD card is mounted as a drive on your computer. You can now copy files to and from the microSD card. NOTE: When uninstalling PC Suite IV, USB and Bluetooth Drivers are not automatically removed. Therefore, they must be uninstalled manually. TIP! To use a microSD card on you phone again, you need to open the notification drawer and touch Turn off USB storage.
Getting to know your phone Earpiece Back key - Returns to the previous screen. Menu key - Opens options menu and check what options are available. End/Power/Lock key - Ends or rejects a call. - Power ON / OFF Your phone by pressing and holding the key - Turns off the screen and locks the phone. Send key - Access to call logs and answers incoming calls. Home key - Returns to home screen from any screen. T540_OPT_Australia Optus_1.0_1021 21 Microphone 21 2010.10.
Getting to know your phone Volume keys - On the home screen: controls ringer volume. - During a call: controls your earpiece volume. - When playing a track: controls volume. Charger, micro USB cable connector Search key - Search the web and contents in your phone. Camera key - Go to the camera menu directly by pressing and holding the key.
Installing the SIM card and battery Before you can start exploring your new phone, you’ll need to set It up. To insert the SIM card and battery: 1 With the back of the phone facing you, remove the back cover. To remove the back cover, firmly press your thumbs on either side of the back cover, and slide the cover below the camera lens. T540_OPT_Australia Optus_1.0_1023 23 2 Slide the SIM card into the SIM card holder. Make sure the gold contact area on the card is facing downwards. 23 2010.10.
Getting to know your phone 3 I nsert the battery into place by aligning the gold contacts on the phone and the battery, then gently press the battery until it snaps into space. Charging your phone Slide back the cover of the charger connector on the side of your GT540. Insert the charger, and plug it into an electrical outlet. Your GT540 must be charged until you can see . NOTE: The battery must be fully charged initially to improve battery lifetime.
NOTE: The GT540 has an internal antenna. Be careful not to scratch or damage this rear area, as that will cause loss of performance. 2 O pen the slot protection and insert the memory card into the slot. Make sure the gold contact area is facing downwards. Installing the memory card To store multimedia files such as captured images by using a built-in camera, you must insert a memory card to your phone. To insert a memory card: NOTE: The GT540 supports upto a 32GB memory card.
Getting to know your phone WARNING! Do not insert or remove the memory card when the phone is on. Otherwise, it may damage the memory card as well as your phone, and the data stored on the memory card may be corrupted. Formatting the memory card Your memory card may already be formatted. If it isn’t, you must format it before you can use it. NOTE: All files on the card are deleted when you format the card. 6 I f you set the pattern lock, input the pattern lock and select Erase Everything.
Your Home screen Touch-screen tips Here are some tips on how to navigate around your phone. Touch - To choose a menu/ option or open an application, touch it. Touch and hold - To open an options menu or grab an object you want to move, touch and hold it. Drag - To scroll through a list or move slowly, drag across the touch screen. Flick - To scroll through a list or move quickly, flick across the touch screen (drag quickly and release). Note •T o select an item, touch the centre of the icon.
Your Home screen Lock and unlock screen Whenever your GT540 is not in use, it will return to the lock screen. If you do not use the phone for a while, the home screen or other screen you are viewing, is replaced with the lock screen when the screen blacks out, to conserve the battery. To wake up your phone, press Send, Home, or Power key. The lock screen will appear. Touch the lock icon and drag your finger to the right to unlock your home screen. The last screen you were working on opens.
Using your home screen Touch the Applications tab at the bottom of the screen. You can then view all your installed applications. Applications NOTE: Some screen images may be different depending on your phone provider. Select your default home screen The user interface is based on two types of home screens: LG Home and Android Home. You can set your favourite home screen as the default. If you want to change the default home settings, choose Home selector from the applications menu.
Your Home screen LG Home Simply swipe your finger to the left or right to view the panels. You can also customise each panel with widgets, shortcuts which are shortcuts to your favourite applications, folders and wallpapers. Centre panel Left panel Right panel Tip! Small dots at the application tab on the bottom of the screen indicate which panel you’re viewing. 30 T540_OPT_Australia Optus_1.0_1030 30 2010.10.
In your LG home screen, you can view quick keys on the bottom of the screen. The quick keys provide easy, one-touch access to the functions you use the most. Touch the Phone icon to bring up the touch-dialling pad to make a call. Touch the Message icon to access the messaging menu. Here, you can create a new message. Touch the Applications icon to open the applications menu. Just touch to scroll through your applications. T540_OPT_Australia Optus_1.0_1031 31 31 2010.10.
Your Home screen Android Home Simply swipe your finger to the left or right to view the panels. You can also customise each panel with widgets, shortcuts which are shortcuts to your favourite applications, folders and wallpapers. Centre panel Left panel Right panel Touch the Applications icon to open the applications menu. Just touch and slide up or down the screen to scroll through your applications. Applications 32 T540_OPT_Australia Optus_1.0_1032 32 2010.10.
Adding widgets to your home screen You can customise your home screen by adding shortcuts, widgets, or folders to it. For more convenience using your phone, add your favourite widgets on the home screen. NOTE: LG Home and Android Home provide this function. To add an desired icon to your home screen: 1 O n the home screen, touch Menu key and select Add. 2 On the Add to Home screen menu, touch the type of item you want to add. 3 For example, select Folders from the list and tap it.
Your Home screen Notification drawer Icon Description The notification drawer runs across the top of your screen. Touch and slide the notification drawer down with your finger. Or, on the home screen, touch Menu key and select Notifications. Here, you can check Wi-Fi, Bluetooth, GPS status as well as other notifications.
Icon Description Flight mode Silent Vibrate No SD card Battery fully charged Battery is charging Data in Data out Data in and out USB to PC Download Upload GPS is acquiring GPS is on T540_OPT_Australia Optus_1.0_1035 35 35 2010.10.
Google Account Set-up The first time you open the 4 When you’re finished to Google application on your input name and username, phone, you will be required to tap Next. Your phone is sign in with your existing Google communicating with Google account. If you do not have a servers and checking Google account, you’re prompted username availability. to create one. 5 Enter and re-enter your password.
3 O nce you have set up your Google account on your phone, your phone will be automatically synchronised with your Google account on the web. (It depends on your synchronization settings.) After sign in, you can use Google Mail, Google Calendar, Android Market and Google Map; download applications from Android Market; back up your settings to Google servers; and take advantage of other Google services on your phone. T540_OPT_Australia Optus_1.0_1037 37 37 2010.10.
Calls Making a call 1 Touch to open the keypad. 2 Enter the number on the keypad. To delete a digit, touch the Clear icon . 3 Touch the Call icon to make a call. 4 To end a call, touch End. TIP! To enter “+” to make international calls, touch and hold down . Calling your contacts 1 T ouch to open your contacts. 2 Scroll through the contact list or enter the first letter(s) of the contact you want to call by touching Search.
2 D ial the number, or search your contacts. 3 Touch the Call icon to connect the call. 4 Both calls will be displayed on the call screen. Your initial call will be locked and put on hold. 5 Touch to toggle between calls. Or touch to make a conference call. 6 To end active calls, touch End call. If there is no active call, it will end the Hold call. To end all calls at the same time, touch the Menu key and select End call. NOTE: You will be charged for each call you make.
Calls Fixed Dialing Numbers – Select Fixed Dialling Numbers to turn on and compile a list of numbers that can be called from your phone. You’ll need your PIN 2 code, which is available from your operator. Only numbers within the fixed dial list can be called from your phone. Voicemail – Set up your voicemail number. Call forwarding – You can configure how your calls are forwarded when you’re on the phone, when you don’t answer, and so on.
Contacts You can add contacts on your phone and synchronise them with the contacts in your Google Account or other accounts that support syncing contacts. Searching for a contact There are two ways to search for a contact: On the Home screen 1 O n the home screen, touch to open your contacts. 2 Touch Search and enter the contact name using the keypad. TIP! To search by group, touch the Contacts tab at the top of the screen and select Groups. This will display a list of all your groups.
Contacts Favourite Contacts Creating a group You can classify frequently called contacts as favourites. To add a contact to your favourites 1 On the home screen, touch to open your contacts. 2 Touch a contact to view its details. 3 Touch the star to the right of the contact’s name. The star turns gold. To remove a contact from your favourites list 1 On the home screen, touch to open your contacts. 2 Touch the Favorites tab and choose a contact to view its details.
Messaging/E-mail Messaging Your GT540 combines SMS and MMS into one intuitive, easy-touse menu. Sending a message 1 T ouch Messaging icon on the home screen, and touch New message to open a blank message. 2 Enter a contact name in the To field. As you enter the contact name, matching contacts appear. You can touch a suggested recipient or continue entering the contact name. You can add multiple contacts. NOTE: You will be charged for a text message for every person you send the message to.
Messaging/E-mail NOTE: When you get an SMS message during a call, there is no alert, but you will seen it on the indicator bar. Entering text Keypad Handwriting settings, Writing language, User dictionary and Input method. Use to swap between lowercase and uppercase. The coloured circle on the button tells you if uppercase is locked on (green) or if it is just on for one character (orange). To enter a space, touch .
123 Mode Setting up your email This mode allows you to enter numbers in a text message (a telephone number, for example) more quickly. Touch the keys corresponding to the required digits before manually switching back to the appropriate text entry mode. Keep in touch while on the move by using your GT540 to send emails. It’s quick and simple to set up a POP3 or IMAP4 email account. 1 On the home screen, touch Applications tab and tap Email to view the mail boxes for each email account.
Messaging/E-mail 2 E nter the recipient’s address, then write your message. You can also attach images, videos, audio files, and various document file formats. 3 Touch Send icon to send your email. TIP! During an active Wi-Fi connection, emails are sent and received using Wi-Fi. Retrieving your email You can automatically or manually check your account for new email. To check manually: 1 Touch Email icon on the home screen. 2 Then touch the account you want to use.
Using smilies Liven up your messages using smilies. When writing a new message, touch the Menu key, then choose Insert Smiley. Changing your messaging settings Your GT540 message settings are predefined, so you can send messages immediately. You can change the settings based on your preferences. Touch Messaging icon on the home screen, then touch the Menu key. Tap Settings. < SMS settings > Delivery reports – Activate to receive confirmation that your messages have been delivered.
Messaging/E-mail Warning: In this mode, the MMS Client device guides the user in creating and sending messages with content belonging to the Core MM Content Domain. This guidance is provided through warning dialogs. Free: In this mode, the MMS Client allows the user to add any content to the message. Receive advertisement Allows receiving advertisement messages. < Other settings > Service message – Choose whether to receive or block service messages.
2 Scroll and touch SNS. 3 Touch Add account to add a social networking account. 4 Select the kind of account to add. 5 Enter your e-mail address and password that you set up on your community, then tap Log in. 6 Wait while your details are checked with your community. 7 Check your community is turned ON. If you tap your community, you can see the current status of your social community.
Camera Getting to know the viewfinder rightness – This defines and controls of the amount of sunlight B entering the image. Slide the brightness indicator along the bar, towards “-” for a lower brightness image, or towards “+” for a higher brightness image. Zoom – Zoom in or zoom out. Alternatively you can use the side volume keys. Settings – Touch this icon to open the settings menu. See Using the advanced settings. Gallery – This enables you to access your saved photos from within the camera mode.
TIP! You can close all the shortcut options to give a clearer viewfinder screen. Just touch the centre of the viewfinder once. To recall the options, touch the screen again. Using the focus mode You can select the focus mode as following options; Auto Focus – Set the camera to focus automatically. Macro – Macro mode allows you to take extreme close-ups. If you are trying to take a close-up shot but the focus box remains red, try turning the macro mode on.
Camera Once you’ve taken the photo Using the advanced settings Your captured photo will appear on the screen. Share Touch to share your photo as Bluetooth, Email, Google Mail, MMS, or SNS. NOTE: Additional charges may apply when MMS messages are downloaded while roaming. Set as Touch to use the image as Contact icon, Lock screen or Wallpaper. Rename Touch to edit the name of the selected picture. Edit Touch to edit the image using various tools. Touch to view a gallery of your saved photos.
Timer – The self-timer allows you to set a delay after the shutter is pressed. Select Off, 3 seconds, 5 seconds, or 10 seconds. This is ideal if you want to be included in a photo. ISO – The ISO rating determines the sensitivity of the camera’s light sensor. The higher the ISO, the more sensitive the camera will be. This is useful under darker conditions when you cannot use the flash. Select from ISO values of Auto, 100, 200, and 400.
Camera Hide icons – Choose the camera setting icons to hide manually or automatically. Blink detection – Turn this on to display a red box around the face that was blinking in the preview image screen. Reset – Restore all camera default settings. Viewing your saved photos 1 Y ou can access your saved photos from within the camera mode. Just touch and your gallery will appear on the screen. TIP! When you exit the camera, all settings will return to their defaults, except image size and image quality.
Video camera Getting to know the viewfinder Brightness – This defines and controls of the amount of sunlight entering the Video. Slide the brightness indicator along the bar, towards “-” for a lower brightness Video, or towards “+” for a higher brightness Video. Zoom – Zoom in or zoom out. Alternatively you can use the side volume keys. Before starting record a video, you can use the zoom function. You can not control the zoom function during recording. Settings – Touch this icon to open the settings menu.
Video camera Shooting a quick video NOTE: Additional charges may apply when MMS messages are 1 P ress and hold the camera downloaded while roaming. key on the right side of the Play Touch to play the video. phone. 2 Then slide the capture button Rename Touch to edit the name of the selected video. down position, the icon will change to . Edit Touch to enter editing mode on this video. 3 The video camera’s viewfinder Touch to access the media will appear on the screen.
Color effect – Choose a colour tone to use for your new view. White balance – The white balance ensures any white areas in your video are realistic. To enable your camera to adjust the white balance correctly, you may need to determine the light conditions. Choose from Auto, Incandescent, Sunny, Fluorescent, and Cloudy. Duration – Set a duration limit for your video. Choose between Normal and MMS to limit the maximum size to send as an MMS message.
Your photos and videos Viewing your photos and videos 1 T ouch on the camera preview screen. 2 Your gallery will appear on the screen. 3 Touch the video or photo to open it fully. TIP! Flick left or right to view other photos or videos. Adjusting the volume when viewing a video To adjust the volume of a video while it is playing, use the volume keys on the left side of the phone. Setting a photo as wallpaper 1 T ouch the photo you want to set as wallpaper to open it.
T ext – Add text to a picture. C lipart – Add clipart to a photo. D rawpad – Draw on your photo, freehand. Select the line thickness from the four options, then choose the colour you want. S tamp – Decorate your photo with stamps. Choose from the different stamps, then touch your photo where you want to place them. R esize – Resize your photo. Save the changes you made to the photos. Delete your photo edits.
Your photos and videos Cropping a photo 1 On the editing screen, touch . 2 Choose the shape you want to use to crop the picture. 3 Drag the box over the area you want to crop. Move the selected area by dragging. 4 When you are finished with your selection, touch Done. Tuning your photo 1 On the editing screen, touch . Use the tuning toolbar to adjust your photo’s tuning as you like. 2 Choose to adjust the tuning settings automatically. 3 Choose to compare before and after tuning.
Using the drawpad Editing your videos 1 T ouch on the editing screen. 2 Touch to select the shape. 3 Also, set the colour and thickness. 4 You can delete the drawing you added using . The video editing features are available for the MPEG-4 format. Adding stamps 1 T ouch on the editing screen. 2 Touch to see which stamps are available. 3 Touch the screen where you want to add the stamp to the photo. 4 Adjust the colour using . Resizing 1 T ouch on the editing screen.
Your photos and videos Adding subtitles Adding edit effects 1 O pen the video you want to edit. 2 Select Edit , then select to add subtitles to the video. 3 Touch , then pause playback to set the start point for text appearance. 4 Touch Start, then choose the text style. Enter your text using the keypad, then select Done. 5 Touch the area of the screen where you want the text to appear, then touch OK. 6 Replace the existing file, or save as a new file. 7 Repeat these steps to add more text.
Adding dubbing to your video 1 O pen the video you want to edit. 2 Select Edit , then choose . 3 Touch . The My Sounds folder will open. Choose the track you want to add to your video. 4 The original audio track on your video will be deleted. 5 If the audio is shorter than the video, choose whether to play it Once or to Repeat it. 6 Replace the existing file, or save as a new file. 7 Or you can record a new file and insert live dubbing by touching . 8 Touch OK to save the current dubbing.
Multimedia You can store multimedia files to a memory card to have easy access to all your image and video files. Touch Applications tab, then select Gallery. You can open a list of catalogue bars that store all your multimedia files. NOTE: Make sure you install a memory card into the phone to save photos and access all your pictures. Without a memory card, the phone will not display any photos or videos. There are seven catalogue bars as shown below. All : Displays all your pictures and videos.
My Images options menu Select a photo, then touch and hold to see the available options. Sending a photo 1 T o send a photo, touch and hold the photo you want. 2 Select Share. Choose from Bluetooth, Email, Google Mail, Messaging, SNS or Picasa. 3 When you choose Email, Google Mail or Messaging, your photo will be attached to a message, then you write and send the message normally.
Multimedia 1 T ouch and hold a photo, then select Detail. Media Player The Media Player folder displays a list of videos you downloaded to or recorded on your phone. Watching a video 1 Select Media Player on the Applications tab. 2 Touch Video and select a video to play. TIP! The GT540 supports DivX video playback to ensure greater content availability. Touch Music and select a music to play. You can play songs, categorise songs by Album and Artist, or create a Playlist.
– Touch to deselect all the files. 25/32 – This shows the selected file number. Touch to go to the next step. 6 T ouch to play the complete video file. 7 Touch to save the video file you created. Music Movie There are three style templates: Portrait, Landscape, and Motion objects. 1 Touch , then select a video. Go to the next step. 2 Touch to preview the video file. 3 Touch to save the file. 1 F lip left and right to check the various styles. For Music Movie, you can select only photos.
Multimedia NOTE: Java game and application installation are only possible through the Web. Transferring files using USB mass storage devices To transfer files using USB devices: 1 Connect the GT540 to a PC using a USB cable. 2 Choose Settings > SD Card & Phone Storage > Mass Storage Only. 3 In the status bar, drag the USB icon. 4 Choose USB Connected and Mount. 5 You can view the mass storage contents on your PC and transfer the files. NOTE: You need to install an SD card first.
6 T ouch to go back to the first part of the song. Touch two times to go back to the previous song. To change the volume while listening to music, press the up and down volume keys on the left side of the phone. Touch and hold any song in the list. It will display Play, Add To Playlist, Use As Phone Ringtone, Delete, and Search as options. NOTE: Music file copyrights may be protected by international treaties and national copyright laws.
Multimedia 3 T ouch Auto Scan, then touch Ok. Assign the stations found to channel numbers by selecting Set, Skip, or Stop. NOTE: You can also manually tune in to a station using the wheel displayed next to the radio frequency. Resetting channels 1 O n the home screen, touch Applications tab and select FM radio. 2 Choose Reset Channel to reset the current channel, or choose Reset All Channels to reset all the channels.
Google applications 1 F irst, set up a Google account. Enter your user name and password. 2 A fter signing in, your contacts, email, and calendar in your Google account will automatically synchronise with your GT540. Tip! If you change your Google account after signing in, or you want to log out, please use the below step: Applications > Settings > Applications > Manage applications > Google Apps > Clear data. Google Maps Check your current location and traffic and receive directions to your destination.
Google applications Google Mail Google Mail is configured when you first set up your phone. Depending on your synchronization settings, Google Mail on your phone is automatically synchronised with your Google Mail account on the web.The inbox conversations list is your default Google Mail view. Touch the Menu key, then touch Refresh to send or receive new emails and to synchronise your emails with your Google Mail account on the web. Google Talk Google Talk is Google’s instant messaging program.
Utilities Setting your alarm 1 O n the home screen, touch Applications tab and select Alarm Clock. 2 If you want to add a new alarm, touch New Alarm. There are preset alarms you can activate. 3 Touch to turn on the alarm, and set the time you want the alarm to sound. After you set the time, the GT540 will let you know how much time is left before the alarm sounds. 4 Choose a ringtone, and turn on Vibrate, if you want. Set the repeat. 5 Choose Label to name the alarm. 6 Set the Snooze interval.
Utilities Adding an event to your calendar 1 O n the home screen, touch Applications tab and select Calendar. 2 First, you must create a Google account to use Calendar. 3 Select the date you want to add an event to. 4 Touch the Menu key, then touch New event. 5 Touch What, then enter the event name. Check the date and enter the time you want your event to begin. Enter the time and date the event finishes in the lower date and time boxes. 6 Also, touch Where, then enter the location.
1 C hoose Memory Card. You can see the files and folder list. 2 If you choose Recent Documents, files you recently viewed will be displayed. 3 Touch and hold any file, and the options Rename, Properties, and Delete will appear. 4 Choose a file, then touch the Menu key to view the Open, Register, Update, Properties, and About options. There are additional options, depending on the file type. PDF: Go To Page, Fit Page, Fit Width DOC/TXT: Search XLS: Worksheet – Choose Summary View or Full View.
The Web Browser Browser gives you a fast, fullcolour world of games, music, news, sports, entertainment, and much more, right on your mobile phone. Wherever you are and whatever you’re into. Accessing the Web 1 O n the home screen, touch Applications tab and select Browser. 2 You will move to the website. NOTE: Additional charges apply when connecting to these services and downloading content. Check data charges with your network provider. Using the Web tool bar Touch to open the toolbar.
S hare Page – Send page by Email or Messaging. • Downloads – Show download history. • Setting – Set browser settings. • Adding and accessing bookmarks For easy and fast access to your favourite websites, you can add bookmarks and save Web pages. 1 On the home screen, touch Applications tab and select Browser. 2 Touch the Menu key then select Bookmarks. Or press . A list of your bookmarks will appear on the screen. 3 Select Add Bookmarks, then enter a name for the bookmark followed by its URL.
Settings On the home screen, touch Applications tab then scroll and touch Settings. Airplane mode – After setting Airplane mode, all wireless connections will be disabled. Wireless controls Sound & display Here, you can manage Wi-Fi and Bluetooth. Also, you can set mobile networks, airplane mode. Wi-Fi – Touch to checkmark: Turns on Wi-Fi to connect to available Wi-Fi networks. Wi-Fi settings – Set network notification, or add a Wi-Fi network.
SD Card notifications – Disable SD card notification sounds. Orientation – Set to switch orientation automatically when you rotate the phone. Animation – Set to display an animation when you open or close windows. Brightness – Adjust the brightness of the screen. Screen timeout – Set the time for screen timeout. Touch calibration – Reset your screen for ease of use. Enable GPS Satellites – If you check Enable GPS satellites, your phone will be determine your location to street-level accuracy.
Settings Install from SD card – choose to install encrypted certificates from your SD card. Set password – set or change the credential storage password. To lock your screen by using the Pattern Lock 1 On the home screen, touch Applications tab and select Settings. 2 T ouch Security & location, and select Set unlock pattern. 3 The first time you do this, a short tutorial about creating an unlock pattern appears. 4 You're prompted to draw and redraw your own pattern.
Date and time Speech synthesis Set date, time, time zone, and formats. You use the Text-to-Speech settings to configure the Android text-to-speech synthesiser, for applications that can take advantage of it. Locale and text Set local language and region, text input, and autocorrect options. Search You use the Search settings to configure Google search, Quick Search Box, and the data on the phone that you want to include in searches.
Wi-Fi Wireless Manager allows you to manage Internet connections your phone’s Wi-Fi (a wireless LAN). It allows the phone to connect to local wireless networks or access the Internet wirelessly. Wi-Fi is faster and has a greater range than Bluetooth wireless technology. It allows fast emailing and Internet browsing. NOTE: The GT540 supports WEP and WPA/WPA2-PSK security. If your Wi-Fi service provider or network administrator sets encryption for network security, fill in the key in the pop-up window.
2) Saving a frequently used AP as a profile makes it easier to enter the security key when connecting to an AP with that security type. 3) If the AP does not support DHCP, you can connect to the AP using a static IP address. 2 Description of each field in the Wi-Fi profile. 1) Network Name: SSID (ID) 2) Security Type: WEP and WPA/WPA2-PSK support. 3) Security Key: Saves the security key. 4) IP/DNS Setting: This allows you to set to Automatic or Static, depending on whether the AP supports DHCP.
Software update Phone Software update LG Mobile Phone Software update from internet For more information on using this function, please visit the http://update.lgmobile.com or http://www.lg.com/common/ index.jsp → select country → Support. This Feature allows you to update the firmware of your phone to the latest version conveniently from the internet without the need to visit a service centre.
Accessories These Accessories are available for use with the GT540. (Items described below may be optional.) Charger Data cable Connect your GT540 and PC. Battery User Guide Learn more about your GT540. Stereo headset NOTE: • Always use genuine LG accessories. • Failure to do this may void your warranty. • Accessories may vary in different regions. T540_OPT_Australia Optus_1.0_1085 85 85 2010.10.
Technical data Ambient Temperatures Max: +55°C (discharging), +45°C (charging) Min: -10°C 86 T540_OPT_Australia Optus_1.0_1086 86 2010.10.
Troubleshooting This chapter lists some problems you might encounter while using your phone. Some problems require you to call your service provider, but most are easy to correct yourself. Message Possible causes Possible solutions SIM error There is no SIM card in the phone or it is inserted incorrectly. Make sure the SIM card is correctly inserted. No network connection Signal weak. Outside GSM network area. Move closer to a window or into an open area. Check the service provider coverage map.
Troubleshooting Message Possible causes Possible solutions Press the On/Off key for at least two seconds. Phone cannot be turned on. On/Off key not pressed long enough. Battery empty. Battery contacts dirty. Battery totally empty. Charge battery. Temperature out of range. Make sure the ambient temperature is right, wait a few moments, then charge again. Contact problem. Check the power supply and connection to the phone. Check the battery contacts, and clean them if necessary. No outlet voltage.
MANUFACTURER’S WARRANTY Australia & New Zealand 1. WHAT THIS WARRANTY COVERS: LG offers you a warranty that the enclosed Product and its enclosed accessories will be free from defects in material and workmanship according to the following terms and conditions: (1) The warranty for the Product is for ONE (1) year beginning on the date of purchase of the Product.
MANUFACTURER’S WARRANTY Australia & New Zealand 2. WHAT THIS WARRANTY DOES NOT COVER: (1) Defects or damage resulting from use of the Product in other than its normal and customary manner.
MANUFACTURER’S WARRANTY MANUFACTURER’S WARRANTY Australia&& New New Zealand Australia Zealand (12) Defects or damage resulting from NEW breakage of or tampering AUSTRALIA: ZEALAND: with the LCD screen. LG Electronics Australia Pty Ltd 2 LG Electronics Australia (13) Where applicable, Products that have been subject to an Pty Ltd removal or deactivation operator Wonderlandunauthorised Drive UnitofA,the 38network Highbrook Drive lockNSW function.
Memo 5_115 memo_Gray.indd 1 2009.12.
5_115 memo_Gray.indd 2 Memo 2009.12.
Memo 5_115 memo_Gray.indd 1 2009.12.
5_115 memo_Gray.indd 2 Memo 2009.12.
Memo 5_115 memo_Gray.indd 1 2009.12.