To contact LG Electronics, 24 hours a day, 7 days a week: 1-800-243-0000 (U.S.A.) 1-888-542-2623 (Canada) USER’S GUIDE & INSTALLATION INSTRUCTIONS Please read this guide thoroughly before operating and keep it handy for reference at all times. Para comunicarse con LG Electronics, 24 horas al día, 7 días a la semana: 1-800-243-0000 O visítenos en la Web en: us.lge.com Pour communiquer avec LG Electronics, 24 heures par jour, 7 jours par semaine : 1-888-542-2623 Ou visitez-nous sur le Web au : ca.lge.
I N T RO D U C T I O N IMPORTANT SAFETY INFORMATION Important Notice: Radio Interference. . . . . . . . . . . . . 3 Important Safety Precautions . . . . . . . . . . . . . . . . 4–8 INTRODUCTION TO INDUCTION COOKING THANK YOU! Induction Cooking . . . . . . . . . . . . . . . . . . . . . . . . . . . 9 Selecting Cookware . . . . . . . . . . . . . . . . . . . . . . . 9–11 Congratulations on your purchase PARTS AND FEATURES and welcome to the LG family. Parts and Features of Your Cooktop . . . . . . . . .
I M P O RTA N T S A F E T Y I N F O R M AT I O N WARNING For your safety, the information in this manual must be followed to minimize the risk of fire, electric shock, or to prevent property damage, personal injury, or death. IMPORTANT NOTICE: RADIO INTERFERENCE This unit has been tested and found to comply with the limits for a class B digital device, pursuant to Part 18 of the FCC rules.
I M P O RTA N T S A F E T Y I N F O R M AT I O N READ ALL INSTRUCTIONS BEFORE USE SAFETY PRECAUTIONS • Proper Installation: Be sure your appliance is properly installed and grounded by a qualified technician in accordance with the National Electrical Code ANSI/NFPA No. 70, latest edition in the United States, and all local code requirements. Install only per installation instructions. • Do not attempt to repair or replace any part of your cooktop unless it is specifically recommended in this manual.
I M P O RTA N T S A F E T Y I N F O R M AT I O N SAFETY PRECAUTIONS (cont.) • Wear proper apparel. Loose-fitting or hanging garments should never be worn while using the appliance. Do not let clothing or other flammable materials contact hot surfaces. • Do not use water or flour on grease fires. Smother the fire with a pan lid, or use baking soda, a dry chemical or foam-type extinguisher. • When heating fat or grease, watch it closely. Fat or grease may catch fire if allowed to become too hot.
I M P O RTA N T S A F E T Y I N F O R M AT I O N READ ALL INSTRUCTIONS BEFORE USE SAFETY DURING USE • This appliance may only be used for normal cooking and frying in the home. It is not designed for commercial or industrial purposes. • Do not use the cooktop to heat the room. • Take care when plugging in electric appliances near the cooktop. Cords must not come into contact with the hot surface. This could cause damage to the cooktop and cable insulation. • Overheated fats and oils catch fire quickly.
I M P O RTA N T S A F E T Y I N F O R M AT I O N ENGLISH READ ALL INSTRUCTIONS BEFORE USE SAFETY DURING USE (cont.) • Do not place hot cookware on cold cooktop glass. This could cause glass to break. • Do not slide pans across the cooktop surface. They may scratch the cooktop surface. • Do not let pans boil dry. This may cause permanent damage in the form of breakage, fusion, or marking that can affect the ceramicglass cooktop. (This type of damage is not covered by your warranty.
I M P O RTA N T S A F E T Y I N F O R M AT I O N READ ALL INSTRUCTIONS BEFORE USE HOW TO AVOID DAMAGE TO THE APPLIANCE • Prior to using your cooktop for the first time, apply the recommended cooktop cleaning creme to the ceramic surface. Buff with a non-abrasive cloth or pad. This will make cleaning easier when soiled from cooking. The special cooktop cleaning cream leaves a protective finish on the glass to help prevent scratches and abrasions. • Do not use the cooktop as a worksurface or storage space.
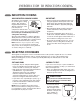
I N T RO D U C T I O N TO I N D U C T I O N C O O K I N G HOW INDUCTION COOKING WORKS IMPORTANT: An induction coil is beneath the ceramic glass cooking surface. This generates magnetic fields, which act directly on the base of the pots and pans as compared to methods that first heat the ceramic glass. This means that the base of the pan is immediately heated up, saving time and energy.
I N T RO D U C T I O N TO I N D U C T I O N C O O K I N G SELECTING COOKWARE 10 (continued) AVOIDING SCRATCHES USE FLAT-BOTTOMED COOKWARE It is recommended to always use heavier gauge stainless steel cookware on your induction cooktop surface. This will help reduce the possibility of developing scratches on the ceramic surface. Low-quality cookware can scratch the cooktop surface. Cookware should always be lifted over the ceramic cooktop surface to prevent scratching.
I N T RO D U C T I O N TO I N D U C T I O N C O O K I N G Minimum pan size = 71⁄4″ (180 mm) SELECTING THE PROPER PAN SIZE • There are 4 Cooking Zones on the induction cooktop. Each element requires a minimum pan size to be used effectively. The inner ring of each cooking zone is a guide to correctly match the minimum pan size. The bottom of the pan must fully cover the inner ring for proper cooking to occur. • The thicker outer ring at each Cooking Zone is helpful to determine the pan MAXIMUM size.
PA RT S A N D F E AT U R E S PARTS AND FEATURES OF YOUR COOKTOP Throughout this manual, features and appearance may vary from your model. 2400W (Normal) 3300W (Boost) 1400W (Normal) 1800W (Boost) 1800W (Normal) 2400W (Boost) Electronic touch controls Ceramic Cooktop: LG’s new induction cooktop features a ceramic cooktop surface that remains cooler than conventional ceramic cooktops, regardless of whether it is ON or OFF.
PA RT S A N D F E AT U R E S ENGLISH TOUCH CONTROL FEATURES 2 1 6 6 1 BRIDGE: Activates the two left Cooking Zones together as a single large Cooking Zone. For bridge operation, touch this pad to activate or and adjust the power level with the pads for either left Cooking Zone. 2 TIMER: When activated, the time remaining is shown in the display. Use the adjust the timer. or pads to 3 CHILD LOCK: Press and hold for 3 seconds to activate and deactivate the child lockout function.
O P E R AT I N G I N S T RU C T I O N S BEFORE USING THE COOKTOP Before using the cooktop for the first time, clean it thoroughly with the included cleaner or ceramic cooktop cleaner according to the Care and Cleaning instructions in this guide. This will remove any help protect the ceramic surface and make future cleanup easier. CAUTION Never use scrub pads or abrasive cleaners. They can cause permanent damage to the cooktop surface.
O P E R AT I N G I N S T RU C T I O N S ENGLISH SETTING THE CONTROLS SETTING THE POWER LEVEL The power level for the selected Cooking Zone to can be set from to and (Boost). To adjust the power level: or pad for the selected 1 Touch the Cooking Zone. Touching will set the power level to . Touching will set the power level to . Touch the or pad of the selected Cooking Zone to increase or decrease the power level. If power level is selected, the Cooking Zone will turn off after 5 seconds.
O P E R AT I N G I N S T RU C T I O N S SETTING THE CONTROLS (cont.) POWER BOOST WARM Boost is the highest power level, designed for quickly heating or boiling larger quantities. Boost will operate for a maximum of 12 minutes. After 12 minutes, it will automatically revert to power level 9. ACTIVATING POWER BOOST 1 Turn on the desired Cooking Zone with the ON/OFF pad for that Cooking Zone. 2 Touch the pad and 3 Touch the pad again and will be displayed.
O P E R AT I N G I N S T RU C T I O N S ENGLISH USING THE BRIDGE COOKING ZONES BRIDGE COOKING ZONES The two left Cooking Zones can be used together as a single Cooking Zone using the Bridge function. This allows you to cook with larger, oblong pans. NOTE: When using the supplied bridge pan, it is important to rub it with oil to prevent burning and sticking. ACTIVATING THE BRIDGE COOKING ZONE Touch the BRIDGE pad. The indicator above the pad will light.
O P E R AT I N G I N S T RU C T I O N S USING CHILD LOCK You can lock the entire cooktop at any time when it is not in use. Locking the cooktop will prevent Cooking Zones from being turned on accidentally. SETTING CHILD LOCK The cooktop must be OFF to set the CHILD LOCK function. If it is not OFF, touch and hold the POWER pad for approximately 2 seconds. The indicator above the POWER pad will turn OFF. CANCELING CHILD LOCK To turn off CHILD LOCK, touch and hold the CHILD LOCK pad for 3 seconds.
CARE AND CLEANING General cleaning for induction ceramic glass cooking surfaces is considerably easier than for cooking surfaces with radiant heating. NOTE: To prevent accidental activation of the controls, it is recommended that you set the CHILD LOCK feature before cleaning. REMOVING HEAVY SOIL To remove food that has boiled over or stubborn spills, use a glass scraper. 1 Hold the glass scraper at an angle of about 45° to the ceramic-glass surface.
I N S TA L L AT I O N I N S T RU C T I O N S INSTALLATION AND SERVICE MUST BE PERFORMED BY A QUALIFIED INSTALLER. IMPORTANT: SAVE THESE INSTRUCTIONS FOR LOCAL ELECTRICAL INSPECTOR’S USE. READ AND SAVE THESE INSTRUCTIONS FOR FUTURE REFERENCE. BEFORE YOU BEGIN Read these instructions completely and carefully. NOTES TO INSTALLER: • Read all instructions contained in these installation instructions before installing the cooktop.
I N S TA L L AT I O N I N S T RU C T I O N S ENGLISH PREPARING THE INSTALLATION LOCATION IMPORTANT INSTALLATION INFORMATION • All electric cooktops run off a single phase, three-wire or four-wire cable, 240/208 volt, 60 hertz, AC-only electrical supply with ground. • Minimum distance between cooktop and overhead cabinetry is 30″ (76.2 cm). I J ** Do not obstruct these areas! 30” Min. (76.
I N S TA L L AT I O N I N S T RU C T I O N S DIMENSIONS AND CLEARANCES Overhead cabinet should not exceed a maximum depth of 13” (33 cm). I Min. recommended distance between rear edge of cutout and nearest combustible surface. 30” (76.2 cm) min. clearance between the top of the cooktop and the bottom of an unprotected wood or metal cabinet. J L 18" ( 45.7 cm) 10" ( 25.4 cm) F K 24” (61 cm) min.
I N S TA L L AT I O N I N S T RU C T I O N S IMPORTANT SAFETY INSTRUCTIONS PROVIDING THE ELECTRICAL CONNECTION • Be sure your cooktop is installed and grounded properly by a qualified installer or service technician. • This cooktop must be electrically grounded in accordance with local codes or, in their absence, with the National Electrical Code ANSI/NFPA No. 70, latest edition in the United States.
I N S TA L L AT I O N I N S T RU C T I O N S ELECTRICAL CONNECTIONS (cont.) ELECTRICAL CONNECTION Connect the flexible armored cable that extends from the surface unit to the junction box using a suitable strain relief at the point the armored cable enters the junction box. Then make the electrical connection as follows. Electrical ground is required on this appliance. This appliance is manufactured with a supply wire and a frame connected green or bare copper grounding wire.
I N S TA L L AT I O N I N S T RU C T I O N S IF COOKTOP IS USED IN A NEW BRANCH CIRCUIT INSTALLATION (1996 NEC), MOBILE HOME, RECREATIONAL VEHICLE, OR WHERE LOCAL CODES DO NOT PERMIT GROUNDING TO THE NEUTRAL (WHITE) WIRE Observe all governing codes and local ordinances. 1 Disconnect the power supply. 2 At the circuit breaker box, fuse box or junction box, connect appliance and power supply cable wires as shown.
I N S TA L L AT I O N I N S T RU C T I O N S COOKTOP INSTALLATION (cont.) 3 Install the retainer brackets to the bottom of the cooktop; then snug the bolts against the bottom of the countertop as shown. Preferred installation NOTE: The retainer brackets MUST be installed to meet local codes or, in their absence, with the National Electrical Code ANSI/NFPA No. 70, latest edition.
T RO U B L E S H O OT I N G Before you call for service, review this list. It may save you time and expense. This list includes common occurrences that are not the result of a defect in workmanship or materials. Problem Possible Causes Solutions Cooktop does not work • Cooktop controls are locked. • See USING CHILD LOCK to turn off the CHILD LOCK feature. • Circuit breaker has tripped or fuse is blown. • Reset the circuit breaker or replace the fuse. • Power outage.
T RO U B L E S H O OT I N G BEFORE CALLING FOR SERVICE 28 Problem Possible Causes Solutions appears in the timer display • Control pad was touched too long. • This message will appear if any pad except the Timer or pads is touched for more than 10 seconds. It will also appear if liquids or objects are spilled or left on the controls area. To clear the error code, remove any liquid or objects from the controls area and press the POWER pad to reset the cooktop.
LG ELECTRONICS, INC. LG INDUCTION COOKTOP LIMITED WARRANTY — USA WARRANTY PERIOD: One year from date of original purchase ENGLISH LG Electronics Inc. will repair or replace your product, at LG’s option, if it proves to be defective in material or workmanship under normal use, during the warranty period set forth below, effective from the date of original consumer purchase of the product. This limited warranty is good only to the original purchaser of the product and effective only when used in U.S.A.
LG ELECTRONICS, INC. LG INDUCTION COOKTOP LIMITED WARRANTY — CANADA LG Electronics Inc. will repair or replace your product, at LG’s option, if it proves to be defective in material or workmanship under normal use, during the warranty period set forth below, effective from the date of original consumer purchase of the product. This limited warranty is good only to the original purchaser of the product and effective only when used in Canada.
ENGLISH N OT E S 31