MODEL : LAC3735 The working life of this product is 7 years since the date of purchase. LAC3735.
7 8 6 2 3 4 5 CAR CD/MP3/WMA Receiver Mute Changing the general settings Using the EQ Adjusting the sound level XDSS+ Checking the clock Setting the clock Connection Basic operation Basic installation Removing the existing receiver unit ISO-DIN installation Battery installation Installation Attaching the control panel Detaching the control panel Table of Contents Safety Note Front Panel / Remote Control(optional) About Detachable Control Panel Table of Contents 11 12 10 9 Troubleshooting Sp
8 cm RISK OF ELECTRIC SHOCK DO NOT OPEN CAUTION This unit cannot play 8cm disc (use 12cm disc only). The temperature of unit’s outside can be extremely high, please use the unit after proper installation in your vehicle. To reduce the risk of fire or electric shock, do not expose this product to dripping or splashing water, rain, or moisture. To reduce the risk of electric shock, do not remove the cover or back of this product. There are no user-serviceable parts inside.
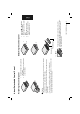
CAR CD/MP3/WMA Receiver EJECT Z [MUTE] • Skip M?+ • Seek M?+ 4 Remote Sensor (Optional) 5 • Volume • Power [PWR] 6 • Auto Store [AS] • Preset Scan [PS] • Equalizer [EQ] 7 DISC SLOT 8 • Search M + • Tune M + 9 Display [DISP (CLOCK)] 10 Release 11 Select [SEL S] 1 2 3 15 16 17 18 19 • Folder Up/Down [F+/F-] Shuffle [SHF] Repeat [RPT] Intro Scan [SCAN] Play/Pause B X Extreme Dynamic Sound System [XDSS] 20 [BAND] 21 • Skip - ?m • Seek - ?m 22 SOURCE [SRC S] 13 Preset Station [1-6] 14 • MP3/WMA Track +10
Align the left side of the panel with the stopper. Push the right side or panel into the unit until it clicks. • Do not allow such volatile agents as benzine, thinner, or insecticides to come into contact with the surface of the control panel. • Do not drop the control panel or otherwise subject it to strong impact. • Do not leave the control panel in any area exposed to high temperatures or direct sunlight.
1 2 3 4 Remove the existing receiver unit. Make the necessary connections. Install the installation sleeve. Install the unit into the installation sleeve. Before installing, make sure that the ignition-switch is set to OFF and remove the terminal of the car battery to avoid short-circuiting. 6 A CAR CD/MP3/WMA Receiver A 3 2 1 Remove the rear support from the unit. Remove the control panel and trim ring from the unit. Insert the lever A into the hole on one side of the unit.
8 7 8 5 6 5 6 3 4 3 4 1 2 1 2 (Optional) Ignition Switch Dimmer Switch Power Antenna BATTERY Control Relay B 8 B 7 B 6 B 5 B 4 B 3 B 2 B 1 Front Left Rear Left Front Right Rear Right To Audio out Remote On(Blue/White) Phone Mute(Orange) A1, A2, A3 : Not connected A8 Ground(-)(Black) A4 To Battery(+)(Yellow) A7 To Ignition(Red) A6 Dimmer(Pink) A5 Power Antenna(Blue) A B B B B B B B B B Amplifier (Optional) CAR CD/MP3/WMA Receiver 7 Violet : Rear Right + Violet/
Rotate PWR 1 Press the DISP and then, press and hold DISP for more 1 second. 2 Press the M?+ to adjust the hour. 3 Press the - ?m to adjust the minute. 8 CAR CD/MP3/WMA Receiver Press SEL [S] (SEL on the remote control) repeatedly to select the mode you want to adjust from volume, balance and fader. Adjusting the sound level EQ is to increase or decrease the signal strength of audio frequencies. The function helps you to enjoy sound more plentifully. Press EQ repeatedly.
BAND - ?m/M? + - m/M + 2. Select a band. 3. Auto seek. Manual seek. Press .bb/BB> Hold .bb/BB> BAND SRC ON REMOTE Press BAND to select the desired band and press the desired preset button 1-6 (preset button 1-6 on the remote control). Note • Up to 24 stations, 6 for each of three FM bands and 6 MW(AM) stations can be stored in the memory.
Rotate PWR ON PLAYER VOLUME ON REMOTE 10 CAR CD/MP3/WMA Receiver Press or press and hold RPT on the player or on remote control. The current selected tracks/files (1 RPT) or folder ( RPT) on the disc is played repeatedly. Press the RPT again to cancel it. Repeat Press or press and hold SCAN on the player or on remote control. The first 10 seconds of each tracks/files in the current selected folder ( SCAN) or each tracks (SCAN) on the disc are played. Press the SCAN again to cancel it.
Remote CD General Cause Correction CAR CD/MP3/WMA Receiver 11 • Confirm once more that all connections are correct. • Rectify the problem that caused the fuse to blow, and then replace it. Be very sure to install the correct fuse with the same rate. • Noise and other factors are causing the built- • Turn the unit off and then on. in microprocessor to operate incorrectly. No sound is heard / The vol- • Cables are not connected correctly. • Connect the cables correctly. ume level will not rise.
20 Hz-20 kHz 80 dB 0.12% 55 dB 520-1720 or 522-1620 kHz 50 dB 1.0% 28 dBµV 87.5-107.9, 87.5-108, 65-74 or 87.5-108 MHz 55 dB 0.7% 12 dBµV 50W x 4CH (Max.) DC 12V 4Ω Negative 180 x 50 x 176 mm (Without Control Panel) 1.3 kg 12 CAR CD/MP3/WMA Receiver Designs and specifications are subject to change without notice.