To contact LG Electronics, 24 hours a day, 7 days a week: 1-800-243-0000 Or visit us on the Web at: us.lge.com Número telefónico de LG Electronics, las 24 horas del día, 7 días a la semana: STEAM WASHER TM O visítenos en la Web en: us.lge.com USER’S GU I D E & INSTALLATION INSTRUC T I O N S Before beginning installation, read these instructions carefully. This will simplify installation and ensure that the washer is installed correctly and safely.
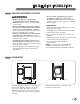
I N T RO D U C T I O N ImPORTANT SAFETY INSTRUCTIONS Basic Safety Precautions .................................. 3–6 PARTS AND FEATURES Special Features ..................................................... 7 Key Parts and Components ................................... 8 INSTALLATION INSTRUCTIONS Congratulations on your purchase and welcome to the LG family. Choose the Proper Location .................................. 9 Clearances .............................................................
I M P O RTA N T S A F E T Y I N S T R U C T I O N S READ ALL INSTRUCTIONS BEFORE USE wWARNING For your safety, the information in this manual must be followed to minimize the risk of fire or explosion, electric shock, or to prevent property damage, personal injury, or loss of life. Your Safety and the safety of others is very important. We have provided many important safety messages in this manual and on your appliance. Always read and obey all safety messages. This is the safety alert symbol.
I M P O RTA N T S A F E T Y I N S T R U C T I O N S READ ALL INSTRUCTIONS BEFORE USE wWARNING For your safety, the information in this manual must be followed to minimize the risk of fire or explosion, electric shock, or to prevent property damage, personal injury, or loss of life. BASIC SAFETY PRECAUTIONS wWARNING: To reduce the risk of fire, electric shock, or injury to persons when using this appliance, follow basic precautions, including the following.
I M P O RTA N T S A F E T Y I N S T R U C T I O N S READ ALL INSTRUCTIONS BEFORE USE wWARNING For your safety, the information in this manual must be followed to minimize the risk of fire or explosion, electric shock, or to prevent property damage, personal injury, or loss of life. SAFETY INSTRUCTIONS FOR INSTALLATION wWARNING: To reduce the risk of fire, electric shock, or injury to persons when using this appliance, follow basic precautions, including the following.
I M P O RTA N T S A F E T Y I N S T R U C T I O N S READ ALL INSTRUCTIONS BEFORE USE wWARNING For your safety, the information in this manual must be followed to minimize the risk of fire or explosion, electric shock, or to prevent property damage, personal injury, or loss of life. SAFETY INSTRUCTIONS FOR USE, CARE AND CLEANINg, AND DISPOSAL wWARNING: To reduce the risk of fire, electric shock, or injury to persons when using this appliance, follow basic precautions, including the following.
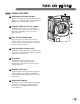
PA RT S A N D F E AT U R E S SPECIAL FEATURES 1 Detergent Dispenser Drawer This four-compartment drawer provides separate dispensers for prewash and main wash detergent, liquid bleach, and liquid fabric softener. 2 1 7 4 2 Control Panel LCD Display Screen Simple electronic controls are user-friendly. The LCD screen shows cycle options and cycle information and displays status messages during operation.
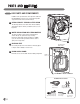
PA RT S A N D F E AT U R E S kEY PARTS AND COmPONENTS In addition to the special features and components outlined in the Special Features section, there are several other important components that are referenced in this manual. 1 ULTRA-CAPACITY STAINLESS STEEL DRUm The ultra-large stainless steel drum offers extreme durability and is tilted to improve efficiency and allow easier access for large items.
I N S TA L L AT I O N I N S T R U C T I O N S CHOOSE THE PROPER LOCATION wWARNING • W asher is heavy! Two or more people are required when moving and unpacking the washer. Failure to do so can result in back or other injury. • Store and install the washer where it will not be exposed to temperatures below freezing or exposed to outdoor weather conditions. Failure to follow this warning can cause serious injury, fire, electrical shock, or death.
I N S TA L L AT I O N I N S T R U C T I O N S FLOORINg • To minimize noise and vibration, the washer MUST be installed on a solidly constructed floor. See the NOTE at right. • Allowable slope under the entire washer is 1° maximum. • Carpeting and soft tile surfaces are not recommended. • Never install the washer on a platform or weakly supported structure. Use only an approved accessory pedestal as described below.
I N S TA L L AT I O N I N S T R U C T I O N S UNPACKING AND REMOVING SHIPPING BOLTS When removing the washer from the carton base, be sure to remove the foam tub support in the middle of the carton base. If you must lay the washer down to remove the base packaging materials, always lay it carefully on its side. Do NOT lay the washer on its front or back. IMPORTANT: To prevent internal damage during transport, the washer is equipped with 4 shipping bolts and plastic retainers.
I N S TA L L AT I O N I N S T R U C T I O N S CONNECTINg THE WATER LINES • IMPORTANT: Use new hoses when installing the washer. Do NOT reuse old hoses. • IMPORTANT: Use ONLY the inlet hoses provided by LG with this laundry product. Aftermarket hoses are not guaranteed to fit or function correctly. Other hoses may not tighten correctly and could cause leaks. Subsequent damage to product or property will not be covered under the terms of LG's warranty. • Water supply pressure must be between 14.
I N S TA L L AT I O N I N S T R U C T I O N S CONNECTING THE DRAIN LINE • The drain hose should always be properly secured. Failure to properly secure the drain hose can result in flooding and property damage. • Do not install the end of the drain hose higher than 96 in. (244.8 cm) above the bottom of the washer. • The drain must be installed in accordance with any applicable local codes and regulations. • Make sure that the water lines are not stretched, pinched, crushed, or kinked.
I N S TA L L AT I O N I N S T R U C T I O N S LEVELINg THE WASHER The drum of your new washer spins at very high speeds, up to 1,300 RPM. To minimize vibration, noise, and unwanted movement, the floor must be a perfectly level, solid surface. NOTE: Adjust the leveling feet only as far as necessary to level the washer. Extending the leveling feet more than necessary can cause the washer to vibrate. • All four leveling feet must rest solidly on the floor.
H O W TO U S E SORTING WASH LOADS Fabric Care Labels Grouping Similar Items Most articles of clothing feature fabric care labels that include instructions for proper care. For best results, sort clothes into loads that can be washed with the same wash cycle. Different fabrics have different care requirements. Always wash dark colors separately from light colors and whites to prevent discoloration. If possible, do not wash heavily soiled items with lightly soiled ones.
H O W TO U S E SELECTINg DETERgENT IMPORTANT: Your Steam Washer™ is designed for use with only High-Efficiency (HE) detergents. HE detergents are formulated specifically for front-load washers and contain suds-reducing agents. Always look for the HE symbol when purchasing detergent. HE detergents produce fewer suds, dissolve more efficiently to improve washing and rinsing performance, and help to keep the interior of your washer clean.
H O W TO U S E LOADING THE DISPENSER Prewash Detergent Compartment Liquid Bleach Compartment Add liquid or powdered detergent to this compartment when using the Prewash option. Always use HE (High-Efficiency) detergent with your washing machine. • The amount of detergent added for the Prewash option is 1/2 the amount recommended for the main wash cycle. For example, if the main wash cycle requires one measure of detergent, add 1/2 measure for the Prewash option.
H O W TO U S E CONTROL PANEL FEATURES 8 1 2 4 7 6 3 5 1 POWER ON/OFF BUTTON Press to turn the washer ON. Press again to turn the washer OFF. NOTE: Pressing the ON/OFF button during a cycle will cancel that cycle and any load settings will be lost. 5 2 CYCLE SELECTOR kNOB Turn this knob to select the desired cycle. Once the desired cycle has been selected, the standard presets will be shown in the display.
H O W TO U S E CYCLE GUIDE The cycle guide below shows the options and recommended fabric types for each cycle. Cycle Fabric Type Wash/Rinse Pre- Rinse + Extra Stain Spin Speed Soil Level Temp. Wash Spin Rinse Cycle Water Quick Wash/Rinse Steam Plus Cycle OptimizerTM Dress shirts, blouses Heavily soiled underwear, work clothes, diapers, etc.
H O W TO U S E THE LCD DISPLAY The LCD display shows the settings, estimated time remaining, options, and status messages for your washer. When the washer is turned on, the light in the display will illuminate. 4 6 7 8 9 10 5 3 1 STATUS/CYCLE DISPLAY This portion of the display shows the selected cycle, operating status, and special messages. If a cycle has special instructions, they will also be displayed in this area.
H O W TO U S E OPERATING THE WASHER Once you have loaded the washer and added laundry products (detergent, bleach, and/or fabric softener): 1 Press the ON/OFF button to turn on the washer. The lights around the cycle selector knob will illuminate. 5 Press the START/PAUSE button to begin the cycle. The door will latch, the display will change, and the washer will calculate the estimated time remaining. Once the washer has calculated the estimated total cycle time, the washer will start.
H O W TO U S E STEAm CYCLES STEAM cycles include the Sanitary, Bulky/Large, Perm. Press, Cotton/Normal, and ALLERGIENETM cycles. Adding the Steam option to these cycles provides superior cleaning performance while reducing energy and water consumption. By using a hot steam spray from above and cooler water below, fabrics get the cleaning benefits of a super hot wash, without the energy usage or potential damage to fabrics.
H O W TO U S E CYCLE SETTING BUTTONS Each cycle has preset settings that are selected automatically. You may also customize the settings using the cycle setting buttons. Press the button for that option to view and select other settings. The washer automatically adjusts the water level for the type and size of wash load for best results and maximum efficiency. It may seem there is no water inside the drum in some cycles, but this is normal.
H O W TO U S E SPECIAL FUNCTION BUTTONS Your Steam Washer™ features several additional cycle options to customize cycles to meet your individual needs. Certain option buttons also feature a special function (see the following page for details) that can be activated by pressing and holding that option button for 3 seconds. To Add Cycle Options to a Cycle: 1 Turn on the washer and turn the cycle selector knob to select the desired cycle.
H O W TO U S E CUSTOM PROGRAM CUSTOM PROGRAM allows you to store a customized wash cycle for future use. It allows you to save favorite temperature, spin speed, soil level, and other options for a cycle, and then recall them at the touch of a button. To store a Custom Program: 1 Select a cycle. 2 Adjust the Wash/Rinse Temperature, Spin Speed, and Soil Level to the desired settings.
H O W TO U S E THE OPTION BUTTON Pressing the OPTION button will display cycle options that can be added to regular wash cycles, including WATER PLUS, QUICK CYCLE, EXTRA RISE, STAIN CYCLE, and SPINSENSE. STAIN CYCLE Select this option for heavily stained clothes, such as play clothes or work clothes. Stain Cycle will add extra wash time to the selected cycle, as well as an additional rinse cycle. To activate cycle options: 1 Turn on the washer and turn the cycle selector knob to select the desired cycle.
CARE AND CLEANING REGULAR CLEANING wWARNING: •U nplug the washer before cleaning to avoid the risk of electric shock. Failure to follow this warning can cause serious injury, fire, electrical shock, or death. • Never use harsh chemicals, abrasive cleaners, or solvents to clean the washer. They will damage the finish. Cleaning the Exterior Storing the Washer Proper care of your washer can extend its life.
CARE AND CLEANING CLEANINg THE WASHER Cleaning the Dispenser The dispenser should be cleaned periodically to remove buildup from detergent and other laundry products. 1 Pull out the dispenser drawer until it stops. Press the button in the center of the drawer and pull to remove the drawer. 28 NOTE: If you clean the detergent dispenser once a week, it will always dispense properly.
CARE AND CLEANING MAINTENANCE Cleaning the Water Inlet Filters If the washer detects that water is not entering the dispenser, an error message will show on the display. If you live in an area with hard water, this may be caused by clogged inlet filters. IMPORTANT: Use extreme care when removing and cleaning the filters. If the filters cannot be cleaned or are damaged, do NOT operate the washer without the inlet filters. Contact LG Customer Service or a qualified LG servicer.
CARE AND CLEANING mAINTENANCE (cont.) Cleaning the Drain Pump Filter Lint and other objects may accumulate and clog the drain pump filter. If the washer fails to drain properly, unplug the washer and allow the water to cool, if necessary, before proceeding. Drain Hose 1 Open the drain pump filter access panel. Pump Filter Plug 3 Remove the plug from the drain hose, and allow the water to drain completely. Twist the pump filter counterclockwise to remove.
T RO U B L E S H O OT I N G NORMAL SOUNDS YOU MAY HEAR The following sounds may be heard while the washer is operating. They are normal. Clicking: Door lock relay when the door locks and unlocks. Spraying or hissing: Steam or water spraying or circulating during the cycle. Humming or gurgling: Drain pump pumping water from the washer at the end of a cycle. Splashing: Clothes tumbling in the drum during the wash and rinse cycles.
T RO U B L E S H O OT I N G BEFORE CALLINg FOR SERVICE (cont.) Problem 2 Possible Causes Solutions Water in the washer drains slowly or not at all, or the display shows: • Drain hose is bent, pinched, or clogged. • The drain filter is clogged. • Make sure the drain hose is free of clogs, kinks, etc., and is not pinched behind or under the washer. • Clean the drain filter. See the Care and Cleaning section.
T RO U B L E S H O OT I N G BEFORE CALLING FOR SERVICE (cont.) Problem Possible Causes Solutions Wrinkling • W asher not unloaded promptly. • Washer overloaded. • Always remove items from the washer as soon as the cycle is completed. • The washer can be fully loaded, but the drum should not be tightly packed with items. The door of the washer should close easily. • Hot water rinse can set wrinkles in garments. Check the inlet hose connections. • Hot and cold water inlet hoses are reversed.
S P E C I F I C AT I O N S / O P T I O N A L AC C E S S O R I E S kEY DImENSIONS AND SPECIFICATIONS The appearance and specifications listed in this manual may vary due to constant product improvements. Steam Washer™ model Wm3001H*A Description Front-Loading Washer Electrical Requirements 120 VAC @ 60 Hz. Max. Water Pressure 14.5~116 PSI (100~800 kPa) Dimensions 27"(W) X 293/4"(D) X 3811/16"(H), 51"(D with door open) 68.6 cm (W) X 75.6 cm (D) X 98.3 cm (H), 129.
LG ELECTRONICS, INC. LG WASHING MACHINE LIMITED WARRANTY - USA Your LG Washing Machine will be will repaired or replaced, at LG’s option, if it proves to be defective in material or workmanship under normal use, during the warranty period (“Warranty Period”) set forth below, effective from the date (“Date of Purchase”) of original consumer purchase of the product.
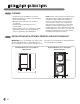
I N T RO D U C C I Ó N INSTRUCCIONES ImPORTaNTES dE SEgURIdad Precauciones básicas de seguridad ...............37-40 ¡GRACIAS! PIEzaS Y CaRaCTERÍSTICaS Felicitaciones por su compra y Características especiales.................................... 41 Piezas y componentes clave ................................ 42 bienvenido a la familia LG. INSTaLaCIÓN Su nueva Steam Washer™ LG Escoja el lugar adecuado ..................................... 43 Espacios de instalación.....................................
I N S T R U C C I O N E S I M P O RTA N T E D E S E G U R I DA D LEA TODAS LAS INSTRUCCIONES ANTES DE USAR wADVERTENCIA Por su seguridad, debe seguir la información indicada en este manual para minimizar el riesgo de incendio o explosión, descarga eléctrica, o para prevenir daños a la propiedad, lesiones personales o muerte. Su Seguridad y la de los demás son de suma importancia. En este manual y en su electrodoméstico figuran muchos mensajes importantes de seguridad.
I N S T R U C C I O N E S I M P O RTA N T E D E S E G U R I DA D LEA TODAS LAS INSTRUCCIONES ANTES DE USAR wADVERTENCIA Por su seguridad, se debe seguir la información indicada en este manual para minimizar el riesgo de incendio o explosión, descarga eléctrica, o para prevenir daños a la propiedad, lesiones personales, o muerte.
I N S T R U C C I O N E S I M P O RTA N T E D E S E G U R I DA D LEA TODAS LAS INSTRUCCIONES ANTES DE USAR wADVERTENCIA Por su seguridad, se debe seguir la información indicada en este manual para minimizar el riesgo de incendio o explosión, descarga eléctrica, o para prevenir daños a la propiedad, lesiones personales o muerte.
I N S T R U C C I O N E S I M P O RTA N T E D E S E G U R I DA D LEA TODAS LAS INSTRUCCIONES ANTES DE USAR wADVERTENCIA Por su seguridad, se debe seguir la información indicada en este manual para minimizar el riesgo de incendio o explosión, descarga eléctrica, o para prevenir daños a la propiedad, lesiones personales o muerte.
P I E Z A S Y C A R AC T E R Í S T I C A S CARACTERÍSTICAS ESPECIALES 1 Cajón de depósito de detergente Este cajón de cuatro secciones provee depósitos separados para el detergente de prelavado y detergente principal de lavado, blanqueador líquido, así como suavizante líquido de telas. 2 1 7 4 2 Pantalla de LCD del panel 5 de control Los controles electrónicos son sencillos y fáciles de utilizar.
P I E Z A S Y C A R AC T E R Í S T I C A S PIEzaS Y COmPONENTES CLavE Además de los componentes y las características descritos en la sección de Características especiales, hay varios componentes importantes adicionales a los cuales se hace referencia en este manual. 1 TamBOR dE aCERO INOXIdaBLE dE ULTRa CaPaCIdad 2 El tambor de acero inoxidable ultra grande ofrece una durabilidad extraordinaria y está inclinado para mejorar la eficiencia y permitir el acceso fácil para prendas grandes.
I N S TA L AC I Ó N ESCOJA EL LUGAR ADECUADO wADVERTENCIA • L a lavadora es pesada. Se necesitan dos o más personas para instalar y trasladar el electrodoméstico. Si esto no se cumple se podrán sufrir heridas en la espalda u otras heridas. • Almacene e instale la lavadora en un lugar no expuesto a temperaturas inferiores a las de congelación ni a la intemperie. Si no se cumple con esta advertencia se podrán producir heridas graves, incendios, descargas eléctricas, o muerte.
I N S TA L AC I Ó N TIPO dE PISO • Para minimizar el ruido y vibración, se DEBE instalar la lavadora en un piso sólidamente construido. Ver la NOTA a la derecha. • La pendiente permitida debajo de toda la lavadora es de 1°. • No se recomiendan las superficies alfombradas o de baldosas blandas. • Nunca instale la lavadora en una plataforma o estructura soportada con poca solidez. Utilice un pedestal accesorio aprobado únicamente como se describe más abajo.
I N S TA L AC I Ó N DESEMBALAJE Y RETIRO DE LOS PERNOS DE EMBALAJE Al retirar la lavadora de la base de cartón, asegúrese de quitar el soporte de base de espuma colocado en la mitad de la base de cartón. Si debe asentar la lavadora hacia abajo para quitar los materiales de embalaje de la base, hágalo siempre cuidadosamente sobre su parte lateral. NO asiente la lavadora sobre su parte frontal o posterior.
I N S TA L AC I Ó N CONEXIÓN dE LaS TUBERÍaS dE agUa • IMPORTANTE: Cuando instale la lavadora, use mangueras nuevas. NO reutilice mangueras viejas. • IMPORTANTE: Usar SOLAMENTE las mangueras de la entrada proporcionadas por LG de este producto del lavadero. Las mangueras del mercado de accesorios no están garantizadas para caber o para funcionar correctamente. Otras mangueras pueden no apretar correctamente y podrían causar los escapes.
I N S TA L AC I Ó N CONEXIÓN DE LA TUBERÍA DE DRENAJE • La manguera de drenaje siempre debe estar asegurada adecuadamente. No asegurar adecuadamente la manguera de drenaje puede resultar en inundación o daños a la propiedad. • No instalar el extremo de la manguera a una altura de más de 2,44 m (96 pulgadas) sobre la parte inferior de la lavadora. • El drenaje debe instalarse según todos los códigos y regulaciones locales vigentes.
I N S TA L AC I Ó N NIvELaCIÓN dE La LavadORa El tambor de su nueva lavadora centrifuga a velocidades muy altas, de hasta 1.300 r.p.m. Para minimizar la vibración, el ruido y movimiento no deseados, el piso deberá ser una superficie perfectamente nivelada y sólida. NOTA: Fije las patas niveladoras solo en la medida necesaria para nivelar la lavadora. La extensión de las patas niveladoras más de lo necesario puede causar vibración de la lavadora.
CÓMO USAR CLASIFICACIÓN DE LAS CARGAS DE LAVADO Etiquetas de cuidado de las telas Agrupamiento de prendas similares La mayoría de las prendas de vestir tienen etiquetas de cuidado de las telas para lograr un cuidado adecuado. Para obtener los mejores resultados, clasifique las prendas en cargas que puedan lavarse con el mismo ciclo de lavado. Telas diferentes tienen requisitos de mantenimiento distintos.
CÓMO USAR SELECCIÓN dE dETERgENTE IMPORTANTE: Su lavadora de vapor Steam WasherTM está diseñada para usarse exclusivamente con detergentes (Alte eficiencia) (HE). Los detergentes de alta eficiencia están formulados específicamente para las lavadores de carga frontal y contienen agentes reductores de espuma. Busque siempre el símbolo (Alte eficiencia) (HE) cuando compra detergente.
CÓMO USAR CARGA DEL DEPÓSITO Compartimiento de detergente para prelavado Compartimiento de blanqueador líquido Agregue el detergente líquido o en polvo a este compartimiento cuando se usa la opción de Prewash (prelavado). Use siempre detergente tipo HE (Alte eficiencia) con su lavadora. • La cantidad de detergente agregado para la opción de prelavado debe ser la mitad de la cantidad para el ciclo de lavado principal.
CÓMO USAR CaRaCTERÍSTICaS dEL PaNEL dE CONTROL 8 1 2 4 7 6 3 5 9 1 BOTÓN dE ENCENdIdO/aPagadO Apriete el botón para ENCENDER la lavadora. Apriete nuevamente para APAGAR la lavadora. NOTA: Apretar el botón de ENCENDIDO/ APAGADO durante un ciclo cancelará ese ciclo y borrará cualquier programación de carga. 5 BOTONES dE PROgRamaCIÓN dE CICLOS 2 PERILLa SELECTORa dE CICLOS Gire esta perilla para seleccionar el ciclo deseado.
CÓMO USAR GUÍA DE CICLOS La guía de ciclos indicada más abajo muestra las opciones y tipos de telas recomendadas para cada ciclo. NOTA: Para proteger sus prendas de vestir, no todas las temperaturas de lavado/enjuague, velocidades de centrifugado, niveles de suciedad u opciones están disponibles en cada ciclo.
CÓMO USAR La PaNTaLLa dE LCd La pantalla LCD muestra los ajustes, el tiempo restante estimado, las opciones y los mensajes de estado correspondientes a su lavadora. Cuando se enciende la lavadora, se iluminará la luz de la pantalla. 1 PaNTaLLa dE ESTadO/CICLO Esta porción de la pantalla muestra el ciclo seleccionado, el estado de funcionamiento y los mensajes especiales. Si el ciclo tiene instrucciones especiales, también se mostrarán en esta área.
CÓMO USAR FUNCIONAMIENTO DE LA LAVADORA Una vez que ha cargado la lavadora y añadido los productos de lavado (detergente, blanqueador y/o suavizante): 1 Apriete el botón de ENCENDIDO/APAGADO para encender la lavadora. Las luces alrededor de la perilla selectora de ciclos se iluminarán. 5 Apriete el botón de INICIO/PAUSA para iniciar el ciclo. La compuerta se asegurará, la pantalla cambiará, y la lavadora calculará el tiempo restante estimado.
CÓMO USAR CICLOS dE vaPOR Los ciclos de STEAM (vapor) incluyen Sanitary (Sanitario), Bulky/Large (voluminoso/grande), Cotton/Normal (algodón/normal), Prem Press (PLANCHADO PERM.), y AllergieneTM. Añadir la opción de vapor a estos ciclos permite un mejor desempeño de limpieza a la vez que se ahorra energía y consumo de agua.
CÓMO USAR BOTONES DE AJUSTE DE CICLO Cada ciclo tiene ajustes preprogramables que se seleccionan automáticamente. También puede personalizar los ajustes utilizando los botones de programación de ciclos. Apriete el botón para ver esa opción y seleccionar otros ajustes. La lavadora ajusta automáticamente el nivel de agua según el tipo y tamaño de la carga de lavado para proporcionar los mejores resultados y eficiencia máxima.
CÓMO USAR BOTONES dE fUNCIÓN ESPECIaL Su Steam Washer™ dispone de varias opciones de ciclo adicionales, las cuales personalizan los ciclos para cumplir con sus necesidades individuales. Ciertos botones de opción también incorporan una función especial (vea la siguiente página para obtener mayor información) que puede activarse apretando y manteniendo apretado ese botón de opción por 3 segundos.
CÓMO USAR PROGRAMA PERSONALIZADO El PROGRAMA PERSONALIZADO le permite guardar un ciclo de lavado personalizado para volver a usarlo. Le permite grabar la temperatura, velocidad de giro, nivel de suciedad y otras opciones según usted desee para un ciclo, y luego volver a usarlo con sólo presionar un botón. Para almacenar un Programa Personalizado: 1 Seleccione un ciclo. 2 Ajuste la Temperatura de Lavado/Enjuague, Velocidad de Giro y Nivel de Suciedad en la configuración deseada.
CÓMO USAR EL BOTÓN OPCIÓN Al presionar el botón OPCIÓN se exhibirán opciones de ciclos que se pueden agregar a los ciclos de lavado regular, incluyendo EXTRA RINSE (enjuague adidonal), WATER PLUS (agua plus), QUICK CYCLE (CICLO RAPIDO), STAIN CYCLE (ciclo de manchas) y SPINSENSE™. Para activar las opciones de ciclo: Encienda la lavadora y gire la perilla selectora de ciclos para elegir el ciclo deseado. 2 Presione el botón OPCIÓN.
M A N T E N I M I E N TO Y L I M P I E Z A LIMPIEZA REGULAR wADVERTENCIA: • Desenchufe la lavadora antes de limpiar la misma para evitar el riesgo de descargas eléctricas. Si no se cumple con esta advertencia se podrán producir heridas graves, incendios, descargas eléctricas o muerte. • Al limpiar la lavadora nunca utilice químicos de corte, limpiadores abrasivos o solventes. Los mismos dañarán su aspecto.
M A N T E N I M I E N TO Y L I M P I E Z A LImPIEza dE La LavadORa Limpieza del depósito Se debe limpiar el depósito periódicamente para eliminar la acumulación de detergente y otros productos de lavandería. 1 Tire del cajón de depósito hasta que se detenga. Apriete el botón en el centro del cajón tire para quitar el cajon. 62 NOTA: Si limpia el dispensador de detergente semanalmente, siempre lo dispensará correctamente.
M A N T E N I M I E N TO Y L I M P I E Z A MANTENIMIENTO Limpieza de los filtros de entrada de agua Si la lavadora detecta que el agua no está ingresando al cajón de depósito, se mostrará un mensaje de error en la pantalla. Si vive en una zona de agua dura, esto puede ser el motivo del taponamiento de los filtros de entrada. IMPORTANTE: Ponga mucho cuidado al quitar y limpiar los filtros. Si no se pueden limpiar los filtros o están dañados, NO ponga en funcionamiento la lavadora sin los filtros de entrada.
M A N T E N I M I E N TO Y L I M P I E Z A maNTENImIENTO (cont.) Limpieza del filtro de la bomba de drenaje Se pueden acumular pelusas y otros objetos y taponar el filtro de la bomba de drenaje. Si la lavadora no drena adecuadamente, desconéctela y deje enfriar el agua, de ser necesario, antes de continuar. Manguera de drenaje 1 Abra el filtro del panel de acceso de la bomba de desagüe. Filtro de la bomba Tapón 64 3 Quite el tapón de la manguera de drenaje, y deje que el agua drene completamente.
R E S O L U C I Ó N D E P RO B L E M A S SONIDOS NORMALES QUE PODRÍA ESCUCHAR Se pueden escuchar los siguientes sonidos mientras la lavadora se encuentra en funcionamiento. Son normales. Chasquido: El seguro de la compuerta se vuelve a colocar cuando la misma se cierra y abre. Zumbido o gorgoteo: La bomba de drenaje bombea agua de la lavadora al final de un ciclo. Sonido de chorro o sibilante: Vapor o chorro de agua o en circulación durante el ciclo.
R E S O L U C I Ó N D E P RO B L E M A S aNTES dE LLamaR a maNTENImIENTO Su Steam Washer™ está equipada con un sistema de monitoreo de error automático para la detección y el diagnóstico de problemas en una etapa temprana. Si su lavadora no funciona adecuadamente o no funciona del todo, revise lo siguiente antes de llamar a mantenimiento. z Problema Causas posibles Soluciones • El detergente cargado en el tambor de la lavadora. • No ha descargado la lavadora con rapidez.
R E S O L U C I Ó N D E P RO B L E M A S ANTES DE LLAMAR A MANTENIMIENTO (cont.) Problema Causas posibles La compuerta no se abre cuando se ha detenido o pausado el ciclo • La temperatura interior de la lavadora es demasiado elevada. • El nivel del agua en la lavadora es demasiado alto. • La compuerta de la lavadora dispone de un seguro para prevenir quemaduras. Deje que la lavadora se enfríe hasta que el indicador del DOOR LOCK (seguro de la compuerta) se apague en la pantalla.
R E S O L U C I Ó N D E P RO B L E M A S aNTES dE LLamaR a maNTENImIENTO (cont.) Problema 68 Causas posibles Soluciones La pantalla muestra: • La carga es demasiado pequeña. • La carga está desbalanceada. • La lavadora cuenta con un sistema de detección y corrección de desbalances. Si se cargan artículos pesados individuales (alfombra de baño, bata de baño, etc.) y hay demasiado desbalance, la lavadora realizará algunos intentos para reiniciar el ciclo de centrifugado.
E S P E C I F I C AC I O N E S / AC C E S O R I O S O P C I O N A L E S DIMENSIONES Y ESPECIFICACIONES CLAVE El aspecto y las especificaciones enumeradas en esta guía podrían variar debido a mejoras constantes del producto. Steam Washer™ Modelo WM3001H*A Descripción Lavadora de carga frontal Requisitos eléctricos 120 V CA a 60 Hz. Presión de agua máx. 14,5~116 libras por pulgada cuadrada (100~800 kPa) Dimensiones 68,6 cm (anchura) X 75,6 cm (prof.
LG ELECTRONICS, INC. GARANTÍA LIMITADA DE LA LAVADORA LG – EE. UU. Su máquina lavadora LG será reparada o reemplazada, a discreción de LG, si se comprueba que existe un defecto en el material o la mano de obra bajo condiciones de uso normales, durante el período de garantía (“Período de garantía”) establecido más abajo, vigente desde la fecha (“Fecha de compra”) de la compra del cliente original de producto. Esta garantía es válida únicamente para el comprador original del producto y cuando se usa en EE.
N OT E S 71
P/No.