
Installation Guide


d. If a motor has become wet - let it dry before operating. Do not allow the pump to operate if it has been
flooded.
e. If a motor has been damaged by water it voids the motor warranty.
NOTE
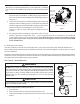
DO NOT wrap motor with plastic or other air tight materials. The motor may be covered during a storm, for winter storage, etc., but
never when operating, or expecting operation.
NOTE
When replacing the motor, be certain that the motor support is correctly positioned to support the size of motor being installed.
SECTION III. SERVICE
WARNING
RISK OF ELECTRICAL SHOCK OR ELECTROCUTION
This pool pump must be installed by a licensed or certified electrician or a qualified pool installer in accordance with
the 2008 National Electrical Code (“NEC”) and/or all applicable local codes and ordinances. The specific section of
NEC covering your pump may vary depending on your location. Some states, and/or municipalities may not have
adopted the current NEC code. In this case your state or local code may only be applicable and/or an earlier edition
of the NEC may apply. Please check your local and state codes and regulations before commencing any installation
of this pump. Improper installation could create, among other things, an electrical hazard which may result in death
or serious injury to pool users, installers, or others due to electrical shock, and/or property damage. Always disconnect
power to the pool pump at the circuit breaker before servicing the pump. Failure to do so could result in death or serious
injury to pool users, installers or others (due to electrical shock) and/or property damage.
WARNING
DO NOT open the strainer pot if pump fails to prime or if pump has been operating without water in the strainer pot. Pumps operated
in these circumstances may experience a build up of vapor pressure and may contain scalding hot water. Opening the pump may
cause serious personal injury. In order to avoid the possibility of personal injury, make sure the suction and discharge valves are open
and strainer pot temperature is cool to touch, then open with extreme caution.
A. Pump Disassembly.
1. All moving parts are located in the rear sub-assembly of this pump.
Tools required:
a. 3/32 inch Allen head wrench.
b. 1/2 inch open end wrench.
c. 9/16 inch open end wrench.
d. Flat blade screwdriver.
2. To remove and repair the motor sub-assembly perform the following procedures.
a. Turn off the pump circuit breaker at the main panel.
b. Drain the pump by removing the drain plugs.
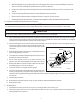
c. Remove the 6 bolts that hold the main pump body (strainer pot/volute) to the rear sub-assembly.
d. GENTLY pull the two pump halves apart, removing the rear sub-assembly.
e. Use a 3/32 inch Allen head wrench to loosen the two holding screws located on the diffuser.
4