B346828321COM3 Date of Purchase __________ Lot Number ______________
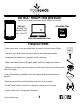
6828321COM 6 Drawer Dresser Keep this Assembly Manual for future reference. Two adults recommended for assembly Las traducciones en español se encuentran al final de este manual. Vous trouverez les traductions en français à la fin de ce manuel. This product is not intended for commercial use. Do NOT return this product. Follow little seeds on For missing or broken parts - Visit littleseedskids.
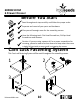
Do NOT return this product! Contact our friendly customer service team first for help. Call us! Assembly Tips 1-800-489-3351 Monday-Friday 9am - 5pm CST You Tube Visit littleseedskids.
6828321COM 6 Drawer Dresser Board Identification C B A D Left Panel 36828015011 Top 36828015040 Partition 36828015031 Right Panel 36828015021 E H G F Bottom 36828015050 x2 Left Brace 36828015061 x2 Brace 36828015071 Apron 36828015081 DWR BACK I J L x2 Large Drawer Back 39991167075850B Lower Drawer Front Middle Drawer Front 36828321102 36828408092 littleseedskids.
6828321COM 6 Drawer Dresser Board Identification M Left Upper Drawer Front 36828015132 P O N Left Lower Drawer Front 36828408142 Left MIddle Drawer Front 36828321152 DWR SIDE T S U x2 Front Leg 36828015210 littleseedskids.
828321COM 6 Drawer Dresser Board Identification This piece is paperboard construction. It is not made from wood but is required for the assembly of your unit. CC DWR BACK DWR BACK Left Upper Drawer Back 39991120038640B x2 Left Drawer Back 39991167038640B This piece is paperboard construction. It is not made from wood but is required for the assembly of your unit. Back Panel K682800000 B D U H G CC G F Z A U littleseedskids.
6828321COM 6 Drawer Dresser Board Identification DWR BACK DWR SIDE DWR BACK S S M DWR SIDE DWR SIDE Left Upper Drawer Cajón Superior Izquierdo Tiroir Supérieur Gauche O N Left Lower & Middle Drawers Gavetas Inferiores y Medias Izquierdas Gauche Bas et Moyen Tiroirs Note: The only difference between the lower and middle drawers is the color of the drawer fronts (N&O).
6828321COM 6 Drawer Dresser Parts List 1 Actual Size 2 3 x60 #A11080 7/16" flat head x48 #A12120 7/16" pan head 5 4 x15 #A12420 5/8" pan head x8 #A12800 1" flat head x30 #A21970 drive fastener 6 8 7 x9 #A17400 7/8" truss head 11 x11 #A21660 6mm x 30mm wood dowel littleseedskids.
6828321COM 6 Drawer Dresser Parts List Not Actual Size 14b 14a 14c 15a 15c 15d 14d 15b left cabinet member right left cabinet drawer member runner x6 14 #A56770 drawer slide package right drawer runner x1 15 #A84050 safety bracket kit 16 17 18 19 20 x5 #A44375 leg littleseedskids.
6828321COM 6 Drawer Dresser Before You Start P P P P P Read through each step carefully and follow the proper order Separate and count all your parts and hardware Give yourself enough room for the assembly process Have the following tools: Flat Head Screwdriver, Phillips Head Screwdriver and Hammer Caution: If you are using a power drill or a power screwdriver for screwing, please be aware to slow down and stop when the screw is tight. Failure to do so may result in stripping the screw.
6828321COM 6 Drawer Dresser Step 1 15a 7 10 15b 15 (x4) #A13410 (x1) #A84050 (x6) #A22610 10 Do not fully tighten this screw in this step. 10 15b 15a 7 D H finished edge borde acabado bord fini 10 10 7 10 10 7 10 7 finished surface superficie acabada surface finie littleseedskids.
6828321COM 6 Drawer Dresser Step 2 Quick Assembly Tip 7 9 (x8) #A22620 (x8) #A21660 Proper orientation of CAM LOCK 7 9 9 9 F x2 7 7 G 9 x2 7 littleseedskids.
6828321COM 6 Drawer Dresser Step 3 14a 14 2 (x9) #A11080 (x3) #A56770 Please Notice: You will use the smallest holes to attach the left cabinet member. A 2 14a finished edge borde acabado bord fini littleseedskids.
6828321COM 6 Drawer Dresser Step 4 9 10 (x2) #A22620 (x2) #A22610 11 (x1) #A21660 10 A 9 Quick Assembly Tip 11 littleseedskids.
6828321COM 6 Drawer Dresser Step 5 4 (x4) #A12800 finished edge borde acabado bord fini U Notice pilot holes inside. 4 A Z 4 littleseedskids.
6828321COM 6 Drawer Dresser Step 6 9 14b 10 11 4 2 (x3) 14 #A56770 (x9) (x2) #A11080 #A22620 (x2) #A22610 (x1) #A21660 (x4) #A12800 Assemble the right panel component the same as the left in steps 3,4 & 5. Quick Please Notice: You will use the smallest holes to attach the right cabinet member. Assembly Tip 4 2 Proper orientation of CAM LOCK B Z 4 10 9 U 4 finished edge borde acabado bord fini littleseedskids.
6828321COM 6 Drawer Dresser Step 7 14b 14a 9 2 (x3 each) (x18) #A11080 14 #A56770 (x2) #A22620 10 (x4) #A22610 11 (x1) #A21660 Attach two cam bolts to each surface. Insert two cam locks into holes in right surface as shown. 9 11 10 left surface right surface 10 C C 14a 14b 2 littleseedskids.
6828321COM 6 Drawer Dresser Step 8 3 16 8 (x5) #A44375 (x5) #A23030 (x15) #A12420 8 Top Surface (less holes) Note: If needed, you may need to loosen screws if the holes in the leg do not line up with the three holes in the bottom surface. After screws are secure, retighten screws. 1st E 16 3 finished edge borde acabado bord fini 8 E 2nd Bottom Surface (more holes) finished edge borde acabado bord fini littleseedskids.
6828321COM 6 Drawer Dresser Step 9 8 (x2) #A23030 finished edge borde acabado bord fini C E 8 littleseedskids.
6828321COM 6 Drawer Dresser Step 10 UNLOCK finished edge borde acabado bord fini finished edge borde acabado bord fini G C G F E F littleseedskids.
6828321COM 6 Drawer Dresser Step 11 8 UN LOCK (x4) #A23030 Attached left panel (A) to left braces (F) then fasten to bottom (E) with two screws. Attached right panel (B) to braces (G) then fasten to bottom (E) with two screws. LOCK B G G F F E A littleseedskids.
6828321COM 6 Drawer Dresser Step 12 UNLOCK B H D C A littleseedskids.
6828321COM 6 Drawer Dresser Step 13 13 (x36) #A21110 2 people are required for this step. Carefully turn the unit over onto its front side as shown. Assure that the unit is square. Distance from corner to corner must be equal as shown. Back panel notch location here. 13 E A Align the bottom edge of the back panel with the bottom edge of the bottom shelf (E). Align side edges with edge of left and right panels (A&B) and nail straight into back edges as shown.
6828321COM 6 Drawer Dresser Step 14 1 x24 #A12120 17 18 (x4) #A54510 (x8) #A54520 Attach the drawer brackets to each drawer front with the screws shown. The smaller drawer bracket (17) will attach to the smaller drawer fronts (M and P). 1 1 1 17 1 1 17 18 M 1 N 1 1 18 O x2 1 17 17 1 1 littleseedskids.
6828321COM 6 Drawer Dresser Step 15 1 (x12) #A12120 You will be assembling three drawers. They all assemble in the same manner. The only difference is the drawer fronts. You will have three left drawer fronts (M,N,0). Attach the smaller drawer sides to the drawer front (M) with screws (1) as shown. Be sure the groove in the drawer sides are centered with the groove in the drawer front. If not, loosen screws in drawer front, adjust and retighten.
6828321COM 6 Drawer Dresser Step 16 5 You will need to tap with a hammer to fasten. x12 #A21970 5 5 5 Left Upper Drawer Back DWR BACK S finished surface superficie acabado surface fini DWR SIDE DWR SIDE DWR BACK Left Drawer Back finished surface superficie acabado surface fini M DWR SIDE S 5 DWR SIDE N O x2 littleseedskids.
6828321COM 6 Drawer Dresser Step 17 14c 14d 6 2 14 (x3 each) #A56770 (x12) #A11080 20 19 (x3) #A17400 (x3) #A52545 14d 2 DWR SIDE 2 6 DWR SIDE 2 M 20 2 DWR SIDE 6 14c DWR SIDE N 2 Two different knobs have been provided. Attach your preference with screws. littleseedskids.
6828321COM 6 Drawer Dresser Step 18 9 (x3) #A22620 12 (x3) #A21520 This part will be used on the three drawers on the right side of your unit. 9 L x3 Quick Assembly Tip Proper orientation of CAM LOCK 12 littleseedskids.
6828321COM 6 Drawer Drsser Step 19 10 1 (x12) #A12120 (x3) #A22610 You will be assembling three drawers. They all assemble in the same manner. The only difference is the drawer fronts. You will have three right drawer fronts (P,I,J). Attach the smaller drawer sides to the drawer front (P) with screws (1) as shown. Be sure the groove in the drawer sides are centered with the groove in the drawer front. If not, loosen screws in drawer front, adjust and retighten.
6828321COM 6 Drawer Dresser Step 20 UNLOCK LOCK DWR SIDE L DWR SIDE DWR SIDE P L DWR SIDE I J x2 littleseedskids.
6828321COM 6 Drawer Dresser Step 21 You will need to tap with a hammer to fasten. 5 x18 #A21970 5 DWR BACK 5 5 5 Upper Drawer Back 5 S 5 raw surface superficie cruda surface non-fini 5 DWR SIDE L 5 5 DWR BACK P 5 Large Drawer Back S raw surface superficie cruda surface non-fini 5 5 DWR SIDE littleseedskids.
6828321COM 6 Drawer Dresser Step 22 14c 14d 19 6 20 2 (x6) #A17400 (x12) #A11080 (x3 each) 14 #A56770 Two different knobs have been provided. Attach your preference with screws. (x6) #A52795 (x6) #A52545 2 14d DWR SIDE 2 6 20 P 6 DWR SIDE 2 2 20 DWR SIDE 2 2 6 20 6 I DWR SIDE 14c 20 2 2 littleseedskids.
6828321COM 6 Drawer Dresser Step 23 15c 15d 15 (x1) For Masonry, Concrete, or other wall materials: Consult your local hardware store for appropriate anchors to securely attach the safety bracket. #A84050 IMPORTANT: THIS UNIT MUST BE SECURE TO THE WALL TO HELP PREVENT TIPOVER. FOLLOW THESE INSTRUCTIONS TO INSTALL THE ANTI-TIPPING SAFETY BRACKET PROVIDED WITH THIS PRODUCT. WARNING Serious or fatal crushing injuries can occur from furniture tipover.
6828321COM 6 Drawer Dresser Step 24 Notice, the drawer bracket holes are slotted. Drawer fronts can be adjusted by loosening screws, making needed adjustments and retightening screws. P J M I O cabinet member corredera de mueble coulisse du cabinet N roller rodillo rouleau littleseedskids.
6828321COM 6 Drawer Dresser MAXIMUM LOADS This unit has been designed to support the maximum loads shown. Exceeding these load limits could cause sagging, instability, product collapse, and/or serious injury. 75 lbs. 34 kg 35 lbs. 15.8 kg 15 lbs. 6.8 kg Warning: Risk of injury to persons - do not place a television on this furniture. This furniture is not approved for use with a television. littleseedskids.
Certificate of Conformity 1. This certificate applies to the Dorel Home Furnishings, Inc. product identified by this instruction manual. 2. This certificate applies to compliance of this product with the CPSC Ban on Lead-Containing Paint (16 CFR 1303). 3. This product is distributed by: Dorel Home Furnishings, Inc. 410 East First Street South Wright City, MO 63390 636-745-3351 4. Site of Manufacture: □ Tiffin OH 5. See front page of instruction manual for date of manufacture. Certificado de Conformidad 1.
Register your product to receive the following: * New trend details - sneak peek on what's new * Surveys - have a voice within our community * Exclusive deals and discount codes * Quick and easy replacement part service To register your product, visit littleseedskids.
6828321COM Cajonera de 6 Cajones Consejos Útiles (página 3) - Abra su artículo en el área donde usted planea utilizarlo para evitar levantar y moverlo menos - Identificar, ordenar y contar las piezas antes de intentar ensamblar - Las clavijas de compresión se golpean con un martillo - Las diapositivas están marcadas con una R (derecha) y L (izquierda) para la colocación correcta - Asegúrese de que siempre este el punto locaizado en la parte superior de bloqueador de leva este volteadohacia borde exterior -
6828321COM Cajonera de 6 Cajones Paso 5 Dese cuenta de los agujeros de adentro. Paso 6 Ensamble el componente del panel derecho de la misma forma como el izquierdo en los pasos 3, 4, & 5. Observe por favor: Usted utilizará los agujeros más pequeños para atar el miembro derecho del gabinete. Paso 7 Adjunte dos pernos de la leva a cada superficie. Ponga dos levas en los agujeros en superficie derecha como se muestra.
6828321COM Cajonera de 6 Cajones Paso 13 2 Personas son requeridas para este paso. Cuidadosamente voltee la unidad hacia enfrente come es mostrado. Asegúrese que la unidad este escuadrada. Distancia de esquina a esquina deben estar iguales come es mostrado. Soporte de panel de atrás localizado aquí. Alinear el borde de abajo del panel de atrás con el borde de abajo del estante de abajo (E).
6828321COM Cajonera de 6 Cajones Paso 18 Esta parte será usada en los tres cajones de la derecha de la unidad. Paso 19 Usted va a montar tres cajones. Todos se reúnen de la misma manera. La única diferencia son los frentes de los cajones. Usted tendrá tres frentes de cajón derecho (P, I, J). Fije los lados del cajón más pequeños al frente del cajón (P) con los tornillos (1) como se muestra. Asegúrese de que la ranura de los lados del cajón esté centrada con la ranura en el frente del cajón.
6828321COM Cajonera de 6 Cajones Paso 23 15c x1 15 #A84050 15d Para mampostería, hormigón u otros materiales de la pared: Consulte a su ferretería local para los anclajes apropiados para fijar firmemente el soporte de seguridad. IMPORTANTE: ESTA UNIDAD DEBE SER ASEGURADA CON LA PARED PARA PREVENIR VOLQUEO. SIGA ESTAS INSTRUCCIONES PARA INSTALAR EL SOPORTE DE SEGURIDAD ANTIVOLQUEO SUMINISTRADO CON ESTE PRODUCTO.
6828321COM Cajonera de 6 Cajones Paso 24 Note, que los agujeros del soporte del cajón están perforados. La parte de enfrente de los cajones pueden ser ajustadas sin aflojan los tornillos, haga los ajustes necesarios y apriete los tornillos otra vez. littleseedskids.
6828321COM Cajonera de 6 Cajones CARGA MAXIMA Esta unidad ha sido diseñada para soportar la carga máxima anotada. El exceder estos límites puede causar inestabilidad, colapsarse y/o causar serias lesiones. 75 lbs. 34 kg 35 lbs. 15.8 kg 15 lbs. 6.8 kg ADVERTENCIA: Riesgo de lesiones a las personas - no coloque un televisor sobre muebles. Este mueble no está aprobado para su uso con un televisor. littleseedskids.
Registre su producto para recibir lo siguiente: Registre * Detalles de nuevas tendencias - Vistazo a lo nuevo * Encuestas - alec su voz entre su comunidad * Códigos de ofertas y descuentos exclusivos * Fácil y rápido servicio de partes de remplace Para registrar su producto, visite littleseedskids.
6828321COM Commode à 6 Tiroirs Astuces Utiles (page 3) -Ouvrez votre article dans la zone que vous prévoyez de le garder pour moins de levage lourd -Identifier, trier et compter les pièces avant d'essayer d'assembler -Les goujons de compression sont taraudés avec un Marteau -Les glissières sont marquées d'un R (droit) et d'un L (gauche) pour un bon placement -Assurez-vous toujours de faire face la pointe situé sur le haut de la Serrure de Came vers le bord extérieur -Utiliser tous les clous fournis pour le
6828321COM Commode à 6 Tiroirs Étape 5 Remarquez les trous pilotes à l'intérieur. Étape 6 Assemblez la composante du panneau droit de la même manière que celle de gauche dans les étapes 3, 4 & 5. Veuillez noter: Vous allez utiliser les plus petits trous pour fixer le membre droit de l'armoire Étape 7 Fixez deux boulons de came sur chaque surface. Insérez deux serrures de came dans les trous de la surface droite comme montré.
6828321COM Commode à 6 Tiroirs Étape 13 2 personnes sont requises pour cette étape. Tournez soigneusement le meuble sur le côté avant comme montré. Assurez-vous que le meuble est à l'équerre. La distance d'un coin à l'autre doit être égale comme montré. Emplacement de l'encoche du panneau arrière ici. Alignez le bord inférieur du panneau arrière avec le bord inférieur de l'étagère inférieure (E).
6828321COM Commode à 6 Tiroirs Étape 18 Cette pièce sera utilisé sur les trois tiroirs sur le côté droit de votre meuble. Étape 19 Vous se réuniront trois tiroirs. Ils sont tous assemblent de la même manière. La seule différence est les façades. Vous aurez trois façades droite (P, I, J). Fixer les petites côtés du tiroir à l’avant du tiroir (P) avec les vis (1), tel qu’illustré. Veillez à ce que la rainure dans les côtés du tiroir sont centrées sur la rainure de la façade du tiroir.
6828321COM Commode à 6 Tiroirs Étape 23 Pour la maçonnerie, béton ou d'autres matériaux de mur: 15c Consultez votre magasin local de 15d matériel pour les ancrages x1 appropriés pour fixer le support de 15 #A84050 sécurité. IMPORTANT: CET APPAREIL DOIT ÊTRE FIXÉ AU MUR POUR AIDER À PRÉVENIR LE BASCULEMENT. SUIVRE CES INSTRUCTIONS POUR INSTALLER LE SUPPORT DE SÉCURITÉ ANTI-BASCULEMENT FOURNI AVEC CE PRODUIT.
6828321COM Commode à 6 Tiroirs Étape 24 Remarquez, les trous du support du tiroir sont fendus. Les façades du tiroir peuvent être ajustées en desserrant les vis, faire les ajustements nécessaires et resserrez les vis. littleseedskids.
6828321COM Commode à 6 Tiroirs CHARGES MAXIMALES Ce meuble a été conçu pour supporter les charges maximales indiquées. En excédant ces limites de charge, le meuble pourrait devenir instable, s’effondrer, et/ou causer des blessures graves. 75 lbs. 34 kg 35 lbs. 15.8 kg 15 lbs. 6.8 kg AVERTISSEMENT : Risque de blessure corporelle - ne pas placer une télévision sur ce meuble. Ce meuble n'est pas approuvé pour une utilisation avec une télévision. littleseedskids.
Enregistrez votre produit pour recevoir les éléments suivantes: Enregistrez * Détails sur les nouvelles tendances - un aperçu sur les nouveautés * Sondages - avoir une voix au sein de notre communauté * Offres exclusives et codes promo * Service de pièces de rechange rapide et facile Pour enregistrer votre produit, visitez littleseedskids.