
User Manual


4
Onyx Artist 1•2 and Onyx Producer 2•2 USB Interfaces
Onyx Artist 1•2 and Onyx Producer 2•2 USB Interfaces
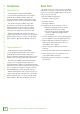
Introduction
Onyx Artist 1•2
Combining high-resolution 24-bit/192kHz
converters with premium Mackie analog circuitry
and Built-Like-A-Tank™ hardware design, the
bus-powered Onyx™ Artist 1•2 is perfect for singer-
songwriters, content creators, and mobile recording.
The Artist 1•2 features an Onyx mic pre with
phantom power and a 1/4" line input with Hi-Z
instrument switch for quick and easy recording.
Plus, with zero-latency direct analog monitoring
ensures you can always hear yourself in real time.
With the Onyx Artist 1•2, you have the power to
capture your performance and experience media with
pristine fidelity at home or on the go. Your Creativity
Without Limits – Onyx Series USB Audio Interfaces.
Onyx Producer 2•2
Combining high-resolution 24-bit/192kHz
converters with premium Mackie analog circuitry
and Built-Like-A-Tank™ hardware design, the
bus-powered Onyx™ Producer 2•2 is perfect for home
studios, mobile recording, and dual mic applications.
Featuring two XLR/TRS combo inputs with Onyx
mic pres, each is equipped with phantom power
and Hi-Z instrument switches for maximum versatility.
Plus, with zero-latency direct analog monitoring ensures
you can always hear yourself in real time. It also has
built-in MIDI I/O for controllers, synths, and more.
With the Onyx Producer 2•2, you have the power to
capture your performance and experience media with
pristine fidelity at home or on the go. Your Creativity
Without Limits – Onyx Series USB Audio Interfaces.
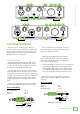
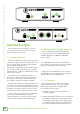
Quick Start
We realize that you can’t wait to hook up your Onyx
USB Interface and try it out. Nevertheless, please take
the time to read this page NOW, and the rest can wait
until you’re good and ready.
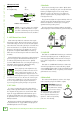
1. PC users: install the latest driver.
Mac users: no driver required.
2. Turn down all knobs.
3. Disengage all switches.
4. Plug signal sources into the interface, such as:
• Microphones plugged into the mic inputs.
(Engage phantom power if needed.)
• Line-level sources such as keyboards, drum
machines, or MP3 players plugged into the
line-level inputs.
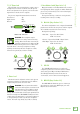
5. Connect cords from the line outs to powered speakers
(or to an amplifier connected to passive speakers).
6. Push the USB cable securely into the interface’s
USB connector and plug the other end into any
open USB slot of the computer.
7. Turn the computer on. Make sure the interface
powers up.
8. Turn the powered studio monitors (or amplifiers) on.
9. Be sure that the volume of the input is the same
as it would be during normal use.
10. Slowly bring up the monitor knob to a comfortable
listening level.