3 RPi - Explorer700 Ausgabe 22.09.
3 RPi - Explorer700 Index 1. Connections 2. Connecting the extension board 3. LED Exampe - Changing the LED Status 4. Key Example 5. PCF8574 Example - I/O Extension Demos 6. BMP180 Example - Barometer Demos 7. DS3231 Example - Real-Time-Clock Demos 8. DS18B20 Example - Temperature Sensor Demos 9. IRM Example - Infrared reflecting sensor program 10. UART Example - Receiving serial data 11. OLED Example 12. Installing the additional libraries 12.1 wiringPi Library 12.
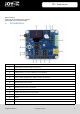
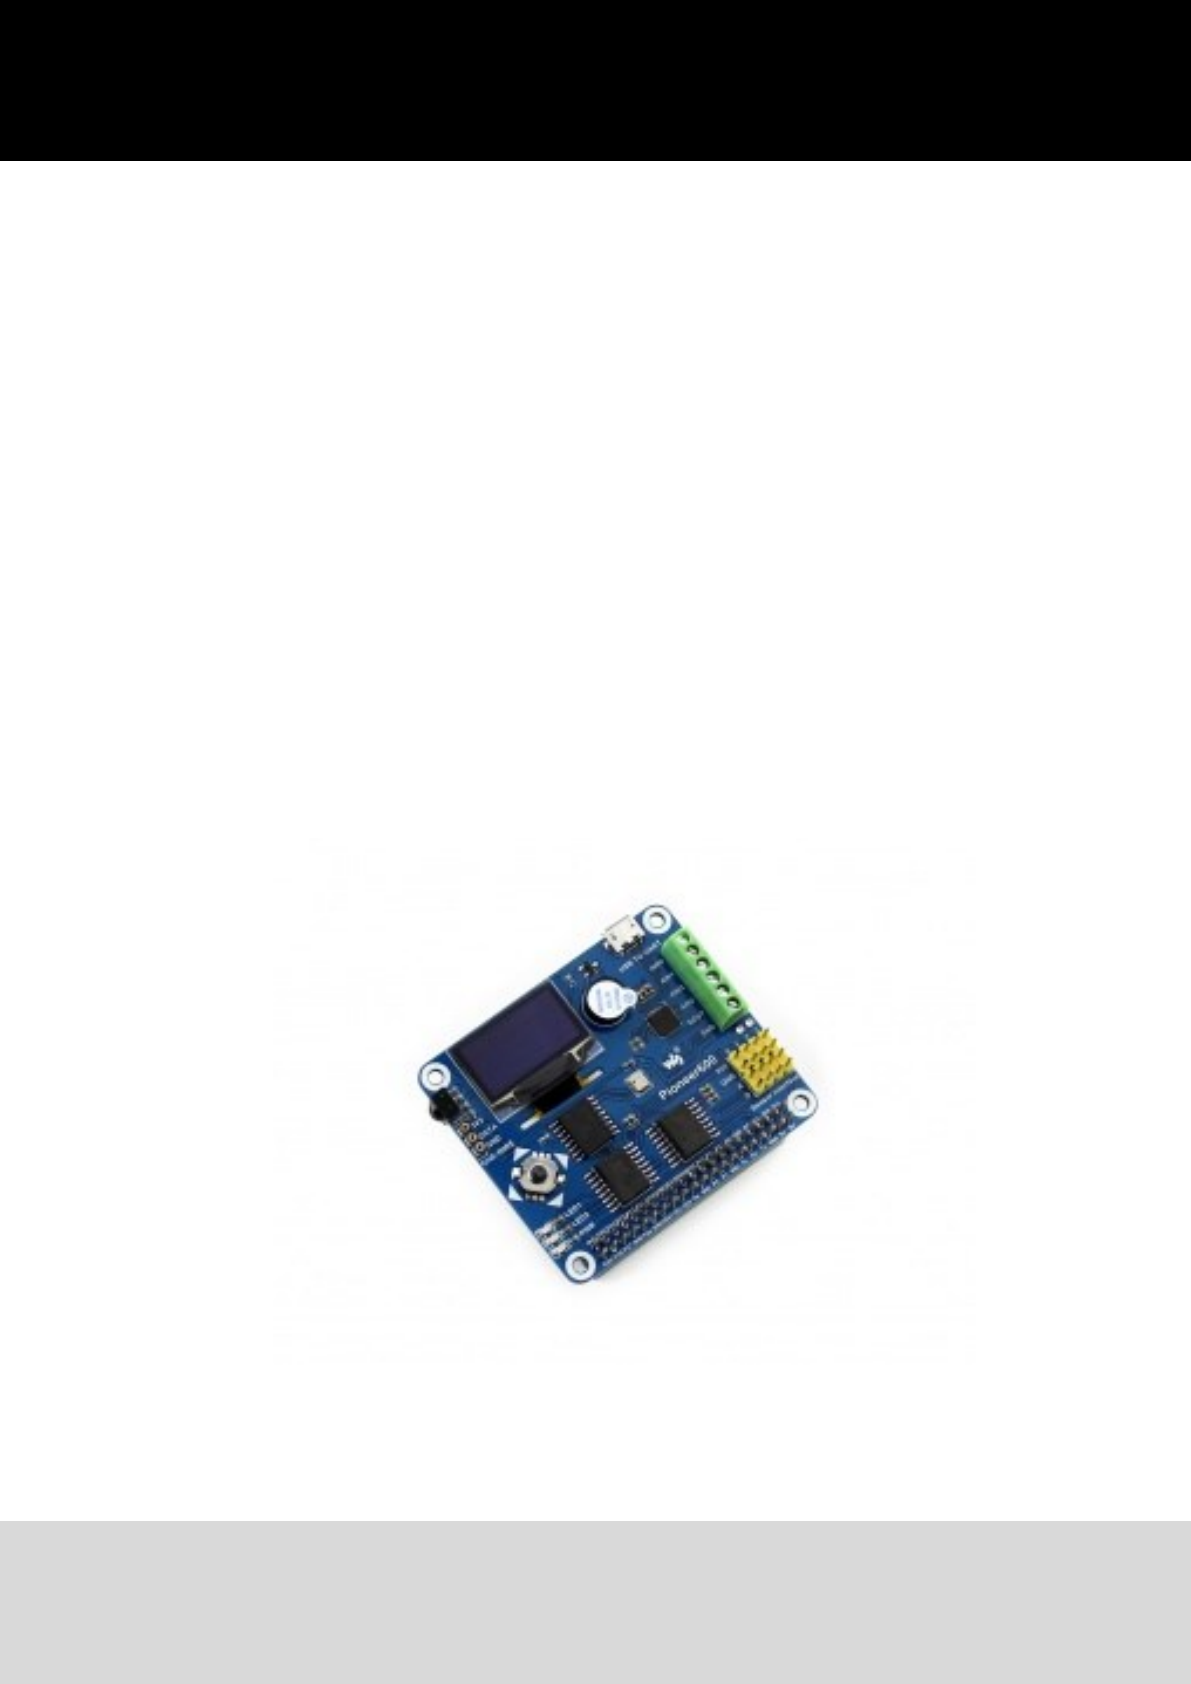
RPi - Explorer700 Dear customer, thank you for purchasing our product. Please find our instructions below. 1. Connections 1 Raspberry Pi GPIO interface: to connect with Raspberry Pi 2 USB to UART: control the Pi with serial terminal 3 AD/DA IO interface: screw terminal 4 1-WIRE interface: to connect 1-WIRE devices like DS18B20 5 Sensor interface: to connect various sensors 6 0.
3 Ausgabe 22.09.
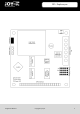
3 2. RPi - Explorer700 Connecting the extension board The Explorer700 extension board supports the Raspberry Pi A+ / B+ / 2 / 3 Model B. Before running the sample programs, please make sure the Explorer700 is connected to the RPi and the RPi is powered up by the USB power supply. Without the RPi main board, the sample programs cannot be used on the expansion board. Connected to Raspberry Pi Model A+ 3.
3 RPi - Explorer700 wiringPi Program: Open the console and enter the following commands: cd /Explorer700/LED/wiringPi make sudo ./led Expected result: LED1 flashes. Press CTRL+C to exit the program. sudo ./pwm Expected result: the brightness of LED1 is changing. Press CTRL+C to exit the program. sysfsProgram: Open the console and enter the following commands: cd /Explorer700/LED/fs make sudo ./led Expected result: LED1 flashes 10 times. The program will quit afterwards. Ausgabe 22.09.
3 RPi - Explorer700 Python Program: Open the console and enter the following commands: cd /Explorer700/LED/python sudo python led.py Expected result: LED1 flashes. Press CTRL+C to exit the program. sudo python pwm.py Expected result: the brightness of LED1 is changing. Press CTRL+C to exit the program. 4. Key Example BCM2835 Program: Open the console and enter the following commands: cd /Explorer700/KEY/bcm2835 make sudo ./key Expected result: Press the centered button of the joystick.
3 RPi - Explorer700 wiringPi Program: Open the console and enter the following commands: cd /Explorer700/KEY/wiringPi make sudo ./key Expected result: Press the centered button of the joystick. The console will push to following informations: Key KEY KEY KEY Test Program!!!! PRESS PRESS PRESS Press CTRL+C to exit the program. Python Program: Open the console and enter the following commands: cd /Explorer700/KEY/python sudo ./key.py Expected result: Press the centered button of the joystick.
3 5. RPi - Explorer700 PCF8574 Example - I/O Extension demos BCM2835 Program: Open the console and enter the following commands: cd /Explorer700/PCF8574/bcm2835 make sudo ./pcf8574 Expected result: LED2 flashes. Press CTRL+C to exit the program. make5 sudo ./pcf8574 Expected result: Press one of the direction-buttons. LED2 will flash up, the buzzer will buzz and the console will push the following: PCF8574 Test Program !!! up left down right Press CTRL+C to exit the program. Ausgabe 22.09.
3 RPi - Explorer700 Python Program: Open the console and enter the following commands: cd /Explorer700/PCF8574/python sudo python led.py Expected result: LED2 flashes. Press CTRL+C to exit the program. sudo python pcf8574.py Expected result: Press one of the direction-buttons. LED2 will flash up, the buzzer will buzz and the console will push the following: PCF8574 Test Program !!! up left down right Press CTRL+C to exit the program.
3 RPi - Explorer700 wiringPi Program: Open the console and enter the following commands: cd /Explorer700/PCF8574/wiringPi make sudo ./led Expected result: LED2 flashes. Press CTRL+C to exit the program. 6. BMP180 Example - Barometer Demos BCM2835 Program: Open the console and enter the following commands: cd /Explorer700/BMP180/bcm2835 make sudo ./BMP180 Expected result: the console will push the following: BMP180 Test Program ... Temperature: 34.20 C Pressure: 1005.12 Pa Altitude: 67.
3 RPi - Explorer700 wiringPi Program: Open the console and enter the following commands: cd /Explorer700/BMP180/wiringPi make sudo ./BMP180 Expected result: the console will push the following: BMP180 Test Program ... Temperature: 34.20 C Pressure: 1005.12 Pa Altitude: 67.66 m Press CTRL+C to exit the program. Python Program: Open the console and enter the following commands: cd /Explorer700/BMP180/python sudo python BMP180_example.
3 7. RPi - Explorer700 DS3231 Example - Real-Time-Clock Demos BCM2835 Program: Open the console and enter the following commands: cd /Explorer700/DS3232/bcm2835 make sudo ./ds3231 Expected result: the console will push the following: start.......... 2015/08/12 18:00:00 2015/08/12 18:00:01 2015/08/12 18:00:02 2015/08/12 18:00:03 Wed Wed Wed Wed Press CTRL+C to exit the program. wiringPi Program: Open the console and enter the following commands: cd /Explorer700/DS3232/wiringPi make sudo .
3 RPi - Explorer700 Python Program: Open the console and enter the following commands: cd /Explorer700/DS3232/python sudo python ds3232.py Expected result: the console will push the following: start.......... 2015/08/12 18:00:00 2015/08/12 18:00:01 2015/08/12 18:00:02 2015/08/12 18:00:03 Wed Wed Wed Wed Press CTRL+C to exit the program. 8. DS18B20 Example - Temperature sensor Demos (Note: To use the DS18B20 program, you should append „dtoverlay=w1-gpio-pullup“ to the end of the /boot/config.
3 RPi - Explorer700 Open the console and enter the following commands: rom: 28-00000674869d temp: 30.437 °C temp: 30.375 °C Press CTRL+C to exit the program. Python Programm: Öffnen Sie die Linux Konsole und geben Sie folgende Kommandos ein: cd /Explorer700/DS18B20/python sudo python ds18b20.py Expected result: the console will push the following: rom: 28-00000674869d temp: 30.437 °C temp: 30.375 °C Press CTRL+C to exit the program. Ausgabe 22.09.
3 9. RPi - Explorer700 IRM Example - Infrared reflecting sensor program BCM2835 Program: Open the console and enter the following commands: cd /Explorer700/IRM/bcm2835 make sudo ./irm Expected result: press one of the buttons of the infrared remote. The console will show which button you pressed: irm Get Get Get test start: the key: 0x0c the key: 0x18 the key: 0x5e Press CTRL+C to exit the program.
3 RPi - Explorer700 Python Program: Open the console and enter the following commands: cd /Explorer700/IRM/python sudo python irm.py Expected result: press one of the buttons of the infrared remote. The console will show which button you pressed. irm Get Get Get test start: the key: 0x0c the key: 0x18 the key: 0x5e Press CTRL+C to exit the program. 10. UART Example - Receiving serial data Note: The Raspberrys serial port is set to debug by default.
3 RPi - Explorer700 Python Program: Open the console and enter the following commands: cd /Explorer700/UART/python sudo python uart.py Connect the extension board to a PC with the USB to UART interface und configure the serial communication-software on your pc (you can use the software „PuTTY“ to show the serial ports). Choose the right serial port number and set the baudrate to 115200. Afterwards you can use your pc to send data by serial communication to your Raspberry Pi.
3 RPi - Explorer700 wiringPi Program: Open the console and enter the following commands: cd /Explorer700/OLED/wiringPi make sudo ./main Expected result: The OLED display will show the JOY-IT logo for 2 seconds and will display the current system afterwards. Press CTRL+C to exit the program. Python Program: If you want to use the OLED display with python, you need to install an additional library first.
3 RPi - Explorer700 12. Installing the additional libraries In order to use the API examples we provide, related libraries are required, which should be installed manually. bcm2835 Libaries wiringPi Libraries 12.1 wiringPi Library Click here to download the wiringPi libraries. You can also download them from the wiringPi website: https://projects.drogon.net/raspberry-pi/wiringpi/download-and-install/ Copy the installation-package with a usb-stick to your system.
3 RPi - Explorer700 12.3 Python Library You can receive the python libraries for Raspbian (contains RPi, GPIO and spidev) by using the apt-get command. Please note that your Raspberry Pi needs to be connected to the internet to install the libaries. Use the following command the make sure that you are going to receive the latest packages. sudo apt-get update Enter the following command to install the python-dev package: sudo apt-get install python-dev Now you can install the package: sudo python setup.
3 RPi - Explorer700 12.4 Configurating the interfaces (Before executing the API codes, you need to activate the core-drivers of the specific interfaces. The I2C and SPI core-drivers are already activated by default. Also the I2C and SPI drivers are active. But the serial port is still in its debug-mode. To enable the I2C functions, enter the following command: sudo raspi-config Choose Advanced Options -> I2C -> Yes You also need to modify the configuration-file.
3 RPi - Explorer700 Chosoe Advanced Options -> Serial. Choose NO. Reboot your system aferwards. Note: The serial port auf the Raspberry Pi 3 Model B is not useable because Pin 14 and 15 is connected with the build in Bluetooth-Module. To activate the SPI functions, enter the following command: sudo raspi-config Choose Advanced Options -> I2C -> yes. Ausgabe 22.09.
3 RPi - Explorer700 13. Code-Example Download To make the access to our code-example as easy as possible, you can of course also download them. Just follow this link, to get the download-package. 14. Support We also support you after your purchase. If there are any questions left or if you encounter any problems, please feel free to contact us by mail, phone or by our ticket-supportsystem on our website. E-Mail: service@joy-it.net Ticket-System: http://support.joy-it.