
Installation Instructions


Important Step: Establishing the Waterline
This toilet is designed to function efficiently using a predetermined amount of water. Please note the waterline marked in the
back of the tank. This waterline indicates the level of the proper water depth in the tank. Please refer to information below
for details in adjusting the type of fill valve in your tank.
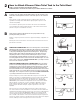
If your tank has one of the following models of fill valves (2206, 90,
Fluidmaster 400A) pictured below, adjust the waterline by turning the
adjustment screw clockwise to raise the waterline and counterclockwise
to lower.
For Fill Valve Models 2206, 90, Fluidmaster 400A:
If your tank has the 08 valve pictured below, adjust the waterline by
turning the adjustment screw clockwise to lower the waterline and
counterclockwise to raise.
For Fill Valve Model 08:
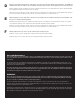
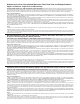
• The use of toilet tank type bowl cleaners will damage rubber and or plastic parts and will void the warranty.
• The use of pipe dope or Teon tape on coupling nut and shank connection on ll valve will void the warranty.
• The use of corrugated metal supply line voids warranty.
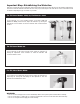
For Fill Valve Model G340:
WARNING:
If your tank has the G340 valve pictured below, adjust the waterline by
depressing the locking tab and sliding the float upwards to raise the
waterline and downwards to lower.