
Installation Manual


10
ChargeMaster Plus 12/75-3, 12/100-3, 24/40-3, 24/60-3 – User and Installation Manual
devices, forming a local data network. Both
networks need a terminating device on both
ends of the network. Do not make ring networks
or T-connections.
• CZone network
Points to consider:
˗ Up to 40 devices can be connected together
on a single backbone.
˗ Make sure the CZone network has two
terminating resistors, one at each open end
of the backbone.
˗ The electric power for the network comes
from a battery or power supply. Make sure
that it delivers enough power and is
positioned as close to the middle of the
backbone as possible to reduce voltage
drop.
• MasterBus network
Points to consider:
˗ Connections between the devices are made
by standard MasterBus cables (straight
UTP). Mastervolt can supply these cables.
˗ Up to 63 MasterBus devices can be
connected together.
˗ The electric power for the network comes
from the connected devices according to the
rule: 1powering / 3 non-powering. Spread
the powering devices over the network.
For more details on networks, please contact
your Mastervolt supplier.
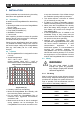
3.4 Batteries
Always follow the instructions published by the
battery manufacturer.
Model
Minimum battery capacity
12/75-3
150 Ah
12/100-3
200 Ah
24/40-3
80 Ah
24/60-3
120 Ah
Minimum based on Mastervolt Gel batteries. If
connecting batteries of a different manufacturer,
make sure the manufacturer's recommendations
are met.
3.5 Things you need
Make sure you have all the parts you need to
install the ChargeMaster Plus:
• ChargeMaster Plus (included).
• Battery temperature sensor with cable and
plug (included).
• DC cables to connect the ChargeMaster Plus
to the batteries and common negative; see
section 3.3.1 for specifications.
• DC fuse holder with a DC fuse, to be
integrated in the positive DC cable; see
section 3.3.1 for specifications.
• Screws/bolts (Ø 6mm with plugs) to mount
the ChargeMaster Plus to a surface. Use
mounting materials which are suitable to carry
the weight of the ChargeMaster Plus.
• AC cable to connect the AC input to an AC
power source. See section 0.
• Batteries. See section 3.4.
• Appropriate and reliable cable terminals,
cable lugs, battery terminals and cord end
terminals.
• For CZone setup, an RJ45-M12 Drop cable
CZone/MB (included) and a tee connector
(not included). When connecting several
drop cables in a similar location, use a 2-way
or 4-way tee connector
• For MasterBus setup, an RJ45 MasterBus
cable (not included).
We recommend as a minimum tool kit:
• Socket wrench 13mm to fix the main DC
cables.
• Socket wrench 10mm to fix the Safety ground
connection.
• Flat blade screwdriver 1.0 × 4.0mm to fix the
screw terminals of the AC wiring.
• Tools to fix the screws / bolts (Ø 6mm) with
plugs to mount the ChargeMaster Plus to a
surface.
• Philips screwdriver number 2 to open the
connection compartment.