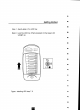
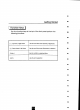
Getting Started Step 7: Gently slide in the HDD tray. Step 8 : Lock the HDD tray. When powers on the Green LED wilt light up. Figure : insisting HDD step 7.
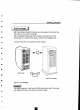
Getting Strafed Host Linkage With the H Dds) installed contently, you oie ready fo connect the Disk Array to your Host computer, Use 4 shielded twisted-poi SCSI cope 16 corn act your Host computer to the Disk Arrays bull-in 68 pin SCS adapter port. Connect the Host computer as shown below : Host Computer For safety reasons, nicks sure the Disk Carny and Host Compiler are fumed off when you plug-in he SCSI Cable.
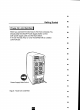
Getting Started Power-On and Self-Test Her you connect the Disk Array to the Host computer, You should press the ON OFF Power Supply Switch on the both power supply units and the Main Switch, It will tum the Disk Ency on ond the Eldest will be started autocratically.
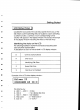
Gatling Started Function Keys The four function keys dt the top of the front panel perform ihe following functions { 1) Up Arrow / it Now Use fo scroll the cursor toward J Right wars {4 ] Down Now | Left Now Use fo scroll Hr Guise DOWNRIGHT 7 Leftward { Enter | Use fo confirm o selected fem {ESC Use toast of selection a o
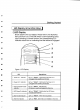
Getting Started LCD Status Panel | Looted the LCD panel, the LCD status panel informs you of the Disk Alaric's current operating status af a glance. Upon activating a certain function, a symbol or Leon consolidating to that function will appear in the display window. The symbol will ermine in the display window indicating the stouts of the Disk Array, Identifying the status on the LCD The following Pincushion shows the symbols characters) been used and their representation.