
Operating instructions


B. Check microwave for
damage
Remove all packing material from the oven cavity.
When unpacking the unit, check for damage such as
misaligned door, damaged gaskets around the door,
or dents inside the oven or on the exterior. If there is
any damage, please do not operate the unit until it has
been checked by an authorized Whirlpool trained ser-
vice technician.
C. Electrical requirements
IMPORTANT:
SAVE THESE INSTRUCTIONS FOR THE
LOCAL ELECTRICAL INSPECTOR’S USE
A. This appliance must be connected to the proper
electrical voltage and frequency as specified on
nameplate. Models rated at 15 KW on 240 volts (11.25
KW on 208V) or more require a separate 50 amp cir-
cuit. Models rated less than 15KW on 240 volts (11.25
KW on 208V) require a separate 40 ampere circuit.
Fuse both sides of the line. DO NOT fuse the neutral.
A time delay fuse or circuit breaker is recommended.
Wire sizes must conform to the requirements of the Na-
tional Electrical Code and/or local codes and or-
dinances for the kilowatt rating of the range. The
nameplate is located on the front frame behind the
microwave oven door.
NOTE: Wire sizes and connections must conform with
the fuse size and rating of the appliance in accordance
with National Electrical Code and local codes and or-
dinances. Do not use an extension cord.
B. The appliance should be connected to the fused
disconnect (or circuit breaker) box through flexible ar-
mored or non-metallic sheathed cable. The flexible ar-
mored cable extending from the appliance should be
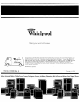
connected directly to the junction box. The junction box
should be locat.ed as shown in Figure 1 on page 2 so
that as much slack as possible remains in the cable
between the box and the appliance so that it can be
moved if servicing is necessary.
C. A suitable strain relief must be provided to attach
the flexible armored cable to the junction box.