
Control Guide
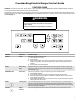
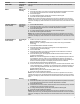
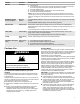
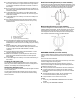
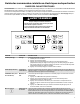

Table Of Contents
- Feature Guide_W11524842
- Cooktop Use_W11524842
- Cookware_EFSR_CG
- Home Canning_EFSR_CG
- Oven Use_W11085354
- Electronic Oven Controls_W11333124
- Sabbath Mode_W11168721
- Positioning Racks and Bakeware_W11524842
- Air Fry Basket_W11523781A
- Baking and Roasting_W11102909
- Broiling_W11102909
- Convection Baking, Roasting and Air Fry
- Cook Time_W11085357
- Feature Guide_W11524842_FR
- Cooktop Use_W11524842_FR
- Cookware_EFSR_CG_FR
- Home Canning_EFSR_CG_FR
- Oven Use_W11085354_FR
- Electronic Oven Controls_W11333124_FR
- Sabbath Mode_W11168721_FR
- Positioning Racks and Bakeware_W11524842_FR
- Air Fry Basket_W11523781A_FR
- Baking and Roasting_W11102909_FR
- Broiling_W11102909_FR
- Convection Baking, Roasting and Air Fry_W11524842_FR
- Cook Time_W11085357_FR
- Feature Guide_W11524842_SP
- Cooktop Use_W11524842_SP
- Cookware_EFSR_CG_SP
- Home Canning_EFSR_CG_SP
- Oven Use_W11085354_SP
- Electronic Oven Controls_W11333124_SP
- Sabbath Mode_W11168721_SP
- Positioning Racks and Bakeware_W11524842_SP
- Air Fry Basket_W11523781A_SP
- Baking and Roasting_W11102909_SP
- Broiling_W11102909_SP
- Convection Baking, Roasting and Air Fry_W11524842_SP
- Cook Time_W11085357_SP

3
KEYPAD FEATURE INSTRUCTIONS
AIR FRY Air Frying
1. Press AIR FRY.
2. Press the Temp/Time up or down arrow keypad until desired temperature is reached.
A tone will sound if the minimum or maximum temperature is reached.
3. Press the START keypad.
4. To change the temperature, repeat Step 2. Press the Start keypad.
5. Press the Cancel keypad when finished.
NOTE: The convection fan will shut off when the oven door is opened. If the oven door
remains open for too long, the heating elements will shut off until the oven door is closed.
All timers, including any active Cook Time or Timed Cook functions, will continue to count
down.
WARMING CENTER
(on some models)
Warming
center
Press WARMING CENTER to select the warming element on the cooktop. Press the Start
keypad.
Press WARMING CENTER again to turn off the warming element.
DELAY START Delayed start Delay Start is used to enter the starting time for an oven function with a delayed start.
Delay Start should not be used for foods such as breads and cakes because they may not
bake properly.
To set a Timed Cook or a Delayed Timed Cook, see the “Cook Time” section.
COOK TIME Timed coking Cook Time allows the oven to be set to turn on at a certain time of day, cook for a set
length of time, and/or shut off automatically.
To set a Timed Cook or a Delayed Timed Cook, see “Cook Time” section.
CLEAN Self Cleaning
cycle
See the “Self-Cleaning Cycle” section in the Owner’s Manual.
CONTROL LOCK (Hold
3 sec)
Oven control
lockout
1. Check that the oven and cooktop are off.
2. Press and hold CONTROL LOCK for 3 seconds.
3. A tone will sound and a lock will be displayed.
4. Repeat to unlock. No keypads will function with the controls locked.
Cooktop Use
WARNING
Fire Hazard
Turn off all controls when done cooking.
Failure to do so could result in death or fire.
Coil Elements and Burner Bowls (on some
models)
Coil elements should be level for optimal cooking results. Burner
bowls, when clean, reflect heat back to the cookware. They also
help catch spills.
Cookware should not extend more than 1/2" (1.3 cm) over the coil
element. If cookware is uneven or too large, it can produce excess
heat, causing the burner bowl to change color.
� Weight of the Cookware to be no Lighter than 1 lb.
� Discoloration of Medallion of the Coil Element is expected over
time.
� Starting in June 2018 Maytag is equipping this product with
new temperature-limiting coils pursuant to the updated
standards in UL858. These new coils may vary cooking times
compared to your old cooktop, e.g., a slightly longer time to
boil large volumes of water.
Ceramic Glass
The surface cooking area may glow red when an element is ON.
Some parts of the surface cooking area may not glow red when an
element is ON. The glow will also randomly cycle off and back on
again, even while on Hi, to keep the cooktop from extreme
temperatures. This is normal operation.
It is normal for the surface of light-colored ceramic glass to appear
to change color when surface cooking areas are hot. As the glass
cools, it will return to its original color.
Clean the cooktop after each use to help avoid scratches, pitting,
abrasions, and to condition the glass surface. Affresh
®
Cooktop
Cleaner and the Cooktop Scraper are also recommended for
stubborn soils. Do not use abrasive cleaners, cleaning pads, or
harsh chemicals for cleaning. The Cooktop Care Kit contains all of
the items needed to clean and condition your ceramic glass
cooktop. Refer to the “Range Maintenance and Care” section in
the Owner’s Manual for additional information.
IMPORTANT: To avoid permanent damage to the cooktop surface
and to make soils easier to remove, clean the cooktop after each
use to remove all soils.
� Avoid storing jars or cans above the cooktop. Dropping a
heavy or hard object onto the cooktop could crack the cooktop.
� To avoid damage to the cooktop, do not leave a hot lid on the
cooktop. As the cooktop cools, air can become trapped
between the lid and the cooktop and the ceramic glass could
break when the lid is removed.
� For foods containing sugar in any form, clean up all spills and
soils as soon as possible. Allow the cooktop to cool down
slightly. Then, while wearing oven mitts, remove the spills
using a scraper while the surface is still warm. If sugary spills
are allowed to cool down, they can adhere to the cooktop and
cause pitting and permanent marks.