Meade Instruments Autostar Suite Desktop Observing For Windows Version 3.
This document and the Autostar Suite software described herein, are copyrighted and are protected from reproduction, proliferation, and disclosure under the Copyright laws of the United States of America. Information in this document is subject to change without notice and does not represent a commitment on the part of Meade Instruments, Inc. The software and/or databases described in this document are furnished under a license agreement or nondisclosure agreement.
LIMITED WARRANTY LIMITED WARRANTY. Meade Instruments warrants that (a) the SOFTWARE will perform substantially in accordance with the accompanying written materials for a period of ninety (90) days from the date of receipt, and (b) any hardware accompanying the SOFTWARE will be free from defects in materials and workmanship under normal use and service for a period of one (1) year from the date of receipt.
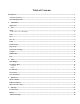
Table of Contents Introduction .................................................................................................................................................. 5 A Note on Accuracy................................................................................................................................................. 5 System Requirements..............................................................................................................................................
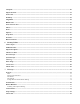
Viewpoint ............................................................................................................................................................... 20 Object Selection..................................................................................................................................................... 21 Lock Az/El..............................................................................................................................................................
Communications.................................................................................................................................................... 35 Start Network Server ............................................................................................................................................ 35 Comm Port Setup ..................................................................................................................................................
Chapter 2 File 5 Introduction Welcome to Autostar Suite, the Desktop Observatory. Now you can perform many of the same computer assisted observing tasks as professional astronomer would do on a large institutional observatories. With Autostar Suite you can: • View the sky as it appears from anywhere on Earth. • See over 45,000 stars in their B-V colors. • View scaled representations of over 13,000 clusters, nebulas, galaxies and other deep sky objects.
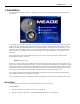
Chapter 2 File 6 1. Installation Insert the Setup disk into the cdrom drive. Normally, after a moment or two the following display will appear on the your monitor: To install the entire Autostar Suite, simply move the cursor over the “Install Autostar Suite” button and click the left mouse button. You will prompted through the balance of the installation. In addition to the Autostar Suite, the CDROM also contains this manual and manuals for the Autostar Image Processing module and the LPI camera.
Chapter 2 File 3. Select either Cities or Observatories, then select your desired location. 4. Check the Timezone and Daylight Savings status by clicking on the Set Timezone button. The Set Timezone dialog box will be displayed. 5. Click on the OK button in the Set Timezone dialog box to return to the Set Location dialog box. 6. If you are satisfied with your selection, click on the OK box. Otherwise, make another selection, then click the OK button. 7.
Chapter 2 File 8 2. File The file menu contains a number of commands for opening and closing image files, printing images and selecting and maintaining the various databases used by Autostar Suite. Open The Open command allows you open either images or spectrographs in any of the following formats.
Chapter 2 File 9 After the image is loaded in 16 bit format, a histogram is constructed that shows the distribution of the data contained in the image. Normally the data is distributed in a rather narrow range of values which lends itself to scaling to the 8 bit format. Once the histogram is constructed, the Threshold values of the data is calculated and are used to set the scaling range. This gives a reasonable starting point for scaling most images.
Chapter 2 File 10 Printer Setup Displays the Printer Setup dialog box which allows the selection of any of the currently installed printers. By selecting the Setup button, the Setup dialog box for the current printer is displayed. You can alter the settings for printer using its setup dialog. To make the highlighted printer the default printer, you must click on the “Set As Default Printer” button.
Chapter 2 File 11 Autostar Suite allows up to 8 custom catalogs and on minor planet/cometary catalog to be used in any starmap. To change edit the custom catalog, you can simply type the name of the catalog or you can use the browse button to navigate around your system to locate a desired catalog. Catalogs can be enabled or disabled by checking the box next to the catalog name. Custom catalogs are simple ascii text files with columns of data.
Chapter 2 File 12 Build Tables Re-builds the files used for the Right Ascension and Declination crosses or circles. This is useful only if the data files have been corrupted. Exit Shuts down Autostar Suite in an orderly fashion and returns to the Windows Manager. If there are any modified files opened, you will be prompted to save those files.
Chapter 3 Time 13 3. Time The Time functions allow you to set the time and date, display the current time in a variety of formats, and select the location from which you want to observe. You may select a time and date anywhere from January 1, 4713 B.C. to December 31, 9999 A.D.. However, you would normally select dates that correspond to your planned observing sessions. If you set a date or time, Autostar Suite's internal clock is halted and all calculations will use your chosen time and date.
Chapter 3 Time 14 Finally, the Local Sidereal Time is shown. This is the Local Apparent Sidereal Time for the current location. Sidereal time is the Right Ascension of any object that is directly overhead (Zenith) at that instance. Or to look at it another way, Sidereal Time is the time that has elapsed since the Vernal Equinox (or first point of Aries) has passed overhead. The sidereal time must always be known when attempting to locate objects in the sky based only on their given coordinates.
Chapter 3 Time 15 own latitude and longitude coordinates. If you enter your own coordinates (or modify predefined values) the Time Display will show User Specified Location instead of the actual location name. This assures that only the predefined (and correct) coordinates are used if you are sending requests to an actual observatory.
Chapter 4 Ephemeris 17 4. Ephemeris The Ephemeris menu allows you to view the parameters of the ephemeral (changeable) objects in the Solar system. The detailed parameters of each object can be viewed individually by selecting the object directly from the menu. The values shown are a function of Autostar Suite's current time value and the precision that is set in the Starmap menu. All values are calculated using the accepted rigorous methods.
Chapter 4 Ephemeris 18 results. These values displayed here are always shown to their full precision, independent of the setting of the Starmap Precision.
Chapter 5 Starmap 19 5. Starmap Autostar Suite provides a highly detailed and extremely accurate map of the sky that includes stars, planets, galaxies, nebulas and other deep sky objects. The map has a number of selectable options that allow you to generate the map in a way that best suits your needs. Once you have configured the starmap to your requirements, you can generate a high quality hard copy version. You can center the starmap on any star, deepsky object, or constellation you choose.
Chapter 5 Starmap 20 In addition to the Reverse switch, two there switches are provided to change the way the animation is handled. The Lock Az/El changes the animation so that the current Azimuth and Elevation of the viewpoint is locked to the center of the display. This method dramatically displays the apparent motion of stars against the sky. The Trails switch, keeps the previous display from being cleared before the next is drawn.
Chapter 5 Starmap 21 To maintain a consistent point of reference of celestial objects, a fixed reference frame must be established. Currently there are two different reference systems in use: the Julian reference (FK5) and the Besselian reference (FK4). The Julian system is based on a year that is exactly 365.25 days in length. The Besselian system is based on the tropical year, which varies from year to year.
Chapter 5 Starmap 22 The New General Catalog of Nebulae and Clusters of Stars was first compiled in 1888 by J.L.E Dreyer. This catalog has been updated since its original publication and two subsequent Index Catalogs were produced. Objects from the NGC catalog have names such as NGC 1984, while the Index Catalog objects use names such as IC 939. The SAO star catalog contains position and other useful information on most of the known stars. It was compiled by the Smithsonian Astrophysical Observatory.
Chapter 5 Starmap 23 dynamically change the limits as you zoom in and out to keep a manageable number of objects displayed. This is the default setting for the program. Hubble Stars The Hubble Stars dialog allows you to enable and disable the display of stars from the Hubble Guide Star Catalog. When enabled, Hubble stars are displayed when the field of view is smaller than 20 degrees. The Hubble catalog includes stars beyond Magnitude 16, so displays can become very dense and redrawing can slow down.
Chapter 5 Starmap 24 The Names option can only be enabled when the corresponding object has been selected. The constellation names and lines may be enabled independently if desired. The Default button sets all of the options to their original default values, The Clear button removes all of the selections. This is useful when making major changes to the options. When new objects are added, only the new items are redrawn on the existing starmap. If an existing item is removed, the entire starmap is redrawn.
Chapter 5 Starmap 25 comets or planets, the Medium mode will give positions that are very close to the actual positions, but will take slightly longer to calculate. Finally, if you desire precision comparable to the Astronomical Almanac, choose the High mode. This mode calculates values using the most rigorous forms of all the equations and corrections needed to accurately determine the objects position to sub-arcsecond accuracy.
Chapter 6 Starmap Utilities 27 6. Starmap Utilities The Starmap Utilities dialog box is displayed by clicking the left mouse button anywhere on the Starmap display. You would normally want to set the cursor over a particular object before clicking the button, but it is not required. The top of the Starmap Utilities box displays the current coordinates of the mouse in (Right Ascension and Declination) at the time the button was pressed.
Chapter 6 Starmap Utilities 28 Sync Telescope If you have the object selected in the center of the eyepiece, clicking on Sync Telescope will align synchronize the telescope’s pointing with the star map. View Log Clicking on View Log opens the observing database.The observing database allows you to keep track of your observations. Autostar Suite automatically fills in the record with information about your observations. The dialog below shows a typical observation record.
Chapter 6 Starmap Utilities 29 All you have to do, is proved a name for your tour, not to exceed 16 characters in length and a brief description of your tour. Add To Tour Once you have created you tour, just point to object in the Sky Map and click to bring up the utilities menu and click the Add To Tour button and a dialog like the one below will apprea: You can enter you own name and description for the object, or take the defaults supplied by the program.
Chapter 7 Telescope 31 7. Telescope The Telescope menu contains a number of commands that allow you to check/set the status of the scope to which you are connected. Protocol There are four different ways to use Autostar Suite to communicate with and control you telescope. The protocol menu allows you to select how you want to talk to your telescope and how your telescope can talk back to you. None Selecting this menu item disconnect the Starmap from the telescope if it is presently connected.
Chapter 7 Telescope 32 When you select a network connection, the following dialog will appear: You will need to enter the network or IP address of the computer running the Network Communications module and its IP port number. By default Autostar Suite uses port 5401. Unless your network administrator requires you to change this value, Meade recommends you leave this setting unchanged. When network communiations is established, you will usually be prompted for a password to access the telescope.
Chapter 7 Telescope 33 By selecting either Circular or Rectangular the display will change from an X/Y entry mode to diameter entry mode as appropriate. Remote Handbox The Remote Handbox module allows to access and exercise all of the functions of the Autostar Telescopes from your computer’s desktop. When you select this menu item, a dialog box like the one below will appear. The dialog is conposed of three main sections. On the left side of the dialog box is the Autostar menu tree.
Chapter 7 Telescope 34 The Menu Tree at the left allows you to look at the entire Autostar menu at once. To access a particular function, all you need to do is click on the terminal menu item (menu items without a plus or minus next to them). It is fast and saves a lot of keytrokes. When the Autostar is requesting data, data can be entered from the PC keyboard. Additionally the PC arrow keys act like the scroll buttons on the keypad. The ENTER key on your PC keyboard acts as the ENTER key on the handbox.
Chapter 7 Telescope 35 Scope Settings Selecting the Scope Settings menu brings up the dialog above. It allows you change and examine key settings in your Autostar telescope. Auto Track Selecting the Auto Track command, when connected to an Autostar telescope, toggles the this feature. When this menu item is checked, the feature is enabled and causes the star map to automatically change its display to keep the location to which the telescope is pointing on the display.
Chapter 7 Telescope 36 When this module is running, it allow network users to access and control your telescope. It can also be run locally to allow multiple modules on your own computer to share access to a single serial port telescope connection on your PC. When initially started, the server is idle and will not accept a connection. To configure the server you sould first enter the serial port numbers into the windows. Enter the number of the port connected to the Autostar into the Scope Port field.
Chapter 7 Telescope 37 Normal settings for the serial port to talk to an Autostar or LX200 telescope are Baud Rate 9600 Parity Check Not Checked Flow Control None Data Bits 8 Parity None When you have configured the settings for you scope or modem, click OK. These settings will be remembered the next time you run your scope. Test Comm Port This command allows you to send test strings over the serial port and see the responses to your commands.
Chapter 7 Telescope 38 via serial ports on the PC, or may connect via a network to a remote telescope. Once you have configured the connection you desire, check the appropriate box to connect to the Observatory Controller and Autostar telescope. In addition to controlling the observatory structure, the controller also keeps a running log of telescope pointing, air mass and auxiliary instrumentation in the Log File. The name and location of this file can be set from the main window.
Chapter 7 Imaging 39 8. Image The Imaging menu allows you to control all of Meades astronimcal imaging cameras from within the Autostar Suite. LPI Selecting this command brings up the LPI imaging module. When clicked a dialog like the one below appears. For complete details on the LPI Imaging Module, see its separate operating Manual Pictor Selecting this command brings up the Pictor View imaging module. When clicked a dialog like the one below appears.
Chapter 7 Imaging 40 It will allow image with the entire line of Meade Pictor CCD Cameras. For complete operating instructions on this software, see the Pictorview Reference Manual. Pictor Guiding Selecting this command brings up the Pictor 200 Serial Autoguider module. When clicked a dialog like the one below appears.
Chapter 7 Imaging For detailed instruction on operating the Pictor Autoguider, see the Auto Guider manual.
Chapter 9 Options 43 9. Options The Options menu contains a variety of commands that are useful in setting up or optimizing your display for the current task at hand. Night Vision The Night Vision command changes all of the standard system colors to shades of red to help maintain your eyes adaptation to the dark. This is useful if you are using the program during actual observing session in the observatory or in the field. After selecting this option you should also lower the brightness on your monitor.
Appendix A 45 Appendix A Image Processing Basics Image processing allows you to modify the appearance of an image by applying various types of filters, scaling options or transformations. The simplest type of processing is linear scaling. With linear scaling, one pixel from the source image is multiplied by a scale factor, then an offset term is added. The original pixel value is then replaced with the resulting value. This process is repeated on each pixel in the image.
Appendix A 1 1 1 1 1 1 46 1 1 1 Each pixel, including the center one, would be multiplied by 1, then the sum of each of these terms is calculated. The result is then divided by the sum of each of the kernel values, in this case 9. Finally, the center pixel value is replaced with the new result. This process is then repeated for every pixel in the image. There are many different kernels that you can create that give various results.
Appendix B Appendix B Constants Astronomical Unit Parsec Light-year Gravitational Constant Velocity of Light Sidereal Year Mass of the Earth Radius of the Earth at the Equator Orbital Velocity of the Earth Mass of the Sun Radius of the Sun Luminosity of the Sun Effective Temperature of the Sun Mass of the Moon Radius of the Moon Radius of the Moon's Orbit Sidereal Month Synodic month Distance of the Sun from the center of the Galaxy Velocity of the Sun about the Galactic Center Diameter of the Galaxy Mass
Bibliography 49 Bibliography George O. Abell, Abells Drama of the Universe, Holt, Reinhart and Winston, 1978 Almanac For Computers 1990, Nautical Almanac Office, United States Naval Observatory, Washington, D.C., 1990 Astronomical Almanac, U.S. Government Printing Office, Washington, D.C., 1984, 1991, 1992 Jean Audouze and Guy Israel, Ed., The Cambridge Atlas of Astronomy, Press Syndicate of the University of Cambridge, 1988 J. Kelly Beatty and Andrew Chaikin, Ed.
Glossary 51 Glossary absolute magnitude - the apparent magnitude an object would have if it were moved to a distance of 10 parsecs. altitude - angular distance of an object above or below the horizon expressed in deg, min, sec. Positive values are above the horizon, negative values are below. angular diameter - the apparent diameter of an object expressed in angular measure i.e., deg, min, sec. aperture - the diameter of the objective lens or primary mirror of a telescope.
Glossary 52 color index - difference between two magnitudes measured in two different spectral regions. For example, B-V which is the difference between the B(blue) magnitude centered in the blue and the V(visible) magnitude, which corresponds to yellow-orange. coma - an optical defect that affects only image details away from the center of the field of view causing stars to appear flared, like tiny comets pointing inward from the edge of the field.
Glossary 53 nutation - a short period oscillation superimposed on the Earth's precession caused by the gravitational torques of the Sun and Moon. obliquity of the ecliptic - the inclination of the plane of the ecliptic with respect to the celestial equator, currently it is approximately 23.5 degrees. parsec - the distance from the Earth an object would have to be so that it's parallax would be one second of arc. One parsec is equivalent to approximately 3.26 LY.
Index Index Accuracy notes on, 5 Animation.
Index Protocol Remote Handbox, 31 Scope Settings, 33 Talking Scope, 32 telescope field of view, 30 Time, 13 local mean solar, 13 local sidereal, 14 local solar, 13 setting, 14 time display, 13 universal (UT), 13 Timezone setting, 14 Topocentric, 23 Universal Time, 13 User Files adding new entries, 25 editing, 11 setting defaults, 11 VGA setting a 16 level gray scale, 41 Viewpoint setting, 20 Zoom, 22 56