User Guide CONTINUOUS GLUCOSE MONITORING SYSTEM
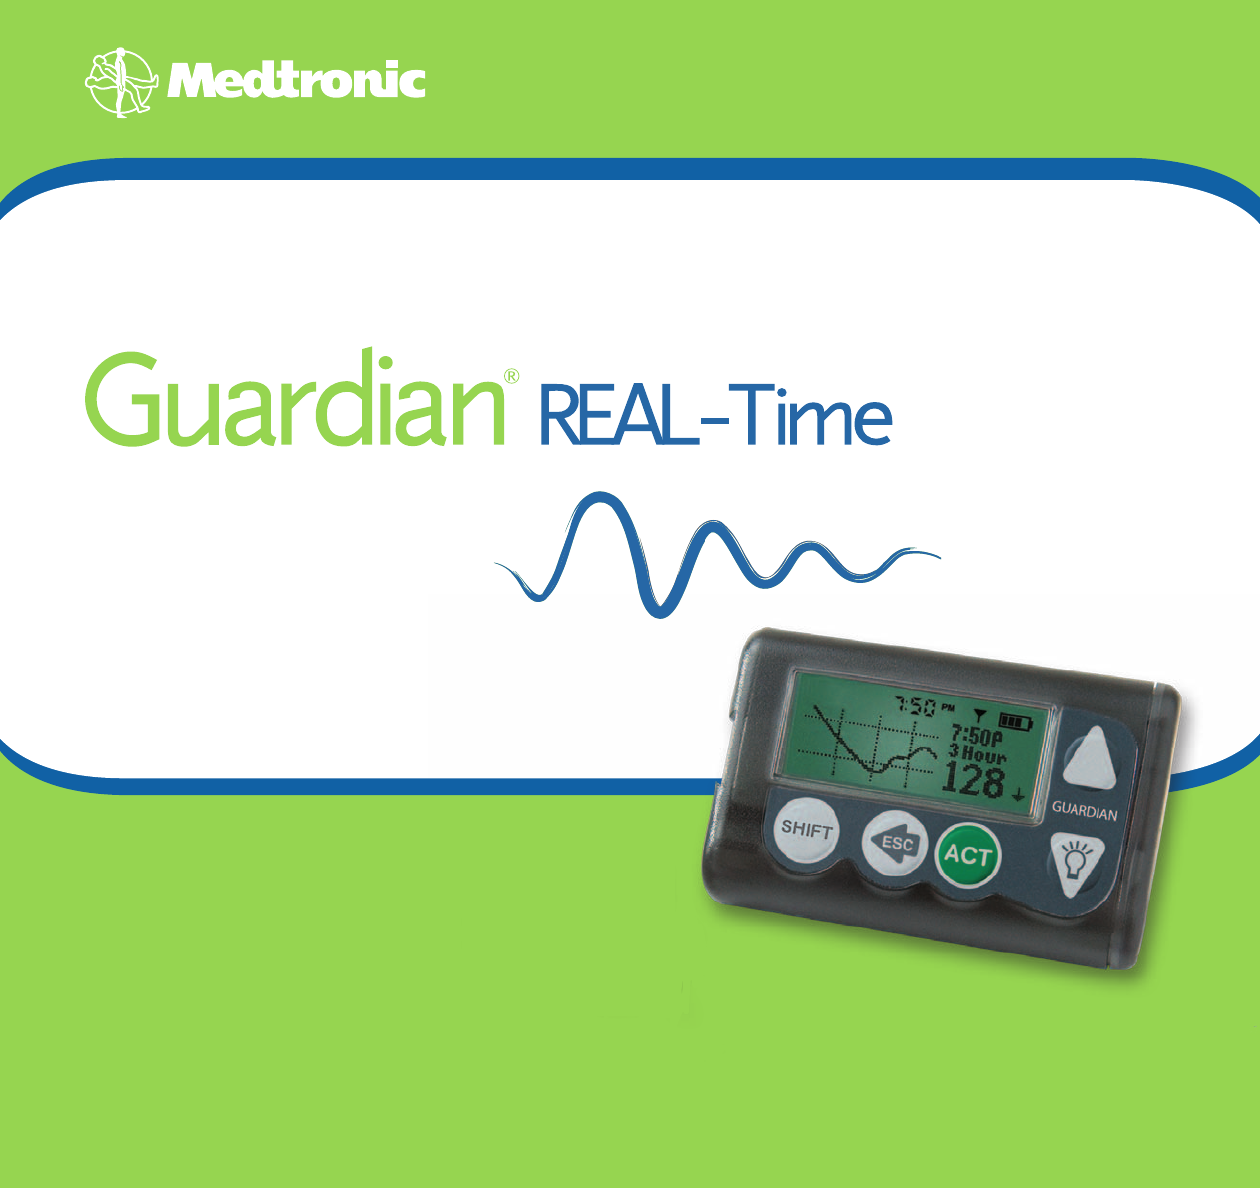
Guardian® REAL-Time Continuous Glucose Monitoring System User Guide
©2006, Medtronic MiniMed, Inc. All rights reserved. This product is covered by U.S. Patents. Other U.S. and/or foreign patents may be pending. Please visit http://www.medtronicdiabetes.com/patents for a listing of patents covering this product. CareLink®, Guardian®, MiniLink®, and Sen-serter® are registered trademarks of Medtronic MiniMed, Inc. CONTOUR® is a registered trademark of Bayer. Energizer® is a registered trademark of Eveready Battery Company. Glucagon™ is a trademark of Eli Lilly and Company.
Contacts: Africa: Medtronic Africa (Pty) Ltd. Tel: +27 (0) 11 677 4800 Australia: Medtronic Australasia Pty. Ltd. Tel: 1800 668 670 (product orders) Tel: 1800 777 808 (customer help) Azerbaijan: Isomed Tel: +994 (12) 464 11 30 Bangladesh: Sonargaon Healthcare Pvt Ltd. Mobile: (+91)-9903995417 or (+880)-1714217131 Belarus: Badgin Ltd Tel: +375 17 313 0990 België/Belgique: N.V. Medtronic Belgium S.A. Tel: 0800-90805 Bosnia and Herzegovina: Medimpex d.o.o.
Latvija: Ravemma Ltd. Tel: +371 7273780 Polska: Medtronic Poland Sp. Z.o.o. Tel: +48 22 465 6934 Macedonia: Alkaloid Kons Dooel Tel: +389 2 3204 430 Portugal: Medtronic Portugal Lda Tel: +351 21 7245100 Fax: +351 21 7245199 Magyarország: Medtronic Hungária Kft. Tel: +36 1 889 0688 Malaysia: Medtronic International Ltd. Tel: +603 7946 9000 Middle East and North Africa: Regional Office Tel: +961-1-370 670 Montenegro: Glosarij Tel: +382 20 642 495 Fax: +382 20 642 540 Nederland, Luxembourg: Medtronic B.V.
Österreich: Medtronic Österreich GmbH Tel: +43 (0) 1 240 44-0 24 – Stunden – Hotline: 0820 820 190 Česká republika: Medtronic Czechia s.r.o.
Contents Chapter 1: Introduction ..................................................................... 1 Assistance ...................................................................................................... 1 Emergency kit ................................................................................................. 2 Your system ................................................................................................... 2 Accessories ...................................................
The monitor screen ......................................................................................... The HOME screen ......................................................................................... Icons ........................................................................................................ Sensor icon .............................................................................................. Battery icon ..................................................................
AUC calculation ........................................................................................... Setting the Alarm Snooze ............................................................................... Setting the Cal Reminder ............................................................................... Entering the transmitter identification number ..................................................... Setting up the Missed Data option ...........................................................
3 hour graph ............................................................................................ 6 hour graph ............................................................................................ 12 hour graph .......................................................................................... 24 hour graph .......................................................................................... How to check for rapid changes in sensor glucose .........................................
Logbook .................................................................................................... 82 Chapter 9: Troubleshooting and alarms/alerts ........................................ 83 About alarms and alerts .................................................................................... What to do when you get an alarm/alert ............................................................... Sensor alerts ....................................................................................
Connecting the tester ................................................................................... Disconnecting the tester ................................................................................ Troubleshooting the monitor .............................................................................. My monitor will not display my BG measurement from my meter ................................ Reconnect old sensor ...............................................................................
High and low Glucose Limits (CSS7100) ................................................................ High and low Glucose Limits (CSS7100K) ............................................................... Daily totals .................................................................................................. Default screen .............................................................................................. Default settings ...................................................................
Glossary ...................................................................................... 155 Index .........................................................................................
Introduction Chapter 1 Thank you for choosing Medtronic Diabetes (legally known as Medtronic MiniMed, Inc.) as your diabetes management partner.
Department Telephone number 24 Hour HelpLine (calls within the United States) 800.646.4633 24 Hour HelpLine (calls outside the United States) +1 818 576 5555 Web site www.medtronicdiabetes.com Emergency kit You should keep a diabetes emergency kit with you at all times - and be sure a family member, friend or co-worker knows where it is.
• Sensor — The sensor (MMT-7002/MMT-7003) is a membrane-covered electrode inserted through the skin into the fatty layer underneath with an insertion device. The sensor tells the transmitter how much glucose is in the interstitial fluid at the insertion site. The transmitter sends this data to the monitor and the monitor screen shows you the reading. Medtronic offers the following accessories to help you better use and more easily wear your monitor.
Conventions used in this guide The conventions used in this guide are defined in the following table. Conventions Meaning Press Push and release the button. Hold Press and keep pressure on the button. Press ESC, ACT Press the ESC button, then press the ACT button. When two buttons are separated by a comma (,) it means to press the first button, then press the next button. Select Choose an item or a value from a menu or screen. Use the and buttons to make your selections.
User safety This section includes important safety information such as indications, contraindications, safety warnings, potential adverse reactions, and how to protect the system from radiation exposure damage. Indications: CSS7100 Chapter 1 The Guardian REAL-Time CGM System (CSS7100) is indicated for continuous or periodic monitoring of glucose levels in the fluid under the skin, in adults (18 years and older) with diabetes mellitus, for the purpose of improving diabetes management.
The Guardian REAL-Time CGM System (CSS7100K) provides real-time glucose values that allow users to track patterns in glucose concentrations and to possibly identify episodes of low and high blood glucose. It also stores the data so that it can be analyzed to track patterns. Glucose data can be further downloaded to PC software for analysis of historical glucose values.
Meter Do not use an RF-capable meter to send blood glucose measurements to your monitor while traveling on an aircraft or if it interferes with another transmitting device. Precautions Avoid extreme temperatures • • Chapter 1 Although the monitor has multiple safety alarms, it cannot tell you about all potential problems. You must test your blood glucose levels at least two times per day. If your blood glucose is out of range, then check your blood glucose using your blood glucose meter.
Damage due to radiation If you are going to have an X-ray, MRI, diathermy treatment, CT scan, or be exposed to other types of radiation, REMOVE YOUR MONITOR, TRANSMITTER, and SENSOR and leave them outside the radiation area. The Guardian REAL-Time CGM System monitor and transmitter are designed and tested to tolerate common electromagnetic interference, including microwave ovens. The monitor is designed to withstand common electromagnetic interference, including airport security systems.
These devices generate, use, and can radiate radio frequency energy and may cause interference to radio or television communications, even if installed and used according to the instructions. If these devices do cause interference, try to correct the interference by one or more of the following measures: • • The transmitter and meter send information to the monitor using radio frequency.
RF interference from other devices Common consumer electronic devices that transmit in the same frequency band used by the MMT-7703 MiniLink transmitter may prevent the Guardian REAL-Time monitor from receiving the glucose information sent by the transmitter. Most cellular (mobile) phones and 900 MHz cordless phones, when transmitting or receiving, may cause significant interruption of transmitter-receiver communication.
The basics CAUTION: Never use sharp objects to press the buttons on your monitor as this can damage the buttons or compromise the seal on the monitor. Some examples of sharp objects that can damage the buttons or the seal are fingernail files, pens, pencils, paper clips, knives, scissors, and keys. Chapter 2 The monitor The screen shows information such as your real-time sensor glucose measurements, alarm/alert messages, current settings, and status readings.
Battery life varies widely depending on the way you use your monitor. Some of the use factors that affect battery life include: • • • • the alert type you choose the number of alerts you receive how much you use the backlight how long you display the graphs To install the battery: 1 2 3 If your new battery has been stored in a refrigerator or other cold environment, you must let it warm up to room temperature before installing it in your monitor.
6 8 Chapter 2 7 If the HOME screen appears, then go to the next step. If the HOME screen does not appear: a. Make sure that the battery is inserted correctly. If not, remove the battery and install it properly as described in the previous steps. b. If the monitor still does not turn on, or if you receive a FAILED BATT TEST alarm, then remove the battery and replace it with a new one. c. If the monitor still does not turn on, then call the HelpLine.
Button Description • Accept the selected menu item. • Choose a setting when entering or changing settings. • Open the MAIN MENU from the HOME screen. • Clear alarms/alerts (press ESC, then press ACT). • Return to previous screen or menu. • Open the following screens and graphs from the HOME screen: • The sensor glucose graphs. • The STATUS screen and SENSOR STATUS screen. • The SENSOR DEMO screens (if the feature is turned On).
The monitor screen The screen shows five lines of text at one time. The first is the operating mode. The second is the current open menu or function. The last three lines show either information or text that you can select for the current function. The HOME screen Sensor icon Battery icon Time When the monitor is on, the time and the battery icons always show across the top of the HOME screen.
Battery icon This icon shows when a battery is installed in the monitor. There are four segments in the icon. Each segment represents approximately 25 percent of the usable battery life you have left until you reach Low Battery point. If you only have one segment left, make sure you have a new battery available. At least 75% Battery indicator icons Low battery Time of day icon The current time of day shows across the top of the monitor screen in the format you select — 12 hour or 24 hour.
Alarm/alert types You can set up your monitor to either beep or vibrate when an alarm or an alert occurs. See the next chapter for details on setting the alert type. Operating modes The screen tells you when a special feature is active or if there is a condition that needs your attention. The monitor status will determine the operating mode. The screens for the different modes are shown below. Chapter 2 Normal mode No alarms or alerts are active.
The screen shows the name of the alarm and information about how to clear it (press to see the information on clearing the alarm). In this example, the alarm is the FAILED BATT TEST alarm. Menus There are three menus. Each menu contains different menu items that you select to set up the system and to view information. MAIN MENU This is the first menu in the system. It contains the following submenus: SENSOR, CAPTURE EVENT, and UTILITIES. To open the MAIN MENU, press ACT from the HOME screen.
The STATUS screen The STATUS screen shows any recent activity, the condition of the monitor battery, and which special features are active, if any. • • To open the STATUS screen from the HOME screen, press ESC until the STATUS screen appears. • To return to the HOME screen, press ESC until the HOME screen appears. To view additional information, press . For details on the information shown in the STATUS screen, see the Using your system chapter.
20 The basics
Entering your settings Basic steps Perform these basic steps in the order shown. Make sure that you have installed the battery in your monitor. Make sure that you have the information you need to begin. Set the time and date. Set the alert type. Enter your glucose monitoring settings. Review your settings. Save your settings. Modify your settings as needed.
4 Use a. b. c. d. e. / to set the correct time and date as follows: Set the correct hour, then press ACT. Set the correct minutes, then press ACT. Set the correct year, then press ACT. Set the correct month, then press ACT. Set the correct day, then press ACT. Minute Hour Month 5 6 22 Year Day If you are setting up your monitor for the first time, then the TIME/DATE CORRECT screen appears. a. Make sure that the time and date shown on the screen is correct. b.
Selecting the language If you do not read English, the next step is to change the Language setting so that all text information, alarms, alerts, sensor updates, meter blood glucose measurements, and sensor glucose measurements show on your screen in your language (some languages are not available on all monitors). You must make this change using the English menus until the language setting is actually changed. To change the language setting: 1 Open the LANGUAGE MENU.
Setting your Alarm/Alert Type You can set your monitor three different ways to let you know when there is an alarm, alert, or special conditions or programming (see the Troubleshooting and alarms/alerts chapter for details). The default setting is Beep Medium, but you can select Beep Long, Beep Short, or Vibrate. The Vibrate setting uses more battery power than beep settings and may shorten battery life.
Turning on the sensor The sensor must be turned on, started and initialized to report glucose measurements. 1 Open the EDIT SETTINGS screen. MAIN MENU > Sensor > Sensor Setup > Edit Settings 2 3 The EDIT SETTINGS screen appears with Sensor: Off selected. Press ACT. The SENSOR ON/OFF screen appears with Off selected. Select On, then press ACT. The EDIT SETTINGS screen appears showing the sensor is now turned on.
Setting the Glucose Limits After you turn the Glucose alerts On, then you need to set the high and low Glucose Limits recommended by your healthcare professional. Your recommended glucose limits may vary throughout the day, so your monitor allows you to set up to eight pairs. A Glucose Limit pair includes one High Glucose Limit and one Low Glucose Limit, as shown in the following table: Glucose Limit pair Alerts Low: 60 mg/dL (3.3 mmol/L) for CSS7100 90 mg/dL (5.
12:00 AM 12:00 AM 9:00 AM Glucose Limits 1 High Glucose Limit: 240 mg/dL (13.3 mmol/L) Low Glucose Limit: 60 mg/dL (3.3 mmol/L) 12:00 AM - 9:00 AM (9 hours) Glucose Limits 2 High Glucose Limit: 250 mg/dL (13.9 mmol/L) Low Glucose Limit: 80 mg/dL (4.4 mmol/L) 9:00 AM - 12:00 AM (15 hours) To set up your Glucose Limits: 2 3 4 5 6 7 8 9 Make sure the EDIT SETTINGS screen is open. MAIN MENU > Sensor > Sensor Setup > Edit Settings Select Glucose Limits, then press ACT.
10 Select your Low Glucose Limit. The available range is: • 40 to 390 mg/dL (2.2 to 21.6 mmol/L) for CSS7100 • 90 to 390 mg/dL (5.0 to 21.6 mmol/L) for CSS7100K 11 Press ACT. The default High Glucose Limit flashes (OFF). 12 Select your High Glucose Limit, then press ACT. The value must be between: • 50 and 400 mg/dL (2.8 and 22.2 mmol/L) for CSS7100 • 100 and 400 mg/dL (5.56 and 22.2 mmol/L) for CSS7100K 13 Press ACT. The SET START TIME 3 screen appears.
4 Press ACT. The EDIT SETTINGS screen shows that the High Snooze is set. Setting the Low Snooze After you receive and clear a Low Glucose, Fall Rate of Change, or Low Predictive alert, the alert will repeat until the condition that caused the alert is resolved. The Low Snooze feature allows you to set how frequently you want the alert to repeat after you clear it the first time. 1 2 3 4 Make sure the EDIT SETTINGS screen is open.
4 Select the Time Sensitivity (how many minutes before you reach your Low Glucose Limit). 5 to 30 minutes (0:05 to 0:30) • Range: • 5 6 5 minutes Press ACT. The HIGH time setting flashes the default time: 15 minutes. Select the Time Sensitivity (how many minutes before you reach your High Glucose Limit. 5 to 30 minutes (0:05 to 0:30) • Range: • 7 Increments: Increments: 5 minutes Press ACT. The EDIT SETTINGS screen appears.
3 Select the Fall Rate Limit. mmol/L/min • Range: • 4 5 6 Increments: from 0.061 to 0.277 mg/dL/min from 1.1 to 5.0 mmol/L/min 0.005 mg/dL/min 0.1 Press ACT. The SET RISE RATE LIMIT screen flashes the rate alert default setting: OFF. Select the Rise Rate Limit. The range and increments are the same as the Fall Rate Limit (see step 3 above). Press ACT. The Rate alerts will now use your settings.
400 (22.2) 350 Glucose Concentration mg/dL (mmol/L) (19.4) 280 (15.5) AUC High Average = 30 mg/dL (1.7 mmol/L) 210 (11.6) 140 (7.8) 70 (3.8) 40 AUC Low Average = 3.9 mg/dL (0.2 mmol/L) (2.2) 12:00 A 4:00 A 8:00 A 12:00 P 4:00 P 8:00 P 12:00 A The default AUC Limits are: • • Low AUC Limit: 70 mg/dL (3.9 mmol/L) High AUC Limit: 180 mg/dL (10.0 mmol/L) To set the AUC Limits: 1 2 3 4 5 6 32 Go to the AUC MENU.
Setting the Alarm Snooze After you receive and clear a METER BG NOW alert, the monitor will repeat the alert until you enter a new meter blood glucose measurement. The Alarm Snooze feature allows you to set how frequently you want the alert to repeat after you clear it. 1 2 3 4 Make sure the EDIT SETTINGS screen is open. MAIN MENU > Sensor > Sensor Setup > Edit Settings Select Alarm Snooze, then press ACT. The SET ALARM SNOOZE screen flashes the default Alarm Snooze time of 30 minutes (0:30).
Entering the transmitter identification number The Transmitter ID starts with 2 and is found on the flat side of your transmitter. You must enter the transmitter identification number so that the transmitter and monitor can communicate with each other. Write the Transmitter ID of the transmitter you are using here: __________________. 1 2 3 Make sure the EDIT SETTINGS screen is open. MAIN MENU > Sensor > Sensor Setup > Edit Settings Select Transmitter ID, then press ACT.
4 Press ACT. The EDIT SETTINGS screen shows the length of time you entered for the Missed Data option. Setting the sensor glucose graph timeout The sensor glucose graph timeout is how long the graph shows on the monitor screen until the HOME screen automatically appears. The default timeout is two minutes, and you can set it for two, four, or six minutes. Using a continuous graph display You can also select NONE to set the sensor graph timeout to display continuously.
4 Save your settings after you have set your preferences so that you can restore the settings you have saved if you receive an alarm/alert or error that resets your settings. Using the Sensor Demo The Sensor Demo shows you demonstrations of the sensor graphs and the Sensor Status screen. To view the Sensor Demo screens, you must first turn on the Sensor Demo feature. Turning on the Sensor Demo feature 1 Make sure the EDIT SETTINGS screen is open.
Setting up your transmitter and sensor Basic steps After you have set up your monitor, there are a few basic steps that you must complete to set up your transmitter and sensor for use. Perform these steps in the order below. 1 2 3 4 5 6 Install the charger battery. Charge the transmitter battery. Insert the sensor into your body. Connect the transmitter to the sensor. Start the sensor. Enter your first meter BG.
2 Insert a new AAA or LR-03 battery with the flat (-) end first. Make sure that you align the small bumps on the battery cap with the small notches in the charger’s battery opening. Push in the cap all the way using a coin. Turn the cap clockwise 1/4 turn to close. 3 If the battery is installed incorrectly or is low, the charger will not work. Repeat the steps above using a new battery.
green light 4 5 When charging is complete, the green light on the charger will stay on, without flashing, for 15 to 20 seconds and then turn off. After the green charger light turns off, disconnect the transmitter from the charger. The green light on the transmitter will flash for approximately five seconds and then turn off. Chapter 4 Inserting the sensor Refer to your Sensor User Guide for information on sensor insertion.
3 Hold the transmitter as shown. Line up the two notches on the transmitter with the side arms of the sensor. The flat side of the transmitter should face the skin. 4 Slide the transmitter onto the sensor until the sensor’s flexible arms snap into the notches on the transmitter. If the transmitter is properly connected, and if the sensor has had enough time to become hydrated, the green light on the transmitter will flash within 10 seconds.
Entering the first meter blood glucose You cannot enter a meter blood glucose (meter BG) measurement into your monitor until you receive a METER BG NOW alert. If you enter a meter BG measurement before you receive this alert, it will not be used by your system for a calibration. Your monitor will show a METER BG NOW alert after the two-hour initialization period. This alert prompts you to enter a meter BG reading into the monitor to calibrate the sensor.
42 Setting up your transmitter and sensor
Meter option About meters Bayer's CONTOUR® NEXT LINK Wireless Meter (Model No. 6201/9624), the LifeScan OneTouch® UltraLink® meter, or the BD Paradigm Link™ meter can be programmed to communicate wirelessly to the Guardian® REAL-Time System. When the wireless feature is turned on, glucose values transmitted from these meters to the Guardian monitor are stored in memory and used for glucose sensor calibration. Your monitor is set at the factory with the meter option turned off.
Meter rules If you want your monitor to communicate with the meter, the following conditions must apply: 1 2 3 4 5 The meter option must be turned on and programmed. Refer to the instructions in this section. Your monitor must be within 4 feet (1.2 meters) of your meter to receive the blood glucose reading. The monitor cannot have a LOW BATTERY alert condition. The blood glucose measurement from the meter will appear as the default blood glucose value on the ENTER BG screen.
4 Reviewing meter IDs a. Select Review ID, then press ACT. b. The programmed IDs will show in the REVIEW METER ID screen. Exit the menus when you are done.
46 Meter option
Using your system Calibrating your system Calibrating your system helps to make sure that the glucose readings from the sensor are as accurate and reliable as possible. You must periodically enter meter BG measurements to calibrate your system; however, do not enter a meter BG until at least two hours after you have started a new sensor. CAUTION: Sometimes your glucose levels change so rapidly that blood glucose measurements taken during those times should not be used to calibrate your system.
What are the best times to calibrate the system? It is suggested that you calibrate your system at the following times: • • Before meals Before going to bed What should I do if I have my RF meter is set to automatically transmit my fingerstick BG measurement and my blood glucose is changing rapidly when I take the measurement? It is recommended that you check the sensor glucose (SG) information on your monitor before taking a fingerstick BG measurement.
Time since last calibration What happens • The system will not take glucose measurements again until you enter a new Meter BG measurement. To calibrate your system: 1 Check the sensor icon on the screen to make sure monitor and transmitter are communicating. • Not communicating. Do not enter your meter BG measurement for calibration. Check the • • • • • • 2 3 following: The sensor and transmitter are correctly connected. The sensor has been started. The monitor is not too far from the transmitter.
Capturing Events The Capture Event feature allows you to electronically save certain types of information that is used with Medtronic CareLink Personal software (not available in all locations) to generate treatment reports that you can share with your healthcare professional.
4 5 Make sure that the number shown on the screen is correct. • If the information is correct, press ACT. • If the information is not correct, select No, then press ACT. The CAPTURE EVENT menu reappears with Enter BG selected. Repeat the procedure and enter the correct information. The BG TO UPDATE SENSOR? screen appears. This allows you to use this meter BG reading to calibrate your sensor if you choose.
6 Make sure that the type and amount of insulin shown on the screen is correct. • If the information is correct, press ACT. The information you entered is saved to the system and can now be used in reports. • If the information is not correct, select No, then press ACT. The CAPTURE EVENT menu shows with Enter BG selected. Repeat the procedure to enter the correct information.
6 If the number on the screen is correct, press ACT. The information you entered is saved and can be used in reports. If the information is not correct, select No, then press ACT. The CAPTURE EVENT menu shows with Enter BG selected. Repeat the procedure and enter the correct information. Entering exercise information Follow these steps to enter information about the exercise you do. 1 2 Make a note about how long you exercised (duration), and how difficult or easy the exercise was (intensity).
Entering Other markers This section shows you how to enter markers other than Enter BG, Insulin Marker, Meal Marker, or Exercise Marker. When you enter Other markers, you only enter the type of marker (Other); the time is automatically recorded by the system. Examples of Other markers include: when you take medications, when you feel ill, when you are under stress, etc. These markers then create reports that appear with the name of the marker (Other) and the time you entered it.
• • Reconnect old sensor (two hours). A meter BG entry is needed for calibration. Two other conditions also prevent a real-time SG value and generate a WARM UP message on your sensor glucose graphs: • • You started a new sensor, and it has entered a two-hour initialization. The sensor is not ready to take glucose readings. You entered a BG for calibration, and your monitor is waiting to receive the first valid SG value. Opening and viewing the graphs The following table describes how to use the graphs.
The graphs All graphs show High and Low Glucose Limits lines, a real-time SG measurement line, a data section, and the cursor (flashing vertical line). When you open any graph, the cursor flashes on the right edge of the graph, the data section shows the most recent SG measurement (or the reason why no measurement shows), and the time in the data section matches the time at the top of the screen. Real-time SG measurement line High Glucose Limit line 200 mg/dL (11.
Examples of real-time sensor glucose graphs The following pages show examples of the different graph types. 3 hour graph Each part of the graph between the vertical dashed lines represents one hour. In this example, the selected SG measurement was taken at 14:50 (2:50 p.m.), and the measurement at that time was 150 mg/dL (8.3 mmol/L). Cursor (flashing line) selects a time on the graph; the data section shows the SG measurement for that time, or the reason no SG measurement was taken for that time.
6 hour graph Each part of the graph between the vertical dashed lines represents one hour. In this example, the selected SG measurement was taken at 1:12 a.m., and the measurement at that time was 149 mg/dL (8.2 mmol/L). Cursor (flashing line) selects a time on the graph; the data section shows the SG measurement for that time, or the reason no SG measurement was taken for that time.
12 hour graph Each part of the graph between the vertical dashed lines represents one hour. In this example, LOST SENSOR is the reason no measurement is shown, and it occurred at 14:20 (2:20 p.m.). Cursor (flashing line) selects a time on the graph; the data section shows the SG measurement for that time, or the reason no SG measurement was taken for that time.
24 hour graph Each part of the graph between the vertical dashed lines represents six hours. The shaded area helps you more easily see the sensor glucose measurements for the previous night. In this example, the selected SG measurement was taken at 11:27 a.m. and the measurement at that time was 119 mg/dL (6.6 mmol/L). The shaded area is the 12 hours from 18:00 to 6:00.
How to check for rapid changes in sensor glucose If your sensor glucose (SG) rises or falls faster than a certain rate, Rapid Change arrows automatically appear in the graphs next to the SG number, as shown in this section. You can also set your Rate of Change alerts to tell you when these arrows appear on your SG graphs. The rapid change arrows These examples show how the Rapid Change arrows tell you when your SG rises or falls faster than a certain per-minute rate.
Checking the status of the system The system allows you to check its status (condition) in the following areas: • • • • Condition of the batteries. The age of the sensor. Connection and communication between the sensor and transmitter, and the transmitter and monitor. When the next meter BG measurement is needed to calibrate the system. Checking the monitor battery status The battery status shows you how much energy remains in the battery. 1 2 Make sure the HOME screen appears.
Status Description Next Cal Shows when your next calibration is due. Sensor Age The total number of days and hours that the sensor has been used. Sensor Isig This information is about the signal of the sensor, not sensor status, and is used only by the Medtronic HelpLine for diagnostic purposes. Checking the transmitter status The transmitter status tells you if the transmitter is connected to the sensor, and the status (condition) of the transmitter battery.
How to make glucose alerts silent The Alert Silence feature allows you to make glucose alerts silent for a preset amount of time between 30 minutes and 24 hours. You do not lose information when you silence the glucose alerts. The system still records each glucose alert time and SG measurement. These are your Alert Silence options: • • • • • Off — This means the alerts are On: the monitor will beep or vibrate when any sensor glucose alerts occurs.
5 6 7 Select the alert silence option you want, then press ACT. The SET DURATION screen flashes one of the following: • A set of dashes (if this is the first time you have used the Alert Silence feature, or you just cleared your settings). • The length of time of the last alert silence that you entered. Select your alert silence length between 30 minutes (minimum) and 24 hours (maximum), then press ACT. The SENSOR MENU shows the new alert that you selected to be silent.
Viewing your current settings You can review your current settings at any time. This is useful for making sure that you use the correct settings when troubleshooting and for checking a setting before changing it. 1 From the HOME screen, open the REVIEW SETTINGS screen. Main Menu > Sensor > Sensor Setup > Review Settings The REVIEW SETTINGS screen appears.
Removing the sensor Gently pull the sensor from your body to remove it. Place it in a sharps container. Using your system in water Your monitor is NOT waterproof: remove it before doing any water activities. After the transmitter and sensor are connected, they form a waterproof seal to a depth of eight feet (2.4 meters) for up to 30 minutes. You can shower and swim without removing them. No occlusive dressing is needed.
68 Using your system
Utilities The data management feature The system keeps a daily record of the following types of information for up to 31 days: • • Daily totals — Daily totals of certain information tracked automatically for you by the system. Averages — Averages of certain information calculated automatically for you by the system.
Sensor glucose information The following table lists the different types of SG information that the system automatically records. The SG information is calculated by using all of the SG measurements that were received by the monitor during the day. Item Description SG Average The average sensor glucose measurement. Above Hi Limit The percentage of sensor glucose measurements that were above your High Glucose Limit.
Item Description BG Average The average meter blood glucose measurement. Number BGs The total number of meter blood glucose measurements taken. Meter L/H The lowest and highest meter blood glucose measurements used to calibrate the system (L is the lowest, and H is the highest). Manual L/H The lowest and highest manually entered blood glucose measurements (L is the lowest, and H is the highest). These can be used for calibration or non-calibration purposes.
2 3 4 Press ACT. The DAYS TO AVERAGE screen flashes the number of days you selected the last time you used this feature. Select the number of days that you want to average. For example, if you want to see the averages for the last seven days, select 7. Press ACT. A message tells you that the system is calculating the averages. Then the SENSOR STATS screen shows the SG information for the number of days you selected. The number of days is also shown on the screen.
Reviewing your current Alarm Clock reminders This procedure shows you how to view your current Alarm Clock reminders. The dashes in this example show that you may set up additional reminders. The total number of reminders that you can set up is eight. 1 Open the ALARM OPTION screen. MAIN MENU > Utilities > Alarm Clock 2 3 4 The ALARM OPTION screen appears. Select On/Set, then press ACT. The ALARM CLOCK screen appears. Select Review Alarms, then press ACT.
The Block feature When this feature is turned on, anyone who may have access to your monitor cannot set or change any of your settings. The only features that can be used are the ones that you use to view information. The vibrate alert type is disabled when Block is on. Discuss what uses and settings are best for you with your healthcare professional. To turn the on Block feature: 1 Open the BLOCK OPTION screen. 2 MAIN MENU > Utilities > Block Select On and press ACT. The Block feature is now turned On.
The Lock Keypad feature Lock Keypad prevents accidental keypad presses. When the keypad is locked, you can still press ESC to view the STATUS screen, the SENSOR STATUS screen, and the sensor graphs. A locked keypad is also automatically unlocked when batteries are inserted and when alarms/alerts occur. To lock the keypad: 1 Open the Lock Keypad screen. 2 3 4 MAIN MENU > Utilities > Lock Keypad Select Utilities, then press ACT. Select Lock Keypad, then press ACT. Press ACT to lock the keypad.
3 4 Press ACT. The system automatically runs the Selftest in the following order: a. Screen Test: The screen appears all black. b. Selftest: The monitor counts down from 10 (it skips the number 4). c. Tone Test: You should hear beeps. d. Vibrate Test: You will feel vibrations. After Selftest is finished, TEST COMPLETE shows on the screen. The screen returns to the UTILITIES MENU, then to the HOME screen.
3 4 5 Press ACT. If you have saved your settings before, then a message shows the last time you saved your settings and asks if you want to overwrite them. Do one of the following: • Press ACT to save your current settings. The SETTINGS SAVED message confirms that your current monitor settings have been saved. • Press ESC if you do not want to save your current settings. To return to the HOME screen, press ESC until it appears.
Clearing your settings Use this utility only if you want to clear your current monitor settings and restore the system default settings. CAUTION: Do not clear your monitor settings unless directed by your healthcare professional or by a Medtronic representative. If you clear your monitor settings, then you must re-enter them manually or restore a previously saved version of your settings. To clear your monitor settings: 1 2 3 4 5 6 7 Open the UTILITIES MENU. MAIN MENU > Utilities Select User Settings.
Viewing your User Settings history This feature allows you to view your most recent User Settings operations. The system can store up to 20 User Settings operations for review. There are three types: • • • Save — Saves your current settings. Restore — Restores previously saved settings. Clear — Clears your current settings. To view the User Settings history: 1 2 3 4 Open the UTILITIES MENU. MAIN MENU > Utilities Select User Settings. Hold down SHIFT and press ACT. The USER SETTINGS screen appears.
80 Utilities
Therapy management software Chapter 8 Medtronic provides software to optimize your monitor use. Contact our 24 Hour HelpLine for more information. CareLink® Personal Your Guardian REAL-Time system provides real-time glucose values so that you can track glucose concentration patterns and possibly identify episodes of low and high blood glucose. It also stores glucose data so that it can be analyzed to track patterns and/or downloaded to CareLink Personal for analysis of historical glucose values.
You can share your reports with your healthcare professional. These reports can help you and your healthcare professional to discover trends and other information. This can lead to improved therapy management for greater control. Logbook The logbook allows you to enter the following self-reported information: • • Carbohydrates consumed Exercise activity The data from your logbook is used in the reports you create.
Troubleshooting and alarms/alerts About alarms and alerts The system is designed to tell you whenever something happens that could affect your diabetes management. The system uses alarms and alerts that are separated into the following categories: • • • • Chapter 9 To receive the full benefits of your Guardian REAL-Time CGM System, all parts of the system must work properly.
Follow these steps when you get an alarm or alert: To view the alarm/alert: 1 2 From the HOME screen, review the alarm/alert by pressing any button to see the message. Read the entire alarm or alert message. The message includes instructions on how to fix the alarm or alert condition. Press 3 4 5 to scroll if the message is bigger than your screen. Press ESC to clear the alarm/alert, then press ACT after you read the alarm/alert instructions. The HOME screen appears.
LOST SENSOR Reason: The monitor has not received a signal from the transmitter for more than 40 minutes. Action: Make sure that the sensor is inserted properly and that the transmitter and sensor are connected. Do not disconnect.
Action: If the alert resulted from two Cal Errors in a row, replace the sensor. If the alert happened without two Cal Errors, use the transmitter's tester to make sure your transmitter is working properly. If you received this alert during initialization, you may be able to resolve this alert without replacing your sensor. Call the 24 Hour HelpLine or your local representative for further assistance. SENSOR END Reason: The sensor has reached the end of its life. Action: Replace your sensor.
METER BG BY Reason: A meter BG measurement is required for calibration purposes by the time that is shown on your monitor. The METER BG BY alert is also known as the Cal Reminder alert. Action: Enter a blood glucose measurement. LOW SG HIGH SG Chapter 9 Reason: The sensor glucose number is equal to or lower than your low glucose limit. If you do not set a Low Glucose Limit and do not set the glucose alerts ON, then you will not get a Low SG alert.
FALL RATE Reason: The sensor glucose measurements are falling at a rate that is equal to or faster than the Set Fall Rate Limit you selected for the alert. RISE RATE Reason: The sensor glucose measurements are rising at a rate that is equal to or faster than the Set Rise Rate Limit you selected for the alert. SENSOR ERROR Reason: The sensor signal is either too high or too low. Action: Clear the alert. Do not change the sensor yet.
Sensor Alarm History display = this alert CalErr = CAL ERROR ChgSen = CHANGE SENSOR ChgXtr = CHARGE TRANSMITTER DwnSlp = FALL RATE Hi = HIGH SG Lo = LOW SG LoBat = LOW BATTERY LowXtr = LOW TRANSMITTER mBGby = METER BG BY hh:mm mBGnow = METER BG NOW PrdHi = HIGH PREDICTED PrdLow = LOW PREDICTED SenEnd = SENSOR END SenErr = SENSOR ERROR SenLos = LOST SENSOR UpSlp = RISE RATE WeakSn = WEAK SIGNAL Chapter 9 • • • • • • • • • • • • • • • • • To view the sensor alert history: 1 Open the SENSOR MENU.
System alarms Alarms put the monitor in Attention mode. You may encounter the alarms listed below while using the system. These alarms include information about how to resolve the alarm condition. A (Alarm) (nn) Shows a letter A followed by two numbers that show the alarm number. A-alarms cause the monitor to reset. If this alarm repeats often, then call the HelpLine or your local representative for assistance.
FAILED BATT TEST The battery does not have enough energy to make the monitor work and the battery cannot be used. Install another battery, and always make sure that you install a new battery into the monitor. OFF NO POWER The battery has no more energy. Replace the battery immediately. Follow the directions on the screen. Check to make sure that the time is correct on the screen. Reset the time if necessary.
• • • • • • BadBat = FAILED BATT TEST ChkSet = CHECK SETTINGS Exx = Any E-Alarm NoPwr = OFF NO POWER Reset = RESET WeakBt = WEAK BATTERY To view your system alarm history: 1 Open the ALARM HISTORY screen. MAIN MENU > Utilities > Alarm > Alarm History 2 Press 3 To view further information about an alarm/alerts, select the alarm/alert and press ACT. The details for that alarm or alert show on the screen. Press ESC to return to the ALARM HISTORY screen.
Question: Why do I see a mix of quick and long flashing red lights on the charger? about about about 2 secs about about Answer: Your charger and transmitter 1 sec 1 sec 1 sec 1 sec batteries are very low. Replace the charger’s AAA or LR-03 battery. If you now get the pattern for very low transmitter battery, leave the transmitter on the charger for eight hours to recharge. If the red light is still flashing after eight hours, call our 24 Hour HelpLine. It may be time to replace your transmitter.
Connecting the tester 1 Hold the transmitter and the tester as shown. Line up the flat side of the tester with the flat side of the transmitter. 2 Push the tester into the transmitter until the flexible side arms of the tester click into the notches on both sides of the transmitter. Within 20 seconds, the green light on the transmitter will flash for approximately 10 seconds when properly connected. You should also see the sensor icon 3 4 on your monitor.
Troubleshooting the monitor My monitor will not display my BG measurement from my meter 1 2 3 6 7 8 Chapter 9 4 5 Make sure you are using the correct meter (a blood glucose meter supported by MWT1 technology). Your monitor will communicate with this meter only. Make sure your meter's RF (radio frequency) feature is on and working correctly.
MAIN MENU > Sensor > Sensor Start 2 The SENSOR START MENU appears with New Sensor selected. Select Find Lost Sensor. Press ACT. A message tells you that your sensor will be ready in 15 minutes. What happens if I leave the monitor battery out for more than ten minutes? If you leave the battery out for more than 10 minutes, you may receive a BATT OUT LIMIT alarm message when you install the new battery.
Why doesn't my monitor battery last very long? • A short battery life does not always mean something is wrong with your monitor. Battery life in your monitor varies, based on the conditions below: • The brand of battery you use (Energizer is recommended). • The way the battery was stored and/or handled before use (avoid high or low temperatures). • How you use your monitor.
I submerged my monitor in water Your monitor is designed to resist brief, accidental contact with water. Do not submerge the monitor in water when bathing, swimming, or other doing water activities. 1 2 3 Gently dry the outside of the case with a paper or cloth towel. Do not use hot air to dry your monitor. This may damage your monitor's internal electronics. Check the battery compartment and the battery. If one or both are wet, allow them to dry completely before using the monitor.
System maintenance Replacing the battery You must replace the monitor battery with a new battery as part of your normal system maintenance. See the Installing the battery section of the Basics chapter for the steps you must follow to replace the monitor battery. These steps include what to do if you receive an alarm after you insert the new battery. Storing the system Storing the monitor If you must remove and store your monitor for short periods of time, do not remove the battery.
Cleaning the system This procedure shows you how to clean the different parts of your system. To avoid accidentally damaging your system during cleaning, be sure to read the Caution section below. CAUTION: • Only use a damp cloth and mild liquid soap to clean your system. • Never use solvents such as lighter fluid, nail polish remover, or paint thinner to clean your system. • Never use lubricants of any kind to clean your system.
CAUTION: • Never place your monitor directly in water. • Keep the battery compartment dry and away from moisture. • Never try to clean the inside of your monitor. Cleaning the Sen-serter This procedure shows you how to clean your Sen-serter. Wash your hands thoroughly. Dampen a clean cloth with mild liquid soap and warm water, and wipe the Sen-serter. Rinse with warm tap water. Using an antibacterial hand sanitizer (available at a local drugstore), wipe down the Sen-serter.
For details on attaching and disconnecting the tester, see Connecting the tester, on page 94 and Disconnecting the tester, on page 94. Inspecting the transmitter connector pins This image is an example of how the connector pins should look. connector opening connector pins housing Look inside the transmitter’s connector opening to make sure that the connector pins are not damaged or corroded.
For single-patient use Always clean the transmitter after each use. To clean the transmitter, you will need the following materials: Ivory® liquid soap, a soft-bristled toddler toothbrush, a container, 70% isopropyl alcohol, and a few clean, dry cloths. You can find these supplies at Walmart, Target, or http://www.amazon.com/. Use life The MiniLink transmitter can be used 122 times or a year, whichever comes first. Discard the transmitter at this point.
5 6 104 Prepare a mild liquid soap solution using one (1) teaspoon of Ivory liquid soap per one (1) gallon of room temperature tap water. With tester still attached, submerge the transmitter in the mild liquid soap solution and soak for one minute. 7 Holding the tester, brush the entire surface of the transmitter using a soft-bristled toddler toothbrush. Make sure to brush all hard-to-reach areas until visibly clean.
10 Holding the tester, wipe the transmitter with 70% isopropyl alcohol. Chapter 10 11 Place the transmitter and tester on a clean, dry cloth and air dry them completely. 12 Disconnect the tester from the transmitter.
For multiple-patient use When using the transmitter in a healthcare facility, always clean and disinfect the transmitter after each use. Warning: You must adhere to Standard Precautions when handling or using this device. All part of the system should be considered potentially infectious and are capable of transmitting blood-borne pathogens between patients and healthcare professionals.
Warning: If you see any body fluid in the connector opening, you must discard the transmitter. Because the transmitter contains a battery, do not discard in a bio-waste container. Instead, continue to clean and disinfect the transmitter, and then discard according to local regulations for battery disposal (non-incineration). connector opening connector pins housing Attach the tester to the transmitter.
8 Holding the tester, remove the transmitter from the solution. Brush the entire surface of the transmitter using a soft-bristled brush, paying close attention to hard-to-clean areas, until visibly clean. 9 Rinse the transmitter under room temperature tap water until all visible detergent is gone. 10 Dry any excess moisture by wiping the outside of the transmitter with a clean, dry cloth. 11 Prepare a 1:10 bleach solution by using one (1) part 8.
13 Rinse the transmitter under room temperature tap water for three minutes. Chapter 10 14 Holding the tester, wipe the transmitter with 70% isopropyl alcohol. 15 Place the transmitter and tester on a clean, dry cloth and air dry them completely. 16 Important: If you saw any body fluid inside the connector opening on earlier inspection, you must now discard the transmitter with tester still attached, according to local regulations for battery disposal (non-incineration).
18 Inspect the housing of the transmitter for any signs of cracking, flaking, or damage. If you see any of these signs, you must now discard the disinfected transmitter according to local regulations for battery disposal (non-incineration). Warning: Cracking, flaking, or damage of the housing are signs of deterioration and the performance of the device may be compromised. This may affect the ability to properly clean and disinfect the transmitter.
System specifications Alarm/alert types • • Audible tone (beep) — To make sure that you are aware of the alarm/alert, the sound goes from a beep to a siren until you respond to the alarm/alert. Vibration — The system vibrates.
Sensor glucose graph timeout • • Default: 2 minutes Options • 2 minutes • 4 minutes • 6 minutes • NONE (no timeout) High and low Glucose Limits (CSS7100) • • • Maximum number of Glucose Limits: 8 Low Glucose Limit 60 mg/dL (3.3 mmol/L) • Default • Range 40 to 390 mg/dL (2.2 to 21.6 mmol/L) • Increments 1 mg/dL (0.1 mmol/L) High Glucose Limit 200 mg/dL • Default (11.1 mmol/L) • Range 50 to 400 mg/dL (2.8 to 22.2 mmol/L) • Increments 1 mg/dL (0.
Daily totals • Maximum number of daily totals recorded: 31 days Default screen • • The HOME screen. The time always shows across the top of the HOME screen. The monitor automatically returns to the HOME screen if no buttons are pressed for 30 seconds (for most screens).
Feature AUC Limits Options Always on Default Setting Low Limit 70 (mg/dL) 3.9 (mmol/L) High Limit 180 (mg/dL) 10.0 (mmol/L) Limits, Range of Values Low Limit range:a Lowest 40 (mg/dL) 2.2 (mmol/L) Highest 400 (mg/dL) 22.2 (mmol/L) High Limit range:b Lowest 40 (mg/dL) 2.2 (mmol/L) Highest 400 (mg/dL) 22.2 (mmol/L) Block 114 • On • Off Blood Glucose Units (BG Units) • mg/dL • mmol/L Cal Reminder • On • Off Off Possible values: On Off mg/dL Possible values: mg/dL mmol/L On 1 hour a.
Feature Glucose Alarms Glucose Limits Glucose Limits 1 Options Default Setting Off Limits, Range of Values You set the thresholds (limits) for the Glucose Alarms using the Glucose Limits settings. • On • Off • Maximum of 8 Glucose Limits. • One pair of Glucose Limits (Glucose Limits 1) is already set up for you, with a default High Glucose Limit and Low Glucose Limit. • Glucose Limits 2 through 8 can be set as needed.
Feature Glucose Limits 2through Glucose Limits 8 Options Default Setting CSS7100 CSS7100 Low: Off, On Low: Off High: Off, On High: Off CSS7100K CSS7100K Low Low: Off • Off, or valid range from 90 to 390 mg/dL (5.0 mmol/L to 21.6 mmol/L) Limits, Range of Values See the Glucose Limits 1 range. High: Off High High Snooze • Off, or valid range from 100 mg/dL to 400 mg/dL (5.6 mmol/L to 22.
Feature Language Low Snooze • Cesky • Dansk • Deutsch • English • Español • Français • Italiano • Magyar • Nederlands • Norsk • Polski • Portugues • Slovenscina • Suomi • Svenska • Turkse • On • Off • On • Off Default Setting English Possible values: Cesky Dansk Deutsch English Español Français Italiano Magyar Nederlands Norsk Polski Portugues Slovenscina Suomi Svenska Turkse Off Possible values: On Off On (Set to On when Low Glucose, Low Predictive, or Falling
Feature Options Default Setting Limits, Range of Values Missed Data (Always on - cannot be turned off) 30 minutes Range: 0:05 – 0:40 (5 to 40 minutes) Predictive Alarms • On • Off Off Default time sensitivity: Low 15 minutes High 15 minutes Range: Off 0:05 – 0:30 (5 to 30 minutes) Rate of Change Alarms • On • Off Fall Rate Limit Off Fall Rate Limit range: Lowest 1.1 (mg/dL/min) 0.065 (mmol/L/min) Highest 5.0 (mg/dL/min) 0.
Feature Sensor glucose graph timeout Time/Date setup a. Options • 2 minutes • 4 minutes • 6 minutes • NONEa • 12 Hour • 24 Hour Default Setting Limits, Range of Values 2 minutes Possible values: Shortest 0:02 (2 minutes) 0:04 (4 minutes) 0:06 (6 minutes) No timeout NONE 12 Hour Possible values: 12 Hour 24 Hour If you select this option the sensor glucose graphs will show continuously on the monitor screen.
Radio frequency (RF) communication specifications • • Monitor to transmitter frequency: 916.5 MHz; proprietary Medtronic protocol; range up to 6 feet (1.8 meters) Monitor to meter frequency: 916.5 MHz; proprietary Medtronic protocol; range up to 4 feet (1.2 meters) Quality of service Common consumer electronic devices that transmit in the same frequency band used by the transmitter may prevent the monitor from receiving the glucose information sent by the transmitter.
Monitor size • • Inches • Height approximately 2.0 inches • Width approximately 3.2 inches • Depth (thickness) approximately 0.77 inches Centimeters (cm) • Height approximately 5.1 cm • Width approximately 8.1 cm • Depth (thickness) approximately 2.
Screen item 122 Description Battery: Shows battery condition (how much energy is left in the battery). This always appears. BG meter value: Shows the most recent meter blood glucose value that you entered within the past 24 hours, and when it was entered (date and time). Meter blood glucose values that were entered more than 24 hours ago are not displayed. This only appears when the meter option is turned on. Date: Shows the current date. This always appears.
Guidance and manufacturer's declaration Guidance and Manufacturer's Declaration - Electromagnetic Emissions The Guardian REAL-Time system (consisting of the CSS7100/CSS7100K Receiver and MMT-7703 transmitter) is intended for use in the electromagnetic environment specified below. The customer or the user of the Guardian REAL-Time system should make sure that it is used in such an environment.
Guidance and Manufacturer's Declaration - Electromagnetic Immunity The Guardian REAL-Time system (consisting of the CSS7100/CSS7100K Receiver and MMT-7703 transmitter) is intended for use in the electromagnetic environment specified below. The customer or the user of the Guardian REAL-Time system should make sure that it is used in such an environment.
Guidance and Manufacturer's Declaration - Electromagnetic Immunity The Guardian REAL-Time system (consisting of the CSS7100/CSS7100K Receiver and MMT-7703 transmitter) is intended for use in the electromagnetic environment specified below. The customer or the user of the Guardian REAL-Time system should make sure that it is used in such an environment.
Guidance and Manufacturer's Declaration - Electromagnetic Immunity The Guardian REAL-Time is intended for use in the electromagnetic environment specified below. The customer or user of the Guardian REAL-Time system should make sure that it is used in such an environment. Immunity Test Radiated RF IEC 61000-4-3 IEC 60601 Level 10V/m 80MHz to 6.0GHz Compliance Level 10 V/m Electromagnetic Environment Guidance d = 0.35 P 80 MHz to 800 MHz d = 0.70 P 800 MHz to 6.
Guidance and Manufacturer's Declaration - Electromagnetic Immunity The Guardian REAL-Time is intended for use in the electromagnetic environment specified below. The customer or user of the Guardian REAL-Time system should make sure that it is used in such an environment.
Recommended separation distances between portable and mobile RF communications equipment and the Guardian REAL-Time system This section provides information on the recommended separation distance between portable and mobile RF communications equipment and the Guardian REAL-Time. The Guardian REAL-Time is intended for use in an electromagnetic environment in which radiated RF disturbances are controlled.
MiniLink specifications Biocompatibility MiniLink: Complies with ISO 10993-1 for long-term body contact Operating Conditions MiniLink Temperature: +32° to +122°F (0° to 50°C) MiniLink Relative Humidity: 10% to 95% with no condensation Charger Temperature: +50° to +104°F (10° to 40°C) Charger Relative Humidity: 30% to 75% with no condensation Storage Conditions MiniLink Temperature: -4° to +131°F (-20° to +55°C) MiniLink Relative Humidity: 10% to 100% with no condensation Charger Temperature: +14° to +1
Warranty Medtronic MiniMed warrants the Medtronic MiniMed Guardian® REAL-Time Continuous Glucose Monitoring (CGM) System against defects in material and workmanship for the following periods: • • Monitor: three (3) years from the date of purchase Transmitter: one (1) year from the date of purchase During the specified warranty period, Medtronic MiniMed will repair or replace, at its sole discretion, any defective part of the Guardian REAL-Time CGM System, subject to the conditions and exclusions stated he
Icon table Attention: Read all warnings and precautions in instructions for use. Date of manufacture (year - month) Manufacturer Batch code Use by (year - month) Catalogue number Device serial number Configuration Storage temperature range Chapter 11 Fragile product Type BF equipment (protection from electrical shock) Monitor: Conforms to IEC60601-1 sub-clause 44.6 and IEC60529 standard Transmitter: Protected against the effects of continuous immersion in water (8 feet or 2.
Magnetic Resonance (MR) unsafe: 132 System specifications
Sensor accuracy The information in this section is meant to be reviewed by you with your healthcare professional. Please also note: The Guardian RT is not an abbreviation for the Guardian REAL-Time CGM System. The Guardian RT is a continuous glucose monitoring system that was developed before the Guardian REAL-Time CGM System. The Guardian RT was originally named TGMS II, and the name was changed to Guardian RT.
Performance results in adults The performance of the Guardian RT in adults was evaluated in a clinical study.3 Guardian RT results were compared to plasma glucose values from a reference method, the YSI 2300 STAT Plus™ glucose analyzer (referred to as YSI). Sixteen subjects with Type I diabetes participated in a single-site in-clinic study. Subjects ranged in age from 18 to 65 years old. Each subject wore two Guardian RT systems simultaneously. One Guardian system was calibrated an average of 3.
Agreement between the matched pair was estimated by evaluating the difference between the Guardian RT reading and the YSI measurement. The difference between them was calculated as a percentage of the YSI (Mean Absolute Percent Difference). The bias was also calculated, and it is defined as the overall difference between the Guardian RT glucose values and the YSI values. The paired glucose measurements are summarized below.
The Clarke Error Grid was used to assess the clinical relevance of the differences between the Guardian RT readings and the comparative YSI measurements. The Clarke Error Grid divides a correlation plot into 5 zones. See following table. Results in zones A and B are considered clinically acceptable, while results in zones C, D, and E are potentially dangerous and, therefore, clinically significant errors. The Clarke Error Grid zones are labeled on the correlation plot.
The plot below is a correlation plot of Guardian RT readings versus readings from the reference method, the YSI 2300 Glucose Analyzer. It is overlaid with the Clarke Error Grid. Sensor BG (mg/dL) The total number of paired data points is 3941.
The percent of Guardian RT readings in the previous graph are presented in the following table according to the percentage of points falling within each zone (A-E). Results are further broken down (stratified) according to the range of glucose concentrations. Glucose Range (mg/dl) Number and (%) of Data Points Evaluated A+B A B C D E 40-80 356 (9) 271 (76.1) 214 (60.1) 57 (16.0) 2 (0.6) 80 (22.5) 3 (0.8) 81-120 769 (20) 768 (99.9) 463 (60.2) 305 (39.7) 1 (0.
Glucose Conc (mg/dL) Time of day The above chart, Guardian RT device #2 is represented by a solid line, and the Guardian RT device #4 by a light-gray line. Low and High Alerts in adults NOTE: Please ask your healthcare professional which low and high alert setting is best for you. Appendix A The ability of the Guardian RT to detect high and low glucose levels was measured in the same clinical study.
The Low Glucose Alert The Low Glucose Alert was evaluated for its ability to detect glucose levels at 70 mg/dL (3.9 mmol/L), or below, using the YSI 2300 STAT Plus glucose analyzer. As a reference, with the Low Glucose Alert set at 70 mg/dL (3.9 mmol/L), 49% (100/205) of low glucose events were detected by the Guardian RT. Better detection of low blood glucose can be obtained by setting the Low Glucose Alert level higher. For example, setting the Low Glucose Alert at 90 mg/dL (5.
high blood glucose can be obtained by setting the High Glucose Alert level lower. For example, setting the High Glucose Alert at 190 mg/dL (10.6 mmol/L), instead of 250 mg/dL (13.8 mmol/L), increases the ability to detect high blood glucose levels from 53% to 85% (see the following table). Sometimes the Guardian RT will alert when the blood glucose levels are not high. When the Guardian RT High Alert was set at 250 mg/dL (13.8 mmol/L) in this study, 7.
As per the stratified Clarke Error Grid analysis above, agreement between Guardian RT values and YSI values tends to be less at low and high glucose concentrations when compared to other concentration ranges. Guardian RT performance in the hypoglycemic range, as a function of sensor insertion time, is characterized below. Results from the two different data sets are presented. The two populations were separated according to the number of calibrations per day.
An analysis of the mean percentage of Absolute Relative Error (ARE percentage) and standard deviations, across 12-hour increments of wear periods, appears in the table below. Both data sets are pooled together in this data. Hours From Insertion Mean ARE (%) Std. Dev. 0-12 hrs 24.84 20.04 12-24 hrs 19.66 16.17 24-36 hrs 16.43 15.62 36-48 hrs 18.23 19.27 48-60 hrs 16.59 14.25 >60 hrs 22.95 23.51 The median sensor life from Data Sets A and B were 57.5 hours and 72.9 hours, respectively.
The percentage of Guardian RT readings within 20 percent and 30 percent of YSI readings was analyzed according to time after sensor insertion and according to the glucose-concentration range (as determined by the YSI analyzer). See the following table. a.
Time-Elapsed Plots Glucose Conc (mg/dL) The plot graph below is a representative example of continuous sensor tracing vs. reference blood glucose reading, where sensor showed excellent performance. The open circles (o) on the graph represent the meter calibration readings. The closed circles (•) represent the reference blood glucose readings, and the solid line (—) represents the sensor glucose value.
Glucose Conc (mg/dL) The plot graph below is a representative example of continuous sensor tracing vs. reference blood glucose reading, where sensor showed average (typical) performance. The open circles (o) on the graph represent the meter calibration readings. The closed circles (•) represent the reference blood glucose readings, and the solid line (—) represents the sensor glucose value.
Glucose Conc (mg/dL) The plot graph below is a representative example of continuous sensor tracing vs. reference blood glucose reading, where sensor showed poor performance. The open circles (o) on the graph represent the meter calibration readings. The closed circles (•) represent the reference blood glucose readings, and the solid line (—) represents the sensor glucose value.
Agreement between the matched pair was estimated by evaluating the difference between the Guardian RT reading and the blood glucose meter measurement. The difference between them was calculated as a percentage of the blood glucose meter measurement (Mean Absolute Percent Difference). The bias was also calculated, and it is defined as the overall difference between the Guardian RT glucose values and the blood glucose meter values.
The accuracy of the Guardian RT was also evaluated by calculating the percentage of Guardian RT readings within 20% and within 30% of the blood glucose meter reading (or within 20 mg/dL (1.1 mmol/L) in the low glucose range). Results are shown in the following table. Plasma Glucose Range (mg/dL) Plasma Glucose Range (mmol/L) Overall Number of Paired Readings Percent Within 20% Percent Within 30% 2599 68% 82% 40-80* 2.2-4.4 360 51% ---- > 80-120 > 4.4-6.7 482 60% 77% > 120-240 > 6.7-13.
The following figure is a correlation plot of Guardian RT readings versus readings from the reference method, the blood glucose meter. It is overlaid with the Clarke Error Grid. The total number of paired data points is 2599. Sensor BG (mg/dL) A (1733, 66.7%) B (665, 25.6%) C (7, 0.3%) D (193, 7.4%) E (1, 0.0%) Meter BG (mg/dL) The percent of Guardian RT readings in the above graph are presented in the table below according to the percentage of points falling within each zone (A-E).
Stratified Clarke Error Grid Analysis Range of Comparative Glucose Readings (mg/dL) Total Count A+B A B C D E 40-80 360 (13.9%) 201 (55.8%) 141 (39.2%) 60 (16.7%) 1 (0.3%) 157 (43.6%) 1 (0.3%) 81-120 482 (18.5%) 478 (99.2%) 287 (59.5%) 191 (39.6%) 4 (0.8%) 0 (0%) 0 (0%) 121-240 1055 (40.6%) 1053 (99.8%) 782 (74.1%) 271 (25.7%) 2 (0.2%) 0 (0%) 0 (0%) 240-400 702 (27.0%) 666 (94.9%) 523 (74.5%) 143 (20.4%) 0 (0%) 36 (5.1%) 0 (0%) Overall 2599 (100.0%) 2398 (92.
low blood glucose can be obtained by setting the Low Glucose Alert level higher. For example, setting the Low Glucose Alert at 90 mg/dL (5.0 mmol/L), instead of 70 mg/dL (3.9 mmol/L), increases the ability to detect low blood glucose levels from 24% to 70% (see the following table). Sometimes the Guardian RT will alert when the blood glucose levels are not low. When the Guardian RT Low Alert was set at 70 mg/dL (3.
Sometimes the Guardian RT will alert when the blood glucose levels are not high. When the Guardian RT High Alert was set at 250 mg/dL (13.8 mmol/L) in this study, 13.1% of the results were considered false alerts (actual blood glucose values are less than 225 mg/dL (12.5 mmol/L)). This percentage may be exaggerated because blood glucose may be rising when the Guardian RT alerts. The following table shows the percent of High Glucose readings correctly identified by the Guardian RT for specific settings.
154 Appendix A
Glossary A Adverse reaction - An unexpected, unpleasant or dangerous reaction to a sensor when it is inserted into the body. An adverse reaction may be sudden or may develop over time. Alarm icon - a solid circle that shows at the top of the screen and the monitor beeps or vibrates periodically until the condition is cleared (see Attention mode).
METER BG BY alert will occur two hours before the calibration is required. Calibrate - Check, adjust, or set to a standard (calibrate your monitor). Circumstance - A condition or fact that has an effect on an action. Contraindication - A condition that makes a specific treatment or procedure NOT advisable. A contraindication is literally contra- (against) an indication, against something that is indicated as advisable or necessary.
High Snooze - For the High Glucose, High Predictive, and Rising Rate of change alerts, allows you to set the delay between the first alert and any subsequent alerts. This allows you to avoid getting an alert every five minutes until the condition is corrected. I Incineration - The act of burning something completely. Increment - A small increase or decrease in a measurement. Indication - A condition that makes a specific medical treatment or procedure advisable or necessary.
P Predictive alerts - These alerts can be used so that you receive alarms before the sensor glucose measurements reach your glucose limits. This alert predicts when the sensor glucose measurements will reach your glucose limits by using information about your glucose limits and recent sensor glucose measurements. Preparation - Getting ready to do something. Prompt - A software message that asks you to do something. Q Quaternary ammonium compound - A specific type of antiseptic used to sterilize.
Sterile gauze - A thin medical bandage with loose weave that is free from substances or germs that could cause infection. Submerge - To place under water or cover completely with water. T Timeout - If you do not enter information or do something in a specific length of time, your monitor automatically stops what it is doing and goes to the HOME screen. Transmitter - The device that sends a signal to your monitor with information from your sensor. Transmtr Batt - The status of the transmitter battery.
160 Glossary
Index Numerics 3 hour graph 57 6 hour graph 58 12 hour graph 59 24 hour graph 60 A alert types battery power usage for Beep versus Vibrate 24 Beep 24 specifications 111 Vibrate 24 alerts basic types 85, 86, 87, 88 Cal error 86 Change transmtr 85 Falling Rate of Change 88 High glucose 87 High Predictive 87 Low glucose 87 Low Predictive 87 Low transmtr 85 Meter BG by 87 Meter BG now 86 Rising Rate of Change 88 Sensor end 86 Sensor error 88 Cal Error 86 for alert conditions 88 low battery alert 88 Area Under
B backlight 13, 14, 16, 88, 97 specifications 111 bad transmitter battery 92 Batt Out Limit alarm 11 Batt out limit alarm condition 90 battery 16, 17, 24, 96, 97, 98, 99 AAA Energizer alkaline 11 cap 12 compartment 98, 101 icon 16 icons 15 installing 11 monitor 19, 62, 91, 96, 99 rechargeable or carbon zinc battery warning 11 recommendations 11 transmitter 63 battery: monitor 97 battery, charger low 92, 93 Battery icon 16 BG units 66 BG Units default settings 114 Block default settings 114 Block feature 74
Glucose Alarms 115 Glucose Limits 115 Glucose Limits 1 115 Glucose Limits 2 through 8 116 High Glucose Limit 116 High Snooze 116 Language 117 Lock Keypad 117 Low Glucose Limit 116 Low Snooze 117 Meter option 117 Missed Data 118 Predictive Alarms 118 sensor 118 sensor glucose graph timeout 119 specifications 113 Time/Date setup 119 DELETE ALARM screen 73 deleting Alarm Clock reminders 73 disconnecting transmitter from sensor 66 disconnecting tester from transmitter 94 E F Failed Batt Test alarm 11 Failed b
High Predictive alert condition 87 High Snooze default settings 116 setting 28 High Snooze alarm setting 28 history sensor updates 65 How to make glucose alarms silent 64 I Icons on the monitor Alert 16 Battery 16 Sensor 15 initialization 55 injection insulin types 51 installing charger AAA battery 37 insulin 51 INSULIN TYPE screen 51 Intermediate Acting insulin 51 L Language default settings 117 Lock keypad 75 Lock Keypad default settings 117 LOCK KEYPAD screen 75 locking the keypad 75 Long Acting insuli
Next Cal 63 Normal mode 17 O Off no power alarm condition 91 on an aircraft entering meter blood glucose measurements 8 OTHER screen 54 P Precautions 7 extreme temperatures 7 sensor 7 Predictive Alarms 118 PREDICTIVE ALARMS LOW/ HIGH screen 29 R S Safety Warnings 6 Save Settings feature 76 screens ADD ALARM 72 ALARM HISTORY 92 ALARM OPTION 72 BLOCK OPTION 74 DELETE ALARM 73 LOCK KEYPAD 75 METER STATS 71, 72 REVIEW ALARMS 73 SENSOR STATS 71, 72 SETTINGS HISTORY 79 Selftest 75, 97, 98 Sen-serter, storing
Sensor icon 15 Sensor Isig 63 SENSOR MENU 18 SENSOR ON/OFF screen 25, 36 SENSOR READY 2 HRS screen 40 SENSOR STATS screen 71, 72 sensor status 62 Next Cal 63 Sensor Age 63 Sensor Isig 63 Transmtr Batt 63 Transmtr ID 63 Transmtr Ver 63 SENSOR STATUS screen 62, 63 SENSOR UPDATE HISTORY screen 65 sensor updates viewing history 65 SET ALARM SNOOZE screen 33 SET AUC LIMITS screen 32 SET CAL REMINDER screen 33 SET FALL RATE LIMIT screen 30 SET GLUCOSE LIMITS 1 screen 27 SET GLUCOSE LIMITS 3 screen 28 SET GRAPH TI
Storing the system 99 supplies, ordering 3 System alarm conditions 90 system alarm/alert history viewing 91 system settings clearing 76, 78 restoring 77 saving 76 T What to do when you get an alarm/alert 83 U unlocking the keypad 75 User safety contraindications 6 Damage due to radiation 8 indications 5 Precautions 7 warnings 6 User settings 76 User Settings screen 98 User Settings, viewing your 79 using the Capture Event feature 50 Using your system in water 67 UTILITIES MENU 18 V Viewing sensor alert
168 Index
6025254-018C_a