
Operation Manual


50
Use the attachment aid on the lower end of the supplied coffee scoop
(assemble before use) to screw the Claris
®
water filter into the thread on
the floor of the water container.
Flip up the lid of the water reservoir (Fig. A, no. 3) and pull the water
reservoir up and out of the appliance.
Fill the water reservoir up to the mark with 0.5 litres of fresh water and
put the reservoir back into the device.
Place a vessel under the Perfect Cappuccino and slide the steam pipe
downward until it is below the edge of the vessel.
Turn the valve switch (Fig.
A, no. 6) clockwise to open the valve.
Water will flow into the vessel under the Perfect Cappuccino.
As soon as the symbol for the water reservoir is illuminated turn the
valve switch anti-clockwise to close the valve.
The appliance is ready for operation.
Note
The Claris
®
water filter should not remain dry for an extended period of
time. Consequently we recommend storing the Claris
®
water filter in a glass
of water in the fridge if the device will not be used for an extended period
of time.
Filling the water reservoir
Flip up the lid of the water reservoir (Fig. A, no. 3) and pull the water
reservoir up and out of the appliance.
Fill the water reservoir with fresh water and reinsert it in the appliance.
Switching on and venting
All lines in the appliance have been drained and vented in the factory. Consequently,
the first time the appliance is switched on after the heat-up phase the symbol for the
valve will be illuminated and the appliance must be vented via the valve. Venting is
only necessary the first time that the appliance is started up.
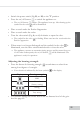
•
•
•
•
•
→
•
→
•
•