
User Manual


100-5-01-000
Ripstation DataGrabber User Manual Page 7 of 23
1.0 Hardware Installation
This section details a set of instructions for correct assembly of the robotic hardware (if
purchased). It begins by listing the items contained within the packaging.
1.1 Robotic Hardware
The autoloader box should contain:
1. The robotic hardware system
2. Power cable
3. Quick Setup Instructions
4. Warranty & support documents
1.2 Step by step guide of Robotic Hardware 7602/7604
1.2.1 STEP ONE Remove the Packing Constraints
Carefully remove the autoloader from its carton, lifting from the bottom using the
hand cut outs in the foam base.
DO NOT attempt to lift the machine using the spindles, column tower, or pick
arm, as these are delicate pieces and are depended on for proper alignment and
functioning of the unit.
Place the system on a level workspace free of debris, dust, humidity, excessive
heat, and electronic or electromagnetic interference.
Keep out of direct sunlight.
Allow at least six inches of clearance on all sides of unit for ventilation.
Remove protective plastic cover from system and save along with the rest of the
packaging.
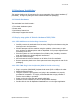
1.2.2 STEP TWO Plug in the Peripherals (KVM PC inside units only)
Plug in a monitor (VGA DSUB), keyboard and mouse (PS2 or USB) to the robot
Attach the Ethernet cable.
Using the enclosed 3 prong power cord, plug in the autoloader to a properly
grounded AC receptacle. It is highly recommended that a surge protector is
used to ensure safety in operation.
Power on the unit using the main switch at the back
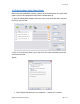
Windows will now load and you will see the Ripstation Desktop
Double click the icon for Ripstation DataGrabber to run the ripper application.