DIGITAL COLOR PRINTER MODEL CP30DW OPERATION MANUAL THIS OPERATION MANUAL IS IMPORTANT TO YOU. PLEASE READ IT BEFORE USING YOUR DIGITAL COLOR PRINTER. This digital color printer complies with the requirements of the EC Directive 89/336/EEC, 73/23/EEC, 93/42/EEC and 93/68/EEC. The electro-magnetic susceptibility has been chosen at a level that gains proper operation in residential areas, on business and light industrial premises and on small-scale enterprises, inside as well as outside of the buildings.
WARNING: In the USA or Canada, use the AC power cord according to the recommendation as below, in order to comply with UL60601-1 and CAN/CSA C22.2 No. 601.1. Case 1. Connect to the 120V receptacle of the room or the host equipment. Use the attached AC power cord. The AC power cord should be UL or CSA approved and consist of type SJT, size 16AWG, length 2.5m or shorter cord with IEC60320-1/C13 type, 125V 13A or higher rating connector and NEMA 5-15 type, 125V 13A or higher rating, Hospital Grade plug.
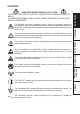
CAUTION: The exclamation point within an equilateral triangle is intended to alert the user to the presence of important operating and maintenance (servicing) instructions in the literature accompanying the appliance. The “Electro Static Discharge (ESD) warning” symbol indicates that trouble (including equipment malfunction) due to static electricity may occur in certain conditions. This symbol indicates the possibility that the user may get his/her fingers caught in the door, slot, or other mechanism.
WARNING: Install and use this appliance in accordance with the operation manual for safety and EMC (Electromagnetic Compatibility). If it is not installed and used in accordance with the operation manual, it may cause interference to other equipment and/or other risk. To prevent fire or shock hazard, do not expose this appliance to rain or moisture. This appliance must be earthed. In Europe, use the attached AC power cord according to the recommendations as below.
INSTRUCTIONS FOR MEDICAL USE FEATURES CONNECTIONS PREPARATION Electro Static Discharge (ESD) 1 Electro Static Discharge (ESD) warning symbol 2 The areas identified with this symbol should not be touched as much as possible because they are sensitive to ESD and may cause equipment malfunction and failure due to ESD.
Compliance with the following EMC guidance is assured only for the use in Europe (220 - 240 V). Guidance and manufacturer's declaration - electromagnetic emissions The Model CP30DW is intended for use in the electromagnetic environment specified below. The customer or user of the Model CP30DW should assure that it is used in such an environment.
Guidance and manufacturer's declaration - electromagnetic immunity Immunity test EN 60601 test level Compliance level Electromagnetic environment - guidance 3 Vrms 150 kHz to 80 MHz 3 Vrms Radiated RF EN 61000-4-3 3 V/m 80 MHz to 2.5 GHz 3 V/m Recommended separation distance d=1.2√P d=1.2√P 80 MHz to 800 MHz d=2.3√P 800 MHz to 2.
Recommended separation distances between portable and mobile RF communications equipment and the Model CP30DW The Model CP30DW is intended for use in an electromagnetic environment in which radiated RF disturbances are controlled.
CONTENTS PRECAUTIONS Contents .................................................................................... 1 Safety precautions .................................................................. 2-5 Special features ......................................................................... 6 Unpacking ................................................................................. 7 Features and functions ......................................................... 8-10 FEATURES Front panel ........
SAFETY PRECAUTIONS In the interest of safety, please observe the following precautions: POWER REQUIREMENT This product is designed to operate at 120/220-240V AC 50/60Hz in the U.S.A. and Canada, and 220-240V AC 50/60Hz in Europe. Never connect to any outlet or power supply having a different voltage or frequency. WARNING: THIS APPARATUS MUST BE EARTHED. This equipment is classified as class , according to the type of protection against electric shock.
PRECAUTIONS UNPLUG THE POWER CORD DURING A LONG ABSENCE OR DURING AN ELECTRICAL STORM Turn off the Main Power switch and unplug the power cord during a long absence or during an electrical storm. WHEN TRANSPORTING THE UNIT When transporting the unit, remove the ribbon cartridge and paper. Make sure to unplug the power cord and other cables.
SAFETY PRECAUTIONS PROTECT AGAINST DEW FORMATION When the unit is moved from a cold area into a warm area, moisture can condense inside the unit and prevent operation. Allow the temperature to stabilize before use. When print paper and ribbon cartridge are loaded, remove them. Replace the wet print paper and ribbon cartridge with new ones. OPERATING AMBIENT TEMPERATURE RANGE The operating temperature range is 41°F - 104°F (5°C to 40°C) and humidity of 30 - 80% RH.
PRECAUTIONS TECHNICAL DESCRIPTION The supplier will make available on request such circuit diagrams, component part lists, descriptions, calibration instructions or other information which will assist the User’s appropriately qualified technical personnel to repair those parts of the EQUIPMENT which are classified by the manufacturer as repairable.
SPECIAL FEATURES SPECIAL FEATURES EASY LOADING AND UNLOADING You can load a ribbon cartridge just by inserting it into the ribbon cartridge loading slot (autoloading), and can unload it by pressing the RIBBON EJECT button only (auto-ejecting). HIGH SPEED PRINTING Printing speed is approx. 16 seconds per sheet (in S size print). HIGH QUALITY PRINTING High quality print is available in dye sublimation mode. It also employs 256 gradients in each YMC and about 16,700,000 colors in total.
UNPACKING UNPACKING PRECAUTIONS Take the unit out of the box by the following procedures. Be sure to check the accessories. Open the box. 2 Remove the packing cushion containing the accessories out of the box. FEATURES 1 Be careful not to drop the accessories. CONNECTIONS PREPARATION 3 Carefully take the unit out of the box. Lift the printer from the box. 4 Unwrap the packing. NOTE 2 TROUBLESHOOTING When you lift up this unit, do not insert your hand to the print outlet.
FEATURES & FUNCTIONS FRONT PANEL 6 STATUS DISPLAY 5 7 4 8 3 9 2 10 DATA 11 RIBBON 12 PAPER 13 ALARM 14 15 1 1 PAPER CASSETTE LOADING SLOT/PRINT OUTLET 5 Paper cassette loading area. Prints are released on the upper part of the paper cassette. 6 2 3 RIBBON CARTRIDGE LOADING SLOT The status display indicates current printer condition. A flap (cover) to protect inside of the unit is attached. DIMMER BUTTON ( ) MODE BUTTON ( 7 8 A blinking for 5 seconds...
STATUS DISPLAY PRECAUTIONS B DATA INDICATOR ( ) This indicator blinks during data transfer and illuminates during printing. C RIBBON INDICATOR ( ) D PAPER INDICATOR ( FEATURES This indicator illuminates for ink ribbon notification. See page 17. ) This indicator illuminates or blinks for paper notification. See page 17. ALARM INDICATOR ( ) CONNECTIONS PREPARATION E This indicator illuminates for error conditions. See page 17.
FEATURES & FUNCTIONS REAR PANEL 1 2 3 5 1 4 USB PORT ( ) Use this terminal to connect the unit to a device equipped with USB interface such as a personal computer. See page 11 for connection. 2 AC LINE SOCKET Connects to the provided power cord. Insert the cord firmly. 3 POTENTIAL CONNECTOR ( EQUALIZATION ) Connect this terminal and that of the connected device. This terminal is used to equalize the potential of the device connected to the unit.
CONNECTIONS CONNECTION WITH USB INTERFACE PRECAUTIONS 2 CONNECTING WITH PC Connect this unit with a personal computer as following example. To USB port FEATURES To USB port Digital printer Personal computer CONNECTIONS PREPARATION NOTE A USB cable is not supplied with this unit. Use the USB 2.0 certified cable of 2 m or less in length. SETTING DIP SWITCHES 2 SETTING DIP SWITCHES All the switches are set to OFF at the time of shipment from the factory.
BEFORE OPERATION Before printing, 1. Turn on the power of this unit. 2. Load print paper into the paper cassette. 3. Load the paper cassette with print paper into the unit. 4. Load a ribbon cartridge to the unit. (page 14) 5. Install the printer driver. (page 16) PAPER/INK RIBBON SET Make sure to use the following types of paper sheet and ink ribbon set. 2 PAPER/INK RIBBON SET Model Size No.
4 Tab PRECAUTIONS Place the paper in the paper cassette together with the protection sheet on the top. Make sure that the front corners of the stack are under the metal tabs. Remove the protection sheet placed on the top of the paper. FEATURES 5 NOTE • You can load only one package of print paper supplied as paper/ink ribbon set. Set the tray (cover) onto the paper cassette. 7 Load the paper cassette in the printer. 8 When using L-size paper, raise the stopper on the tray (cover).
BEFORE OPERATION LOADING RIBBON CARTRIDGE Be sure to turn on the power of this unit before loading a ribbon cartridge. 1 Remove the used ribbon cartridge by pressing the RIBBON EJECT button. When you use the unit for the first time, this operation is not required. 2 Remove slack in the ink ribbon. Turn the gear in the direction of the arrow (backside of the ribbon cartridge) to remove slack. NOTE If slack is left, the ink ribbon may be damaged when loaded.
• Fingerprints or dust on the paper’s surface may degrade the print quality and cause paper jams. When print paper is transferred from a cool place to a hot place, vapor or dew will be generated on the paper’s surface causing paper jams or degraded print quality. Leave the print paper in the room to stabilize its temperature before use. When print paper or ink ribbon runs out during printing, the printing operation stops and the RIBBON/PAPER indicator lights or blinks.
BEFORE OPERATION INSTALLING PRINTER DRIVER A printer driver is required to print the data from a personal computer connected with this unit. The printer driver for Windows® is supplied with this unit. Printer driver Operating conditions CPD30X Microsoft®Windows® 2000 and Windows XP® Refer to the PRINTER DRIVER GUIDE in the CD-ROM for installing the printer driver. Windows 2000 and Windows XP are the registered trademarks of Microsoft Corporation in the U.S.A. and other countries.
TROUBLESHOOTING INDICATION ON THE STATUS DISPLAY & COUNTERMEASURES PRECAUTIONS If printing is not possible or error occurs during printing for some reason, the indicators on the front panel will be lit. In this case, follow the procedure described below. : lit Status indicator RIBBON PAPER ALARM Page TROUBLESHOOTING OTHERS A ribbon cartridge is not loaded. A ribbon cartridge runs out. 14 • Load a new ribbon cartridge. A paper cassette is not loaded. 12 • Load a paper cassette with paper.
TROUBLESHOOTING OVERCOMING PAPER JAMS 1 Check the error display on the status indicator. When is displayed, go to step 2. DATA RIBBON PAPER ALARM 2 Eject the ribbon cartridge by pressing the RIBBON EJECT button. When the ribbon cartridge can not be ejected by pressing the RIBBON EJECT button, turn off the power and turn it on again. If the ribbon cartridge is not ejected, contact your dealer. 3 Unload the paper cassette. 4 Flip open the access cover.
PRECAUTIONS BEFORE CALLING FOR SERVICE 2 Use the troubleshooting chart to resolve problem in operation. If you are unable to resolve the problem, unplug the power cord and contact your dealer. The power is not turned on. Is the power cord plug disconnected from the outlet? → Connect the power cord plug to the outlet firmly. After tuning the power off, wait for approx. 2 minutes. Then turn on the power. The image is not printed.
TROUBLESHOOTING REPAIRING A TORN INK RIBBON 1 Position the ribbon cartridge with the torn ink ribbon on a flat, clean surface. 2 Place a piece of transparent adhesive cellophane tape on the center of the ink ribbon. Cellophane tape Direction to turn the gear 3 Wind the gear in the direction of the arrow so that the cellophane tape is not seen and the ink ribbon is stretched taut. 4 Install the repaired ribbon cartridge in the printer.
CLEANING CLEANING PRECAUTIONS Clean the thermal head using the cleaning kit for CP30 (option) to maintain stable printer operation and extend the printer’s life. Please ask your dealer about the cleaning kit.
SPEC & OPTIONS SPECIFICATIONS Product name Model Printing method Digital color printer CP30DW Thermal dye sublimation 3-color faces progressive printing (yellow, magenta and cyan) Print quality S size 1600 x 1200 dots L size 2100 x 1600 dots Dot resolution 423 DPI DPI : Dots per Inch Number of grades 256 (8 bits) for each color ( About 16.7 million colors) Printing time S size Approx. 16 sec./sheet L size Approx. 25 sec.
2 PAPER/INK RIBBON SET Model CK30S CK30L 2 PRECAUTIONS OPTIONS Size S size L size No. of prints 80 50 Usage Color print Color print Remarks 3 packs contained 4 packs contained CLEANING KIT FOR CP30 FEATURES SERVICE INFORMATION Before requesting service please review this operation manual to correct minor complaints. If you are unable to correct the problem, consult your MITSUBISHI Dealer or MITSUBISHI Service Department.