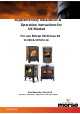
Supplementary Installation & Operation instructions for UK Market For use Morsø UK Stoves EN 13 240 & HETAS Ltd.
SUPPLEMENTARY INSTALLATION INSTRUCTIONS FOR USE WITH MORSØ UK STOVES 1430 72 3610 220 7943 162-174 S11-40 76 1440 90 6140 105 7948 156 S11-42 73 1442 90 6148 118 7970 135 S11-43 82 In all cases the installation must comply with current Building Regulations, Local Authority Byelaws and other specifications or regulations as they affect the installation of the stove.
If installation is into an existing chimney then it must be sound and free from cracks or other faults which might allow fumes into the property. Any existing chimney must be clear of obstruction and have been swept clean immediately before installation of the stove. If the stove is fitted in place of an open fire then the chimney should be swept one month after installation to clear any soot falls which may have occurred due to the difference in combustion between the stove and the open fire.
cm in front of the stove and 15 cm to each side measuring from the door of the combustion chamber. Important Notes Combustion air supply General Before lighting the stove check with the installer that the installation work and commissioning checks described in the installation instructions have been carried out correctly and that the chimney has been swept clean, is sound and free from any obstructions.
Permanent air vent The stove requires a permanent and adequate air supply in order for it to operate safely and efficiently. In accordance with current Building Regulations the installer may have fitted a permanent air supply vent into the room in which the stove is installed to provide combustion air. This air vent should not under any circumstances be shut off or sealed.
Controlling the burning rate When operating the stove with solid fuels the combustion air supply should be predominantly controlled by the primary air intake. The primary air on many of the stoves is controlled by an air spinner on the ash door or on the bottom of the main door. In the case of the Morsø Owl 3410, 3440 and the Ø range the primary air is controlled via a lever below the ash lip (please refer to main instructions) Riddling and ash clearance Riddling twice a day is usually sufficient.
• That same an room extractor fan as the is fire. not fitted in the • 12 • 5. Fire Blazing Out Of Control • Check that: • The door or doors are correctly closed. • The door seals are in good condition. • The main body gaskets are in good condition. With stove running trace along the of the stove with a burning incense stick; if the smoke trail is drawn into the stove at point it would indicate a defective seal.
Morsø Jernstøberi A/S - 29.10.
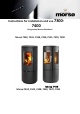
Instructions for installation and use 7300- 7400 Designed by Monica Ritterband Morsø 7340, 7343, 7348, 7350, 7351, 7370, 7390 Morsø 7440, 7443, 7448, 7450, 7470, 7490
Morsø 7343 EN 13240 · NS 3058-3059 MORSØ JERNSTØBERI A/S . DK-7900 NYKØBING MORS www.morsoe.comE-Mail: stoves@morsoe.com · Website: www.morsoe.
Enjoy your new Morsø stove! 1.0 Installing your Morsø stove Morsø, the biggest stove company in the Danish market, has been making wood-burning stoves of the highest quality since 1853. Just follow the instructions below, and we are certain that you will be able to use and enjoy your new stove for many years to come. 1.0 2.0 Installing your Morsø stove 1.1 Unpacking the stove 1.2 Installing the stove 1.3 Chimney sweep 1.4 Location of the stove/distance requirements 1.5 The chimney 1.
The floor If the stove is installed on a flammable floor, national and local regulations must be observed with regard to the size of the non-flammable underlying surface that must cover the floor beneath the stove. The underlying surface must naturally be able to bear the weight of the stove and, if applicable, the steel chimney. Distance to furniture The minimum clearance to combustible materials in front of the stove is 850 mm.
Mounting the flue collar pointing upwards From the factory, the stove is prepared for installation with the included flue collar pointing upwards with included screws. Mounting the flue collar to the rear With a hammer use light, firm taps to knock out the iron piece on the convection back panel from the small “bridges” holding the piece in place. The cover plate for the smoke outlet is unscrewed from the back panel and the fixed onto the top panel.
If there is insufficient draught in the chimney, it may be a good idea to install the flue pipe straight up, so as to minimise smoke migration in the actual combustion chamber. Avoid having any more bends than necessary, and limit the length of the flue pipe so as not to reduce the draught. Fresh air supply A wood-burning stove requires air for combustion. As a result, firing a wood-burning stove will help to create a healthy climate in your house.
2.0 Firing/using the stove When heating up or cooling down, the material is exposed to major temperature differences that may cause the stove to give off creaking sounds. Your stove is constructed with air inlets in three places. 8 Pre-heated, fast-moving combustion air is added to the fire beneath the grate. and is regulated using the handle beneath the door. The combustion air is let in when the handle is pushed to the left, and shut off when the handle is pushed to the middle position.
5. If the condition in step 4 is met, place max. 2 pieces of wood with a total weight of 1-1.5 kg and a length of 2025 cm over the embers in a single layer, with a distance of approximately 1 cm. Once the wood has burned out, it becomes glowing charcoal. If a good layer of embers has already formed on top of a sufficient layer of ash, the stove can keep warm for a very long time, not least due to the favourable qualities of the cast iron.
If you fire the stove using wet wood, a lot of the fuel’s thermal energy will be spent forcing the water out of the wood, without releasing any heat to the stove. This incomplete combustion results in a layer of soot being left in the stove, pipe and chimney. Comparison between firing with wood and oil Type of wood (moisture content 20%) No. of cubic metres per 1000 l oil Oak 7.0 Beech Ash Sycamore Birch Elm Common spruce Silver fir 7.0 7.2 7.5 8.0 8.9 10.4 10.9 3.0 Routine stove maintenance 3.
In most cases, the ash will need to be taken away by the waste disposal company. Because embers may be concealed in the ash pan for several days, it may be necessary to store the ash in a container made of non-flammable material before pouring it into a rubbish bag.
Spare parts for the 7300/7400 series Description Product no. Cast grate 7300/7400 Vermiculite baffle 7300 Vermiculite baffle 7400 Glass window, front 7300/7400 Glass window, outer side 7400 Glass window, inner side 7400 Rear vermiculite brick 7400 Rear vermiculite brick 7300 Vermiculite side, right 7300 Vermiculite side, left 7300 34745600 79748000 79743500 79743400 79742700 79742000 79742200 79747900 79748200 79748100 MORSØ JERNSTØBERI A/S . DK-7900 NYKØBING MORS E-Mail: stoves@morsoe.