MOTOROLA, the Stylized M Logo, and Radius are registered in the Use Patent & Trademark Office. All other product or service names are the proper of their respecitive owners. © Motorola, Inc. 2004. All rights reserved. Printed in the U.S.A.
VL50TOC.fm Page 1 Tuesday, February 24, 2004 4:43 PM Contents Introduction . . . . . . . . . . . . . . . . . . . . . . . 2 Package Contents . . . . . . . . . . . . . . . . . 2 FCC Licensing Information . . . . . . . . . . 4 Product Safety and RF Exposure Compliance. . . . . . . . . . . . . . . . . . . . . . 6 Battery Charger Safety Instructions . . . . 7 Radio Controls . . . . . . . . . . . . . . . . . . . . 8 Getting Started . . . . . . . . . . . . . . . . . . . . 9 Installing the Swivel Belt Holster . .
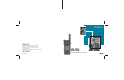
VL50intro.fm Page 2 Thursday, February 26, 2004 3:28 PM Introduction Introduction 2 Thank you for purchasing a Motorola VL50 Radio. Your radio is a product of Motorola’s 75 plus years of experience as a world leader in designing and manufacturing communications equipment. The VL50 radio provides cost-effective communications for businesses such as retail stores, restaurants, hotels, and schools.
VL50intro.
VL50fcc.fm Page 4 Wednesday, February 25, 2004 11:45 AM FCC Licensing Information FCC Licensing Information 4 The Motorola VL50 two-way radio operates on radio frequencies that are regulated by the Federal Communications Commission (FCC). In order to transmit on these frequencies, you are required to have a license issued by the FCC. Application is made available on FCC Forms 601, schedules D and H, and remittance form 159.
VL50fcc.fm Page 5 Tuesday, February 24, 2004 4:44 PM FCC Licensing Information maintenance and repairs in the private land mobile and fixed services as certified by an organization representative of the user of those services. Replacement of any transmitter component (crystal, semiconductor, etc.) not authorized by the FCC equipment authorization for this radio could violate FCC rules.
VL50safety.fm Page 6 Tuesday, February 24, 2004 4:44 PM Product Safety and RF Exposure Compliance Product Safety and RF Exposure Compliance 6 ! Before using this product, read the operating instructions for safe usage contained in the Product Safety and RF Exposure booklet enclosed with your radio. Caution ATTENTION! This radio is restricted to occupational use only to satisfy FCC RF energy exposure requirements.
4. To reduce the risk of damage to the cord or plug, pull the plug rather than the cord when disconnecting the charger from the AC receptacle. 5. To reduce the risk of electric shock, unplug the charger from the outlet before attempting any maintenance or cleaning. 6. Use of an attachment not recommended or sold by Motorola may result in a risk of fire, electric shock, or personal injury. 7. Make sure the cord is located so it will not be stepped on, tripped over, or subjected to damage or stress. 8.
VL50getstart.
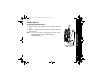
VL50getstart.fm Page 9 Wednesday, February 25, 2004 1:44 PM Getting Started 1. Slide the bottom of the radio into the holster until it snaps into place. 2. To remove, push the tab on the holster and pull the radio away from the holster. Note: In case of loss, please contact your point-of-sale or call 1-800-422-4210 to request replacement part number HCLN4013.
VL50getstart.fm Page 10 Wednesday, February 25, 2004 1:44 PM Installing the Batteries Getting Started Your radio uses a rechargeable Lithium-Ion (Li-Ion) battery or 3 AAA alkaline batteries with the 56564 AAA Battery Tray. 10 Li-Ion Battery 1. If the battery door is already in place, push down on the recess on the door and slide it off the radio. 2. Insert the battery, printed arrows first, into the battery compartment and press down to secure firmly in place. 3.
VL50getstart.fm Page 11 Wednesday, February 25, 2004 1:44 PM Charging the Battery Using the Drop-in Charger 1. Place the charger on a flat surface. 2. Insert the plug of the power cord into the jack on the charger. 3. Plug the cord into an AC outlet. 4. Turn the radio off. If the radio is on while charging, it will take longer to fully charge. 5. Insert the radio (with battery installed) into the front charging pocket. Note: The radio will fit in the charger with the holster on.
VL50getstart.fm Page 12 Thursday, February 26, 2004 2:53 PM Using the 56531 Multi-Unit Charger Getting Started The Multi-Unit Charger (MUC) allows drop-in charging of up to 6 radios or batteries. Batteries can be charged inside the radios or removed and placed in the MUC separately. Each of the 6 charging pockets can hold a radio or battery, but not both. 12 1. 2. 3. 4. 5. Place the charger on a flat surface. Insert the power cord plug into the jack on the MUC. Plug the cord into an AC outlet.
VL50getstart.fm Page 13 Wednesday, February 25, 2004 1:44 PM Charging Status LEDs On the drop-in charger, the radio and battery charging pockets have their own LEDs. On the MUC, each of the 6 charging pockets has an LED. The LEDs are grouped into pairs to show which charging pockets are paired (for cloning, see page 27). Battery Meter The battery meter in the upper left corner of the display (see page 15) shows how much battery power is remaining.
VL50getstart.fm Page 14 Wednesday, February 25, 2004 1:44 PM Turning Your Radio On and Off See page 8 for a basic radio diagram. Turn P clockwise to turn the radio on, and counterclockwise to turn the radio off. When the radio is on, the transmit light on the top of the radio flashes every 3 seconds. Getting Started When you turn the radio on, the radio chirps and the display briefly shows all features and display segments.
VL50getstart.fm Page 15 Wednesday, February 25, 2004 1:44 PM Adjusting the Volume Turn P clockwise to increase the volume, and counterclockwise to decrease the volume. Note: Do not hold the radio too close to your ear when adjusting the volume.
VL50operation.fm Page 16 Tuesday, February 24, 2004 4:46 PM Talking and Receiving Basic Radio Operation Talking and Receiving 1. Press and hold T to check for channel activity. If you hear static, the channel is clear to use. Do not transmit if someone is speaking on the channel. Press T again to stop monitoring. 2. To talk, press and hold Push to Talk and speak into the microphone. Hold the radio 2 to 3 inches away from your mouth. 3. To listen, release Push to Talk.
VL50operation.fm Page 17 Tuesday, February 24, 2004 4:46 PM Industrial Multi-Level Outdoor Inside steel/concrete industrial buildings Inside multi-level buildings Flat ground with no obstructions Up to 200,000 sq. ft. Up to 15 floors Up to 5 miles Handsfree Use (VOX) The VL50 radio can operate handsfree when used with compatible voice activation (VOX) accessories. A short delay occurs between the time when you start talking and when the radio transmits.
Talking and Receiving VL50operation.fm Page 18 Tuesday, February 24, 2004 4:46 PM 18 With Compatible VOX Accessories 1. Turn the radio off. 2. Open the accessory cover. 3. Plug the audio accessory firmly into the accessory jack. 4. Turn the radio on. The radio displays g. If g is flashing and you are setting up the VOX accessory for the first time, set the VOX sensitivity level (see page 19). 5. Lower the radio volume BEFORE placing the accessory in or near your ear. 6.
Setting the VOX Sensitivity You can adjust the sensitivity of your radio’s accessory or microphone during VOX operation to suit different operating environments. These menus appear only when the VOX feature is in use, which is indicated by g. 1. Press S until g displays. The radio displays H when you are setting the external VOX (with audio accessory). 2.
VL50operation.fm Page 20 Tuesday, February 24, 2004 4:46 PM Talking and Receiving Scanning 20 You can scan up to 4 channels and frequencies. When the radio detects activity, it stops scanning and locks in on the active channel. This allows you to talk and listen to the person transmitting without changing channels. 1. To start scanning, briefly press T. The scan icon h displays and the radio begins to scan the channels.
VL50operation.fm Page 21 Tuesday, February 24, 2004 4:46 PM Programming mode allows you to change the following settings on your radio: • Channel • Frequency • Interference eliminator code • Call tones • Microphone gain • Scan list • Available channels Notes: • To talk with someone on your two-way radio, the channel, frequency, and interference eliminator code must be the same on both radios. • You cannot enter programming mode while a VOX accessory is plugged into the radio.
VL50operation.fm Page 22 Wednesday, February 25, 2004 11:54 AM Factory Default Settings Programming Mode Your radio is programmed at the factory to the following settings: Channel 1 2 3 4 5 6 7 8 Code Call Tone/ VibraCall® VOX Microphone Gain Frequency 1 2 3 4 5 6 7 8 1 Off (0) Off (0) 2 (medium sensitivity) To restore the factory settings, turn the radio on while holding Push to Talk and S for 22 3 seconds.
VL50operation.fm Page 23 Tuesday, February 24, 2004 4:46 PM Press and hold Push to Talk and T for 3 seconds while turning the radio on. The radio beeps and displays k, the channel number flashes, and the frequency (indicated by l) and code (indicated by y) display alternately. Note: If you press and release the Push to Talk button when programming, you will return to the front of the Programming Mode. Selecting a Channel 1.
Programming Mode VL50operation.fm Page 24 Tuesday, February 24, 2004 4:46 PM Programming the Interference Eliminator Code The interference eliminator code helps minimize interference by providing code combinations that filter out static, noise, and unwanted messages. 1. In programming mode, press S until y displays and the code number flashes. 2. Press [ or ] to select the code (see page 37). 3. Press and hold Push to Talk to exit programming mode, or press S to continue programming.
The VibraCall® feature is an additional call tone option that makes the VL50 radio vibrate briefly when it receives if you have not transmitted or received in the last 30 seconds. Select call tone 8 to turn VibraCall® on. i displays on the radio when VibraCall® is on. 1. In programming mode, press S until E displays. 2. Press [ or ] to hear and select the call tone. Select call tone 8 for VibraCall®. 3. Press and hold Push to Talk to exit programming mode, or press S to continue programming.
Programming Mode VL50operation.fm Page 26 Tuesday, February 24, 2004 4:46 PM 26 Programming Microphone Gain You can adjust the microphone sensitivity to suit different users or operating environments. 1. In programming mode, press S until g and ? display. 2. Press [ or ] to select the sensitivity level: 3 = High sensitivity, for quiet environments 2 = Medium sensitivity (default) 1 = Low sensitivity, for loud environments 3.
VL50operation.fm Page 27 Thursday, February 26, 2004 2:51 PM Cloning Radio Settings Cloning Radio Settings You can copy VL50 radio settings from one radio (the source) to a second radio using the 56531 Multi-Unit Charger (MUC) optional accessory. See the MUC User's Guide for more information. You can clone only one radio at a time. A multi-channel radio can clone to a single-channel radio, but only the first channel is cloned.
VL50operation.fm Page 28 Tuesday, February 24, 2004 4:46 PM Advanced Features You can set the following features by pressing and holding additional buttons while turning the radio on. Press This Button While Turning the Radio On Default Setting Turn Keypad Tones On/Off Turns keypad beeps off for silent keypad operation. [ On Turn End-of-Transmission Tone On/Off If enabled, your two-way radio transmits a tone when you finish transmitting (like saying Roger or Over).
To Do This Restore Factory Defaults Returns radio to its original factory settings. Press This Button While Turning the Radio On Default Setting Push to Talk S --- Advanced Features VL50operation.
VL50operation.fm Page 30 Tuesday, February 24, 2004 4:46 PM Troubleshooting Troubleshooting Symptom Try This: No Power Recharge or replace Li-Ion battery. Reposition or replace Alkaline batteries. Message not transmitted Make sure Push to Talk is completely pressed while transmitting. Recharge, replace, and/or reposition batteries. Verify the transmit light is illuminated while speaking. Verify Channel, Frequency, and Code settings are correct. Hearing other Frequency may be in use.
Symptom Try This: Limited talk range Steel and/or concrete structures, heavy foliage, buildings, or vehicles decrease range (see page 17). Check for clear line of sight to improve range. Wearing radio close to body such as in a pocket or on a belt decreases range. Change location of radio. Message not received Confirm radios have the same channel, frequency, and interference eliminator code settings (see page 21). Recharge, replace, and/or reposition batteries. Move to another location.
Troubleshooting VL50operation.fm Page 32 Tuesday, February 24, 2004 4:46 PM 32 Symptom Try This: Charger light does not come on Reinsert radio and/or battery. Clean battery and/or charger contacts. Verify that the charging pin on the transformer is inserted correctly into the drop-in charger. AAA cells installed in radio. Remove and replace with Li-Ion battery. Low battery meter reading although new batteries are installed Verify radio is set to the correct battery type (see page 10).
VL50operation.fm Page 33 Tuesday, February 24, 2004 4:46 PM Use and Care Use a soft damp cloth to clean the exterior. Do not immerse in water. Do not use alcohol or cleaning solutions. If the radio is submerged in water... Turn radio off and remove batteries. Dry with soft cloth. Use and Care XXX Do not use radio until completely dry.
VL50operation.fm Page 34 Tuesday, February 24, 2004 4:46 PM Frequencies and Bandwidths Frequencies and Bandwidths 34 These charts provide frequency information and are useful when using Motorola VL50 radios with other business radios. Frequency Display Number is identical to Spirit M, GT, and SSeries frequency position (where applicable), but bandwidth may be different. UHF Frequencies Display Number Frequency (MHz) Bandwidth Display Number Frequency (MHz) Bandwidth 1 464.5000 12.5/25.0 11 462.
VL50operation.fm Page 35 Tuesday, February 24, 2004 4:46 PM UHF Frequencies (Continued) Frequency (MHz) Bandwidth Display Number Frequency (MHz) Bandwidth 21 462.8625 12.5 35 461.2875 12.5 22 462.8875 12.5 36 461.3125 12.5 23 462.9125 12.5 37 461.3375 12.5 24 464.4875 12.5 38 461.3625 12.5 25 461.0375 12.5 39 462.7625 12.5 26 461.0625 12.5 40 462.7875 12.5 27 461.0875 12.5 41 462.8125 12.5 28 461.1125 12.5 42 462.8375 12.5 29 461.1375 12.5 43 462.
VL50operation.fm Page 36 Tuesday, February 24, 2004 4:46 PM UHF Frequencies (Continued) Frequencies and Bandwidths Display Number 36 Frequency (MHz) Bandwidth Display Number Frequency (MHz) Bandwidth 49 464.5625 12.5 53 466.1125 12.5 50 466.0375 12.5 54 466.1375 12.5 51 466.0625 12.5 55 466.1625 12.5 52 466.0875 12.5 56 466.1875 12.
VL50operation.fm Page 37 Tuesday, February 24, 2004 4:46 PM Display Number Code (Hz) Display Number Code (Hz) Display Number Code (Hz) 1 67.0 14 107.2 27 167.9 2 71.9 15 110.9 28 173.8 3 74.4 16 114.8 29 179.9 4 77.0 17 118.8 30 186.2 5 79.7 18 123.0 31 192.8 6 82.5 19 127.3 32 203.5 7 85.4 20 131.8 33 210.7 8 88.5 21 136.5 34 218.1 9 91.5 22 141.3 35 225.7 10 94.8 23 146.2 36 233.6 11 97.4 24 151.4 37 241.8 12 100.0 25 156.
VL50operation.
VL50operation.
VL50operation.fm Page 40 Tuesday, February 24, 2004 4:46 PM Spirit GT Series Programming Spirit GT Series Programming 40 The VL50 radio platform is designed to replace the Spirit GT Series radio. The first eight frequencies and 38 interference eliminator codes of VL50 radio are compatible with Spirit GT Series. To program your VL50 radio to talk with a Spirit GT Series, verify or change your Spirit GT settings as follows. To verify the frequency and code: 1. Press the Menu button 3 times.
VL50warranty.fm Page 41 Wednesday, February 25, 2004 1:48 PM Limited Warranty for Motorola Personal Communications Products Purchased in the United States and Canada Warranty What This Warranty Covers • Products. Defects in materials and workmanship in wireless cellular telephones, pagers, and/or two-way radios, and certain accessories that are sold with them, such as the battery, battery charger, and holster manufactured and/or sold by Motorola (Products). • Batteries.
VL50warranty.fm Page 42 Wednesday, February 25, 2004 1:48 PM III. Who is Covered This warranty extends to the first end-user purchaser only. Limited Warranty IV. 42 What We Will Do to Correct Warranty Problems At no charge to you, we have the option to repair or replace the Products or software that do not conform to the warranty, or to refund the Products’ purchase price. We may use functionally equivalent reconditioned/refurbished/pre-owned or new Products or parts.
You will receive instructions on how to ship the Products to Motorola. You must ship the Products to us with freight, duties and insurance prepaid.
Limited Warranty VL50warranty.fm Page 44 Wednesday, February 25, 2004 1:48 PM 44 • Rechargeable batteries that: (a) are charged by other than the Motorola-approved battery charger specified for charging such batteries; (b) have any broken seals or show evidence of tampering; (c) are used in equipment other than the Product for which they are specified; or (d) are charged and stored at temperatures greater than 60 degrees centigrade. Any of these voids the warranty.
VL50warranty.fm Page 45 Wednesday, February 25, 2004 1:48 PM Flat-rate repair rates may apply to Products not covered by this warranty. To obtain information about Products needing repairs that are not covered by this warranty, please call the telephone number previously listed. We will provide information on repair availability, rates, methods of payment, where to send the Products, etc. This is Motorola’s complete warranty for the Products, and states your exclusive remedies.
VL50warranty.fm Page 46 Wednesday, February 25, 2004 1:48 PM Limited Warranty VIII. Patent and Software Provisions 46 At Motorola’s expense, we will defend you, and pay costs and damages that may be finally awarded against you, to the extent that a lawsuit is based on a claim that the Products directly infringe a United States patent.
Laws in the United States and other countries preserve for Motorola and other third party software providers certain exclusive rights for copyrighted software, such as the exclusive rights to reproduce in copies and distribute copies of such software. The software may be copied into, used in and redistributed with only those Products that are associated with such software.
VL50warranty.
VL50qr.fm Page 49 Tuesday, February 24, 2004 4:47 PM VL50 Radio Programming Quick Reference To enter programming mode, press and hold Push to Talk and Qfor 3 seconds while turning the radio on. The radio beeps and displays k, the channel number flashes, and the frequency (indicated by l) and code (indicated by y) display alternately. Set the Channel Set the Frequency Set the Interference Eliminator Code Set Available Channels Press [ or ]. Press S until l displays. Press [ or frequency.
VL50qr.fm Page 50 Tuesday, February 24, 2004 4:47 PM VL50 Radio Programming Quick Reference Press S until E display.s Set a Call Tone Press [ or ] to select1, 2, or 3 for audible call tones, 4 for VibraCall, or 0 for off (default). Press S until g and ? display. Set the Microphone Gain Press [ or ] to select: 1 Low sensitivity 2 Medium sensitivity 3 High sensitivity Press S until h displays and the channel number and Y or n flash.
CP50fcc.
MOTOROLA, the Stylized M Logo, and Radius are registered in the Use Patent & Trademark Office. All other product or service names are the proper of their respecitive owners. © Motorola, Inc. 2004. All rights reserved. Printed in the U.S.A.