MultiTech Systems Intelligent Serial Interface Model ISI551PC Card (ISI) Owner's Manual
82031702
NOTE: This equipment has been tested and found to comply with the limits for a Class B digital device, pursuant to Part 15 of the FCC Rules. These limits are designed to provide reasonable protection against harmful interference when the equipment is operated in a residential installation. This equipment generates, uses and can radiate radio frequency energy, and if not installed and used in accordance with the instruction manual, may cause harmful interference to radio communications.
Owner's Manual P/N 82031702, Rev. C ISI551PC This publication may not be reproduced, in whole or in part, without prior expressed written permission from Multi-Tech Systems, Inc.. All rights reserved. Copyright © 1995, by Multi-Tech Systems, Inc. Multi-Tech Systems, Inc., makes no representation or warranties with respect to the contents hereof and specifically disclaims any implied warranties of merchantability or fitness for any particular purpose. Furthermore, Multi-Tech Systems, Inc.
TABLE OF CONTENTS 1.1 1.2 1.3 1.4 CHAPTER 1 INTRODUCTION & DESCRIPTION Introduction ........................................... 1-1 Product Description .............................. 1-2 How to Use This Manual ...................... 1-2 Technical Specifications ...................... 1-3 2.1 2.2 2.3 CHAPTER 2 HARDWARE INSTALLATION ISI Card Installation .............................. 2-1 Determining Current System Settings . 2-1 Hardware Installation Procedure ..........
1.1 Introduction The introduction of high speed, data compression modems, such as Multi-Tech's MultiModem II TM Series, has shown that many PC serial ports are unable to keep up, essentially becoming a bottleneck for the entire system. The ISI551PC card provides processing power to reliably transmit data up to 115.2K bps. Using an ISI enables your system's processor to perform more efficiently.
This manual contains product specifications, installation instructions, configuration and technical support information which will assist you in the operation process. It is assumed that you have basic PC skills at the very least. Therefore, we have not included step-by-step instructions for basic operations such as logging in and file editing, etc. 1.2 Product Description The ISI551PC card is a single port serial expansion card which adds data buffering for enhanced serial port performance.
This manual includes hardware configuration and installation procedures described in Chapter 2. Chapter 3 covers technical support, warranty and BBS information. Appendix A describes complete information on Base I/O addressing. 1.
Card Dimensions ISI551PC · 4.95" L x 2.375" W x .062" D · 12.5 cm L x 6.0 cm W x .16 cm D Baud Rates · Up to 115.
2.1 ISI Card Installation This chapter provides you with the procedures to install the Multi-Tech ISI551PC card in your ISA or EISA bus personal computer. Hardware installation involves: 1) Opening your PC. 2) Setting card configuration (determining I/O address DIP-Switch setting and IRQ jumper setting). 3) Installing the card into the PC. 2.
use the base I/O address of 380h, addresses 380h387h must be unused.) To select an unused I/O address and an IRQ value, it may be necessary to find out which values are already in use. To determine your system's current settings, refer to Appendix A. The ISI551PC is shipped with the IRQ set to level 3 and the base I/O address at 2F8 hex. If you are certain that these settings are not already in use, continue with the hardware configuration and installation.
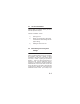
2.3 Hardware Installation Procedure Perform the procedures in Table 2-1 to configure and install the ISI551PC card into your ISA or EISA bus host computer. Table 2-1 ISI Configuration and Installation Procedure Step 1 Procedure Make sure your computer and any peripheral equipment connected to it, are turned off. Failure to do so may damage both your ISI card and your PC. The card may be installed in any 286-, 386- or 486-based computer with an ISA or EISA bus architecture. Figure 2-1.
Table 2-1 (cont'd) ISI Configuration and Installation Procedure Step Procedure computer as instructed in your computers documentation. 3 Locate the unused slot(s) which you will be using for your ISI card, and remove the slot cover(s) per the instructions in your computers documentation. 4a The figure below shows the default settings for this card. Record any changes made to the Base I/O Address settings. The default Base I/O Address is 2F8 (COM2).
Table 2-1 (cont'd) ISI Configuration and Installation Procedure Step Procedure 4b Select a unique I/O Address for your ISI551PC card using the block of 8-position DIP-Switches on your ISI circuit board. Figure 2-3 shows various I/O addressing and IRQ settings. 5 Record any changes you make to these settings and keep them handy for the driver installation. Com Port I/O Address Setting IRQ Level COM1 COM2 COM3 COM4 Figure 2-3.
Table 2-1 (cont'd) ISI Configuration and Installation Procedure Step Procedure 6 Install the ISI card into the selected expansion slot(s) in the same manner as any other add-on card, as instructed in your computers documentation. 7 Fasten the retaining bracket to the computer chassis and replace the cover. 8 Connect the appropriate cable to the ISI card. The ISI551PC has one DB-9 connector. The DB-9 is a DTE-type serial port suited for the connection of Data Circuitterminating Equipment, or DCEs.
If you are using MultiExpress communication software, note during your communication set-up that your ISI card is activated by choosing Serial and then Comm port selection. Do not use the MultiTech ISI selection for this card. The MultiTech ISI selection is used with ISI models ISI502 and ISI508, which are older legacy products.
3.1 Introduction This chapter starts out with statements about your ISI551PC's 2-year warranty. The next section, Tech Support, should be read carefully if you have questions or problems with your ISI551PC. It includes the technical support telephone numbers, space for recording your ISI551PC information, and an explanation of how to send in your ISI551PC should you require service.
which have been neglected, altered, abused, used for a purpose other than the one for which they were manufactured, repaired by the customer or any party without MTSs written authorization, or used in any manner inconsistent with MTSs instructions. MTSs entire obligation under this warranty shall be limited (at MTSs option) to repair or replacement of any products which prove to be defective within the warranty period, or, at MTSs option, issuance of a refund of the purchase price.
any questions about the operation of this unit, call 1-800-972-2439. Please fill out the ISI551PC information (below), and have it available when you call. If your ISI551PC requires service, the tech support specialist will guide you on how to send in your ISI551PC (see Section 3.3.2). 3.3.1 Recording ISI551PC Information Please fill in the following information on your Multi-Tech ISI551PC. This will help tech support in answering your questions. ISI551PC Model No.: ISI551PC Serial No.
3.3.2 Service If your tech support specialist decides that service is required, ISI551PCs may be sent (freight prepaid) to our factory. Return shipping charges will be paid by Multi-Tech Systems. Include the following with your ISI551PC: a description of the problem. return billing and return shipping addresses. contact name and phone number. check or purchase order number for payment if the ISI551PC is out of warranty. (The standard repair charge for this ISI551PC is $95.
Send ISI551PCs to this address: MULTI-TECH SYSTEMS, INC. 2205 WOODALE DRIVE MOUNDS VIEW, MINNESOTA 55112 ATTN: SERVICE OR REPAIRS You should also check with the supplier of your ISI551PC on the availability of local service and/or loaner units in your part of the country. You may call us at 1-800-328-9717 or (612) 785-3500 (in Minnesota). 3.4 About the Multi-Tech BBS Multi-Tech Systems maintains a Bulletin Board Service (BBS) for its customers.
3.4.1 How to Use the Multi-Tech BBS To use Multi-Tech's BBS, perform the following steps. 1. Dial our BBS at 1-800 392-2432 (U.S.A. and Canada) or 612-785-9875 (International). 2. Set your computer or communications program to "8N1", and to emulate ANSI (e.g., with MultiExpress software, press ALT-S and choose "ANSI"). 3. At the prompt, type your first name, last name, password, then hit RETURN. If you are a first time caller, after you hit RETURN the BBS asks if your name is spelled correctly.
the files on the BBS. At the list of the directories, select the number of directories required. A list of files and a description for each of the files is displayed. Select a file that you would like to download; if you already know the file name, type D at the Files Menu to download the selected file(s). Pess V to view a text file. 6. At the Message Menu, you can leave a message to the Sysop (you can not read messages at this point). The BBS will tell you if you have a personal message (mail).
Multi-Tech is a commercial user of the Internet, and messages are retrieved from our customers on a periodic basis. If you prefer receiving technical support viathe Internet, plaese address your message to: techsupport@multitech.com. Multi Tech also maintains a home page on the World Wide Web at the following address: http://www.multitech.com Multi Tech also maintains a FTP Server at the following address: FTP.multitech.
Appendix A Base I/O Address Switch Settings The table below provides the DIP-Switch settings for valid base I/O addresses of the ISI551PC. The switches can be set to "OPEN" (O in the table below) or to "CLOSED" (C in the table below). Holding the board with the switch facing you (reading numbers 1-8 left to right), the "UP" position for the switch is OPEN, and the "DOWN" position is CLOSED. "S1" below is labeled as "1" on the left side of the switch and so on, through S8.
Table A-1(cont'd) I/O Address Switch Settings for ISI Cards (hex) S1 S2 S3 170 178 180 188 190 198 1A0 1A8 1B0 1B8 1C0 1C8 1D0 1D8 1E0 1E8 1F0 1F8 200 208 210 218 220 228 230 238 240 248 250 A-2 C O C O C O C O C O C O C O C O C O C O C O C O C O C O C O O C C O O C C O O C C O O C C O O C C O O C C O O C C O O O C C C C O O O O C C C C O O O O C C C C O O O O C C C S4 S5 O O C C C C C C C C O O O O O O O O C C C C C C C C O O O C C O O O O O O O O O O O O O O O O C C C C C C C C C C C S6 S7 S8 O O
Table A-1(cont'd) I/O Address Switch Settings for ISI Cards (hex) 258 260 268 270 278 280 288 290 298 2A0 2A8 2B0 2B8 2C0 2C8 2D0 2D8 2E0 2E8 2F0 *2F8 300 308 310 318 320 328 330 338 340 S1 S2 S3 S4 O O C O C C O O O C O O C O O O O O O O C C C C O C C C C O C C O O C C C C O C O C O C C O O C O O O C C C C O O C C O C O C O O O C O C C O O O C O O C O O O O O O O C C C C O C C C C O C C O O C C C C O C O C O C C O O C O O O C C C C O S5 C C C C C O O O O O O O O O O O O O O O O C C C C C C C C C S6 S7 C
Table A-1(cont'd) I/O Address Switch Settings for ISI Cards (hex) S1 S2 S3 S4 S5 S6 S7 S8 348 350 358 360 368 370 378 380 388 390 398 3A0 3A8 3B0 3B8 3C0 3C8 3D0 3D8 3E0 3E8 3F0 3F8 O O O O O O O C C C C C C C C O O O O O O O O C C C C C C C O O O O O O O O O O O O O O O O O O O O O O O O O O O O O O O O O O O O O O O A-4 O C O C O C O C O C O C O C O C O C O C O C O C O O C C O O C C O O C C O O C C O O C C O O C C C O O O O C C C C O O O O C C C C O O O O O O O O O O O O O O O O O O O O O O O
Index A About CompuServe ........................... 3-7 About the Multi-Tech BBS .................. 3-5 B Base I/O Switch Settings ................... A-1 Baud Rates ...................................... 1-4 Bus Type ...................................... 1-3 C Card Dimensions .............................. CompuServe .................................... Computer Requirements ................... Connector Types ............................... 1-4 3-7 1-3 1-4 H Hardware Installation Procedure ........
I I/O Address ....................................... I/O Address Switch and IRQ Jumper Locations .................................. Introduction ....................................... ISI Card Installation ............................ 1-4 2-3 1-1 2-1 L Limited Warranty ............................... 3-1 M Multi-Tech BBS ................................. 3-5 O Operating Temperature ...................... 1-3 P Power Consumption .......................... 1-3 Product Description ......................
S Serial Interface ................................ 1-3 Service ............................................. 3-4 T Tech Support .................................... 3-2 Technical Specifications ..................... 1-3 W Warranty ...........................................