RAPID RIVER Operators Manual IT IS THE RESPONSIBILITY OF THE OPERATOR TO MAINTAIN CUSTOMER SAFETY AT ALL TIMES, AND IT IS IMPERATIVE THAT THE DETAILS SET OUT IN THIS MANUAL ARE FOLLOWED PRECISELY. Part No.
PORTABLE APPLIANCE TESTING Please Note: During testing of the machine with a portable appliance tester the insulation test will show a failure due to the fitting of two VDRs between Live/Earth and Neutral/Earth. These components have been fitted to safeguard against high voltage surges that may occur on the mains supply to the machine and to comply with the EMC regulations. To conduct an insulation test on this machine, the VDRs must be isolated from the circuit first.
No part of this publication may be reproduced by any mechanical, photographic or electronic process, or in the form of phonographic recording, nor may it be stored in a retrieval system, transmitted or otherwise copied for private or public use, without permission from NAMCO EUROPE LIMITED. While the information contained in this manual is given in good faith and was accurate at the time of printing. NAMCO EUROPE LIMITED reserve the right to make changes and alterations without notice.
NOTES ON INSTALLATION NEVER turn the power to the machine ON until installation has been completed. In order to prevent possible electric shocks, be sure that the machine is connected to the mains with a securely connected earthed plug. So that customers are not injured by the movement of the machine, ensure that there is as least 500mm separation between other machines or walls. In order to avoid damage to the machine due to mis-operation, ensure that the voltage of the mains supply is 230volts AC.
쮕 Dieses Dokument darf in keiner Weise vervielfältigt werden. Jegliche Tonaufnahmen sowie die Speicherung auf Datenträger (Suchsysteme), die Weitergabe oder sonstiges Kopieren für den gewerblichen und privaten Gebrauch sind untersagt und bedürfen der vorherigen Genehmigung durch NAMCO EUROPE LIMITED. Die informationen in diesem Handbuch entsprechen den Tatsachen bei Drucklegung. NAMCO EUROPE LIMITED behält sich jedoch das Recht zu Änderungen ohne vorherige Bekanntgabe vor.
HINWEISE ZUR AUFSTELLUNG NIEMALS das Gerät einschalten bevor die Aufstellung völlig abgeschlossen ist. Zur Vermeidung von Elektroschlägen muß das Gerät mit einem ordnungsgemäß geerdetem Netzstecker an die Stromversorgung angeschlossen werden. Um zu vermeiden, daß Kunden durch die Gerätebewegungen verletzt werden, muß ein Sicherheitsabstand zu anderen Geräten und Wänden von mindestens 50cm eingehalten werden.
Denne udgivelse må ikke reproduceres af nogen som helst mekanisk, fotografisk eller elektrornisk proces eller i form af indspilning, den må heller ikke lagres i et eftersøgningssystem transmitteres eller kopieres til nogen form for offentlig benyttelse uden tilladelse fra Namco Europe Limited. Da informationerne i denne manual er givet med god tro og var korrekt på udskivningstidspunktet, forbeholder Namco Europe Limited sig retten til, at foretage ændringer og forandringer uden varsel.
PUNKTER OM INSTALLATION Tænd aldrig for strømmen til maskinen før installering er fuldført. For at undgå mulige elektriske stød sikres, at maskinen er forbundet til hovedstrømmen med sikkert monterede jordstik. For at kunder ikke kommer til skade ved spillets bevægelser sikres, at der er mindst 50cm afstand til andre maskiner og vægge. For at undgå skader på maskinen p.g.a. fejlbetjening sikres, at spændingen på hovedstrømmen er 230 volt AC.
No se permite la reproducción total ni parcial de esta publicación por ningún medio mecánico, fotográfico o electrónico, grabaciones fonográficas, ni su almacenamiento informático, su transmisión o su copia, ya sea para uso público o privado, sin permiso de NAMCO EUROPE LIMITED. Si bien la información contenida en este manual se da de buena fe y es correcta en el momento de su impresión, NAMCO EUROPE LIMITED se reserva el derecho de hacer cambios y alteraciones sin previo aviso.
NOTAS DE INSTALACIÓN. JAMÁS ENCIENDA la máquina antes de haber completado la instalación. Para evitar posibles descargas eléctricas, asegúrese de que la máquina está conectada a la red con un enchufe provisto de toma de tierra. Para que los usuarios no sufran lesiones debido al movimiento del juego, asegúrese de que hay al menos 500 mm de separación entre éste y otras máquinas o las paredes.
Aucun élément de cette publication ne sera reproduit, ni par procédé mécanique, photographique ou électronique, ni par un moyen d’enregistement phonographique. Ces informations ne seront ni stockées grâce à un procédé de récupération, ni transmises ou autrement copiées pour un usage publique ou privé, sans l’autorisation de NAMCO EUROPE LIMITED.
NOTES D’INSTALLATION NE JAMAIS mettre le jeu en marche avant que l’installation ne soit complétement effectuée. Afin de prévenir une éventuelle électrocution, s’assurer que la machine est connectée au réseau avec une prise de terre reliée selon les normes de sécurité. Afin que les clients ne soient pas blessés par les mouvements du jeu, s’assurer qu’il existe au moins 500 mm de séparation aves les autres jeux ou les murs.
ও ÊáíÝíá ìÝñïò áõôÞò ôçò Ýêäïóçò äåí ìðïñåß íá áíáðáñá÷èåß ìå ïðïéïäÞðïôå ìç÷áíéêü ,öùôïãñáöéêü Þ çëåêôñïíéêü ìÝóï , Þ ìå ìïñöÞ öùíçôéêÞò ç÷ïãñÜöçóçò êáé ïýôå íá áðïèçêåõôåß ìå åðáíïñèùôéêü óýóôçìá , íá ìåôáäïèåß Þ íá áíôéãñáöåß ãéá äçìüóéá Þ éäéùôéêÞ ÷ñÞóç , ÷ùñßò ôçí Üäåéá ôçò NAMCO EUROPE LIMITED. Êáèþò áõôÝò ïé ðëçñïöïñßåò óå áõôü ôï åã÷åéñßäéï Ý÷ïõí äïèåß ìå êáëÞ ðßóôç êáé áêñéâþò ôçí þñá ôçò ôýðùóçò , ç åôáéñåßá NAMCO EUROPE LIMITED êñáôÜåé ôï äéêáßùìá íá êÜíåé ïðïéåóäÞðïôå áëëáãÝò ÷ùñßò åéäïðïßçóç.
ÓÇÌÅÉÙÓÅÉÓ ÃÉÁ ÔÇÍ ÅÃÊÁÔÁÓÔÁÓÇ ÐÏÔÅ íá ìçí áíÜâåé ôï ìç÷Üíçìá åÜí äåí Ý÷åé ïëïêëçñùèåß ç åãêáôÜóôáóç. Ãéá ôçí áðïöõãÞ çëåêôñéêþí óïê ðñÝðåé ôï ìç÷Üíçìá íá Ý÷åé ãåéùèåß. Ãéá ôçí áðïöõãÞ êéíäýíïõ óå êÜðïéïí ðáßêôç , ðñÝðåé ôï ìç÷Üíçìá íá Ý÷åé áðüóôáóç ôïõëÜ÷éóôïí 500mm áðü Üëëï ìç÷Üíçìá Þ ôïß÷ï. Ãéá ôçí áðïöõãÞ âëÜâçò óôï ìç÷Üíçìá ëüãï ëÜèïò ëåéôïõñãßáò , ðñÝðåé ç ðáñï÷Þ íá åßíáé 230volt AC..
Nessuna parte di questa pubblicazione può essere riprodotta con processo meccanico, fotografico o lettronico, nè sotto forma di registrazione fonografica, nò può essere memorizzata in un sistema di salvataggio, trasmessa o in altro modo copiata per uso pubblico o privato, senza l’autorizzazione di NAMCO EUROPE LIMITED. Le informazioni contnute in questo manuale sono state date in buona fede ed erano accurate al momento della pubblicazione.
NOTES D’INSTALLATION NON ACCENDERE MAI la macchina finchè l’installazione non è stata completata. Allo scopo di prevenire possibili scosse elettriche, la macchina deve essere obbligatoriamente collegata alla rete con un connettore messo a terra con connessioni sicure. Perchè i clienti non siano feriti dal movimento del gioco, assicurarsi che ci siano almeno 500mm di distanza rispetto alle altre macchine o rispetto al muro.
Ingen del av denne utgivelsen må reproduseres av noen mekaniske, fotografiske elle elektroniske prosesser, eller i form av fotografiske opptak, og ikke kan det lagres i et gjenvinnbart system, sendt eler kopiert for offentlig eller privat bruk, uten tillatelse fra NAMCO EUROPE LIMITED. Da informasjonen i denne manualen er gitt i god tru og var korrekt da den ble utgitt, tillegger NAMCO EUROP LIMITED seg retten til å lage forandringer uten varsel.
MERKNADER VED INSTALLASJON Slå ALDRI på maskinens strømforsyning før installasjonen er fullført. For å forhindre eventuelle elektriske sjokk, forsikre deg om at maskinen er koplet til et strømnett med ordentlig jording. For å forhindre at kundene blir skadet av spillets bevegelige deler. forsikre deg om at det er minst 500mm avstand mellom andre maskiner eller vegger. For å forhindre skade på maskinen p.g.a. feil bruk, sørg for at spenningen til hoved strømforsyningen er 230Volt AC.
Niets uit deze publikatie mag worden gereproduceerd door enig mechanisch, fotografisch of electronisch proces, of in de vorm van een fonografische opname, noch mag het opgeslagen worden in een retrieval systeem, doorgezonden of anderszins gekopieerd voor publiek of privégebruik, zonder toestemming van Namco Europe Limited.
Opmerkingen aangaande Installatie Sluit de machine nooit aan op de stroomtoevoer totdat de installatie is voltooid. Om mogelijke electrische schokken te voorkomen, dient ervoor gezorgd te worden dat de machine middels een goed vastzittende aardstekker op het lichtnet is aangesloten. Om ervoor te zorgen dat klanten niet gewond raken door de beweging van het spel, dient ervoor gezorgd te worden dat er minimaal 500mm ruimte is tussen andere machines of muren.
Nenhuma parte desta publicacão poderá ser reproduzida por processos mecanográficos, fotográficos, electrónicos ou ainda sob a forma de gravacão sonora nem tão pouco poderá ser gravada através de sistemas informáticos transmissiveis ou de outra forma copiados para uso publico ou privado sem autorização expressa da NAMCO EUROPA LIMITADA. A informação contida neste manual foi fornecida de boa fé, sendo rigorosa na altura da sua publicação.
NOTAS SOBRE A INSTALAÇÃO NUNCA ligar a maquina sem que a instalação esteja completamente finalizada. Afim de evitar possiveis choques electricos, certifique-se que a maquina está ligada à rede de alimentação com uma ficha protegida com circuito de terra. Afim de evitar ferimentos pessoais nos clientes, provocados pelo movimento da maquina, certifique-se que existe pelo menos 500mm de separação entre outras maquinas ou paredes.
Ingen del av denna publikation får reproduceras, varken fotografiskt, elektroniskt eller i någon form av ljudinspelning. Det får inte heller lagras i något återvinningssystem, översändas eller på annat sätt kopieras för offentlig eller privat användning, utan tillstånd från NAMCO EUROPE LIMITED. Eftersom informationen i denna manual lämnas ut i god tro och var korrekt när den trycktes, reserverar sig NAMCO EUROPE LIMITED för ändringar.
ATT BEAKTA VID INSTALLATION Sätt aldrig på strömmen på maskinen innan installationen är klar. För att förhindra elektriska chocker, försäkra dig om att maskinen kopplas till strömförsörjning med jordad kontakt För att undvika skador av spelets rörelser, försäkra dig om att det finns ett avstånd på minst 500 mm till annan maskin eller vägg. För att undvika skador på maskinen p g a felaktigt handhavande, försäkra dig om att strömstyrkan är 230 volt AC.
Tästä julkaisusta ei saa ottaa missään muodossa kopioita yksityis- tai julkiseen käyttöön ilman NAMCO EUROPE LIMITED:in lupaa. Tässä ohjekirjassa olevat tiedot pitävät julkaisuhetkellä paikkansa. NAMCO EUROPE LIMITED:illä on kuitenkin oikeus muutoksiin ilman erillistä ilmoitusta. Tämä laite on valmistettu EC direktiivien mukaisesti. Se on testattu ja todettu noudattavan seuraavia direktiivejä: 89/336/EEC ja 72/23/EEC (EN55014, EN55104 ja EN 60335-1 standardit).
ASENNUSHUOMIOITA Älä koskaan kytke laitetta päälle ennen kuin asennus on suoritettu loppuun. Tämän laitteen virtalähde on kytkettävä maadoitetulla johdolla maadoitettuun pistorasiaan, jotta sähköiskun vaaraa ei olisi. Varmista, että laitteen ja seinän tai toisen laitteen välissä on vähintään 500 mm, jotta asiakkaat eivät loukkaannu laitteen likkumisesta johtuen. Varmista, että virtalähteen jännite on 230 V AC, jotta ei laite vioitu. Huomio: Jos tämä laite sijoitetaan liukkaalle esim.
Contents Operators Manual ......................................................................................................................... 1 PORTABLE APPLIANCE TESTING .............................................................................................3 GENERAL SAFETY CONSIDERATIONS..................................................................................... 4 ALLGEMEINE SICHERHEITSHINWEISE ......................................................................
1. SPECIFICATIONS POWER SUPPLY:- 230volts AC AMBIENT OPERATING TEMPERATURE: +5°C to +25°C MONITOR:- Pioneer 50” JVS Projector Monitor COIN ACCEPTOR:- Mars CashFlow - 1 Channel DIMENSIONS:Assembled 1430(w) x 2190(d) x 2320(h) 1150(w) x 720(d) 1430(w) x 1470(d) 1130(w) x 620(d) x 1880(h) x 1210(h) z 440(h) Monitor Cabinet Ride Assembly Header Assembly WEIGHT:Assembled 454kg Monitor Cabinet Ride Assembly Header Assembly 190kg 244kg 20kg ACCESSORIES:- Keys: (Cash Door) ....................
2. HOW TO PLAY This game allows one or two players to ride on a boat in the virtual attraction of the “Rapid River” river, and to clear the various stages, by using the paddle, to reach the finish. Seven normal stages and three bonus stages are provided. (1) How to Operate Sit on the seat (sit in the middle when only one person is playing, and sit side by side when two people are playing) and use the paddle to go forward, (paddle backwards to decelerate). By rotating the paddle faster speed is accelerated.
3.
4. MOVING THE MACHINE This machine is fitted with castors to make it easier to move. Take care when moving the machine on an inclined surface. The overall height of the machine is 2280mm. Take care of any overhead obstructions. (e.g. Light Fittings, Electric Cables etc.) When moving the game, ensure that the game is dis-assembled into 3 parts: Monitor Assembly, Ride Assembly, and Header Assembly. Note: The monitor assembly can be further dismantled by removing the projector from the projector base.
Play Zone Page 33
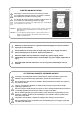
1. 2. 3. 4. 5. 6. 쮕 1. 2. 3. 4. 5. 1. 2. 3. 4. 5. 1. 2. 3. 4. 5. This machine is designed for INDOOR USE ONLY. Do not install in the following places. Outdoors Direct Sunlight, places with excessive humidity or dust, places where there is water leakage, near air-conditioning or heating equipment, places with excessive heat or cold temperature. Places where it would be in the way of emergency exits or fire extinguishing equipment. Unstable places or places with excessive vibration.
1. 2. 3. 4. 5. ও 1. 2. 3. 4 5. 1. 2. 3. 4. 5. 1. 2. 3. 4. 5. 1. 2. 3. 4. 5. CETTE MACHINE EST DESTINEE UNIQUEMENT A UN USAGE INTERIEUR NE PAS INSTALLER LA MACHINE DANS LES ENDROITS SUIVANTS A l’extérieur. Directement exposée au soleil, aux endroits excessivement humides ou poussiéreux, aux endroits où il y a des risques de fuite d’eau, près de ventilateurs ou source de chaleur, aux endroits très chauds ou froids.
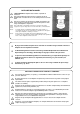
1. 2. 3. 4. 5. 1. 2. 3. 4. 5. 1. 2. 3. 4. 5. ESTA MAQUINA FOI CONCEBIDA PARA UTILIZAÇÃO EM ESPACOS INTERIORES APENAS NÃO INSTALAR A MAQUINAS NOS SEGUINTES LOCAIS:Exteriores. `Luz solar directa, locais com humidade excessiva ou pó, locais aonde existam fugas de água perto de ar condicionados ou equipamentos calorificos e locais com temperaturas excessivamente quentes ou frias. Locais aonde ficaria colocada no caminho de saidas de emergência ou equipamentos extintores de fogo.
5-1 Removing the Monitor from the Monitor Base The monitor is heavy (approx. 100kg). At least 4 people are required to lift the monitor from the monitor base. 1. Remove 6off Security screws (M5x30), and remove the front cover panel. 2. Disconnect the connectors. 3. Remove 2off Hex head screws (M10x130), spring and special washer from the front underside of the monitor. 4. Remove 2off Pozi head screws (M5x30) and remove the cover bracket.
5. Remove the rear door from the monitor base. 6. Remove 2 off Hex head screw (M10x130), spring and special washers from the rear underside of the monitor. 7. Carefully lift and remove the monitor from the base. Note: Ensure that the monitor is kept level and avoid any knocks while lifting or carrying the monitor.
5-2 Fitting the Header Assembly The Header Assembly has a forward centre of gravity, so it is important that at least two people are used to fit or remove the Header Assembly. The fitting position of the Header Assembly is very high, and it is important that a means of reaching the height safely, without stretching, is available. (e.g. steps, step stools etc.) 1. Place the Header assembly on to the monitor cabinet and slide it backwards so that it engages under the retaining bracket. 2.
3. Remove two pozi head screws (with flat and spring washers) (M5x16), and remove the connector cover. 4. Connect the connector of the Header assembly to the projector,and refit the connector cover with the two pozi head screws (with flat and spring washers) (M5x16).
5-3 Joining the Ride Assy and Monitor Assy 1. Remove the four security screws (M5x12) on the ride assy, and remove the joint cover. 2. Move the ride assy up to the projector cabinet and fit the four hex head screws (M8x40).
3. 4. Remove 8off Hex head screws (M10x20), and remove the four shipping brackets. Refit the 8off Hex head screws previously removed. 5. Remove the four nuts (M8). 6. Place one shipping bracket (removed in step 3) on top of another and retain each pair, for future use, on the studs with the four nuts (M8) removed in step 5.
7. Connect the connectors and air tube. 8. Replace the joint cover removed in step 1. Note: 9. The air tube is a push fit. Ensure that the tube is pushed fully in when fitting. When removing the air tube push the blue ring of the connector in and whilst holding it in, pull the air tube out. If the compressor reservoir tank has air in it, a loud noise will be heard as the air escapes when the air tube is removed.
5-4 Fitting the Paddles 1. Fit the blade assy into the paddle assy. 2. Adjust the angle of the blade so that the spring pin of the blade assy is aligned with the screw hole of the paddle assy. Tighten the nut to fix the blade assy. 3. Fit the grub screw (M6x10) into the screw hole of the paddle assy.
6. ADJUSTMENTS 쮕 Adjustment or maintenance on this machine should be carried out by qualified personnel only. Einstellungen und Wartung des Gerätes dürfen nur von dafür qualifiziertem Fachpersonal vorgenommen werden. eller vedligehold af denne maskine bør kun udføres af Justeringer kvalificeret personale. ও Los ajustes y el mantenimiento de esta máquina deben ser realizados sólo por personal cualificado.
6-2 Adjustment Switches The Adjustment switches are located inside the coin door. 1. Service Switch. Press this switch to obtain game credits without incrementing the play meter. 2. Test Switch Slide the test switch ON to enter test mode. Test mode allows testing and the changing of game settings. (Refer to section 6-3 "Test Mode" page 46) 3. Select Up/Down Switch This switch is used to select the test required when in the Test Mode. 4.
6-3 Test Mode 1. Open the coin door and slide the test switch “ON”. The “Menu Screen” will be displayed on the monitor. 2. Select the test required by using the select up/down switch. The colour of the selected test will change. 3. Activate the test by pressing the Enter switch. Select “EXIT” in each test to return to the “Menu Screen”. 4. After testing is completed, slide the test switch to the “OFF” position to return to normal game mode.
6-3-1 Coin Options 1. Select “COIN OPTIONS” on the menu screen to set the game cost and related settings. The following screen is displayed. 2. Use the Select Up/Down switch choose the required item then press the Enter button. The selected item will flash 3. Use the Enter button to change the setting of the flashing item. 4. Select “EXIT” and press the Enter button to return to the menu screen. Note:- The price of play on this machine is set within the Cashflow Coin Mech.
6-3-2 Game Options 1. Select “GAME OPTIONS” on the menu screen to set the game variables, the following screen is displayed. 2. Use the Select Up/Down switch to choose the required item then press the Enter button. The selected item will flash. 3. Use the Enter button to change the setting of the flashing item. 4. Select “EXIT” and press the Enter button to return to the menu screen. GAME OPTIONS [DEFAULT IN GREEN] TIME DIFFICULTY NORMAL .................................
6-3-3 I/O Test 1. Select “I/O TEST” on the menu screen to test the control pots, switches and lamps. The following screen is displayed. 2. Use the Select Up/Down switch to choose the required item then press the Enter button. The selected item will flash 3. Use the Enter button to change the setting of the item flashing. 4. Select “EXIT” and press the Enter button to return to the menu screen. I/O TEST DIP 12345678 ................................ (a) SWITCH & PADDLE ............................
6-3-3-1 Switch and Paddle Test 1. Select “Switch Test” on the I/O menu screen and press enter to test the switches. The following screen is displayed. 2. The display shows the current state of the switches. 3. Press the Up Select switch and the Enter switch together to EXIT and return to the I/O menu screen SWITCH & PADDLE TEST COIN SERVICE START UP SELECT DOWN SELECT ENTER HORIZONTAL VERTICAL THRUST UP + ENTER : : : : : : : : : : : ON .............................................. OFF .............
6-3-3-2 Ride Test 1. Select “Ride Test” on the I/O menu screen and press enter to test the ride air springs. The following screen is displayed. RIDE TEST GET OFF THE SEAT & PUSH START FL : 0000 OK FR : 0000 OK RL : 0000 OK RR : 0000 OK START : START ENTER : ENTER 2. Press the start switch to begin the test. 3. The air springs are operated to move the seat in the following sequence:Front up - > Rear up - > Left up - > Right up - > After checking the seat movement, ‘CHECK END’ appears on the screen.
6-3-4 Monitor Test 1. Select “MONITOR TEST” on the menu screen to test and adjust the Monitor. The following screen is displayed. 2. Use the Select Up/Down switch to choose the required item, (the selected item will flash), then press the Enter button. To return to the Monitor Test Menu from a test pattern press the Enter button. 3. Select “EXIT” and press the Enter button to return to the menu screen.
6-3-5 Sound Test 1. Select “Sound Test” on the menu screen to set the sound volume levels. The following screen is displayed. 2. Use the Select Up/Down switch to choose the required item, (the selected item will flash), then press the Enter button. 3. Use the Select Up/Down switch to change the setting, then press Enter to store the change. 4. Select “EXIT” and press the Enter button to return to the menu screen.
6-3-6 ADS Data By selecting ADS Data from the menu screen, all of the bookkeeping details can be read and/or reset. 6-3-7 Others 1. Select “OTHERS” on the menu screen. The following screen is displayed. 2. Use the Select Up/Down switch to choose the required item, (the selected item will flash), then press the Enter button. 3. Select “EXIT” and press the Enter button to return to the menu screen. OTHERS _/_ /_ ROM1 Ver.
7. INITIALATION Adjustments after Replacing Parts. 1. Display the ‘OTHERS’ test screen. To display the test screen, perform either of the following operations :- • Select ‘VOLUME ADJUST’ on the ‘OTHERS’ menu (see 6-3-7 page 54) • Press and hold the service switch and slide the test switch ON.
8. MAINTENANCE. 쮕 Adjustment or maintenance on this machine should be carried out by qualified personnel only. Do not make any alterations on this machine without prior approval. Doing so could cause unforeseeable danger. If performing work not described in this manual, be sure to contact your distributor for instructions, as no responsibility will be accepted for damage or injury Einstellungen und Wartung des Gerätes dürfen nur von dafür qualifiziertem Fachpersonal vorgenommen werden.
Regolazioni e manutenzione su questa macchina devono essere fatti solo da personale specializzato. Non apporre alcuna modifica alla macchina senza autorizzazione preventiva. Il fare questo può causare un pericolo non prevedibile. Se state per iniziare un lavoro non descritto in questo manuale, contattate il vostro distributore per instruzioni poichè non si accetta alcuna responsabilità per danni o ferite.
8-1 Checking the Condensate Bottle The condensate bottle collects any water generated within the compressor, and should be checked WEEKLY, and emptied (if neccessary). 1. Ensure that the machine is switched off. 2. Remove the back door on the monitor cabinet to gain access to the condensate bottle. 3. Remove the Pozi head screw (M6x25) and remove the bottle complete with bracket. 4. Unscrew the bottle from the cap and discard the water.
8-3 Removing the Seat Assy 1. Remove 8off Hex head screw (M10x30), and remove the seat assy. 8-4 Replacing the Base Control Potentiometers The Base assy is fitted with four (4) potentiometers. All controls are removed and replaced in the following manner. 1. Remove the seat assy. (see section 8-3 above) 2. Disconnect the connector.
3. Loosen the grub screw (M4x6), and remove the control potentiometer complete with bracket. 4. Remove the control from the bracket, and replace the potentiometer. When refitting the potentiometer ensure that locating tag on the potentiometer is fitted into the hole in the bracket, the bracket is fitted in the correct position, and that the grub screw engages on the flat of the potentiometer shaft.
8-5 Replacing the Air Valve The Base assy is fitted with four (4) Air valves. All Air valves are removed and replaced in the following manner. 1. Remove the seat assy. (see section 8-3 page 59) 2. Disconnect the connector. 3. Disconnect tha air tubes from the air valve. Note: When removing the air tube push the blue ring of the connector in and whilst holding it in, pull the air tube out.
5. Remove the half union, elbow union and silencer from the air valve. 6. Refit the half union, elbow union and silencer to the new air valve, and refit the new air valve to the control board in reverse order. Note: The air tube is a push fit. Ensure that the tubes are pushed fully in when fitting.
8-6 Replacing the Base Bellows The upper unit of the ride assy weighs approx. 90kg. Ensure that at least FIVE (5) people are available to remove or install the assy, and that there is sufficient space to work safely. The front of the upper ride assy, where the coin tower is situated, is heavier than the back. Take care when lifting that the assy does not tip forward. 1. Remove the seat assy. (see section 8-3 page 59) 2.
4. Remove six (6) security screws (M5x12), and remove the left and right mat guards. (3 screws per guard). 5. Remove two (2) security screws (M5x12), and remove the floor board. 6. Remove two (2) pozi head screws (M5x10), complete with flat and spring washers. Lift the tube adaptor sufficiently to disconnect the connector.
7. Remove eight (8) pozi head screws (M5x10), complete with flat and spring washers, and remove the links from the upper assy. (2 screws per link). 8. Remove sixteen (16) Hex head screws (M10x30) and nuts, complete with flat and spring washers, from the top of the air springs. (4 screws per air spring). 9. Remove the upper unit. 10 Replace the bellows. 11. Re-assemble in reverse order.
8-7 Removing the Paddle Vac-Form Covers 1. Remove two (2) security screws (M5x20) and six (6) security screws (M5x12). 2. Remove the vac-form (A). 3. Disconnect the connector , and remove the vac-form (B).
8-8 Replacing the Roll Control Potentiometer 1. Remove the paddle vac-form covers. (see section 8-7 page 66) 2. Disconnect the connector. 3. Loosen the grub screw (M4x6) in the nylon pot extension shaft, and remove the potentiometer complete with the contol bracket. 4. Remove the control potentiometer from the bracket and replace with a new potentiometer.
8-9 Replacing the Yaw Control Potentiometer 1. Remove the paddle vac-form covers. (see section 8-7 page 66) 2. Disconnect the connector. 3. Loosen the grub screw (M4x6) on the nylon pot extension shaft, and remove the potentiometer complete with the contol bracket. 4. Remove the control potentiometer from the bracket and replace with a new potentiometer.
8-10 Replacing the Paddle Bellows The paddle assy is fitted with two paddle bellows (left & right). Both bellows are removed and replaced in the following way. 1. Remove the paddle vac-form covers. (see section 8-7 page 66). 2. Remove six (6) security screws (M5x12). 3. Remove the paddle bellows bracket from the paddle bellows main body. 4. Undo the zip fastener of the paddle belows main body, and remove both the paddle bellows main body and the paddle bellows bracket. 5.
8-12 Replacing the Paddle Assy The paddle assy weighs approx. 25kg. Ensure that at least two (2) people are available to remove or install the assy, and that there is sufficient space to work safely. 1. Remove the paddle vac-form covers. (see section 8-7 page 66) 2. Remove the left and right paddle blades. (See section 5-4 page 44) 3. Remove the left and right paddle bellows. (see section 8-10 page 69) 4. Remove four (4) security screws (M5x12).
8-13 Replacing the Fluorescent Tube or Starter 1. Remove five (5) security screws (M5x12), and remove the header acrylic. 2. Replace the fluorescent tube or starter. 3. Re-assemble in reverse order.
9.
Page 74
ITEM 2 3 DESCRIPTION PART No Monitor Front Decal 40000088 Fuse - 1…" 500mA Q/B 63500631 Fuse - 1…" 1A Q/B 63500424 XRAP-GAMEPCB 4 Game PCB 5 Pioneer JVS 50" Projector 84000000 6 Condensate Bottle 4600553 7 Header Retaining Bracket 46000081 8 Monitor Cabinet Side Decal -LHS/RHS 40000087 9 Cabinet Front Closing Wood 37100029 10 Wooden Blanking Strip 37100109 14 3.
Page 76
ITEM DESCRIPTION PART No 2 Rear Base Cover 46000685 3 Front Safety Rail 46000686 4 Front Joint Cover 46000687 5 Floor Mat - Black 46000688 7 Pot Shaft Bracket 46000690 8 Seat Filler Decal 40000120 9 Floor Mat Closing Bracket 46000692 10 Bellows Front / Rear Closing Bracket 46000696 11 Bellows Side Closing Bracket 46000695 14 Bearing Spacer 46000697 15 Top-Hat Support Bracket 46000698 16 Pot Locating Bracket 46000699 17 Connector Locating Bracket 46000700 18 Rear To
Page 78
ITEM DESCRIPTION PART No 1 Paddle Fin XRAP-670-511 2 Control Bracket - R XRAP-670-512 3 Control Bracket - Y XRAP-670-513 4 Potentiometer 60 5 Guide Rubber Cover XRAP-670-531 6 Guide Follower XRAP-670-532 7 Guide Rubber XRAP-670-533 8 Roster Bracket XRAP-670-534 10 Roster spring DR-S15x40 XRAP-106-077 11 Vibration-Proof Rubber RA-30 XRAP-106-078 12 Air Cylinder CM2E40-N1088-50 XRAP-004-533 13 Bearing ASPE205 XRAP-103-076 14 Roll Pot Insulator 46000813 15 Pot Extensio
Page 80
ITEM DESCRIPTION PART No 3 Rear Access Cover Plate 46000717 4 Paddle Cover - LHS 46000718 5 Paddle Cover - RHS 46000719 6 Paddle Cover Mounting Bracket - LHS 46000720 7 Paddle Cover Mounting Bracket - RHS 46000721 8 Paddle Cover Bracket - LHS 46000740 9 Paddle Cover Bracket - RHS 46000741 10 Start Switch Decal 40000099 11 Main Cabinet Top Vac-Form 46000722 12 Paddle Assembly Top Vac-Form Cover 46000723 14 Play Instruction Decal 40000105 17 Wooden Cash Box 37100093 Pane
Page 82
Page 83