
Manual


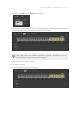
Table Of Contents
- Table of Contents
- 1. Disclaimer
- 2. Welcome to KOMPLETE KONTROL
- 3. Accessibility
- 4. The KOMPLETE KONTROL Workflow
- 5. Setting up KOMPLETE KONTROL
- 6. Software Overview
- 7. Keyboard Overview
- 8. Global Controls and Preferences
- 9. MIDI Communication
- 10. Using the MIDI Assignment Editor
- 11. Host Integration
- 12. Browsing the Library
- 12.1. Browser Basics
- 12.2. Opening the Browser
- 12.3. Loading Preset Files
- 12.4. Choosing Between Factory Content and User Content
- 12.5. Filtering Preset Files by Product
- 12.6. Filtering Preset Files by Bank
- 12.7. Resetting the Product Selection
- 12.8. Types and Characters Tags
- 12.9. Working with Favorites
- 12.10. Performing a Text Search
- 12.11. Displaying Preset File Information
- 12.12. Auditioning your Preset Files
- 13. Working with Effects
- 14. Working with Loops and One-Shot Samples
- 15. Managing the Library
- 15.1. Saving Preset Files to the User Library
- 15.2. Deleting User Preset Files from the User Library
- 15.3. Editing the Tags and Properties of User Preset Files
- 15.4. Syncing Multiple Instances
- 15.5. Working with the Files Pane
- 15.6. Loading VST Plug-ins
- 15.7. Installing NKS Instruments
- 15.8. Importing KOMPLETE KONTROL-Compatible User Files
- 16. Controlling Instrument, Loop, One-shot and Effect Parameters
- 17. Smart Play – Playing and Editing Scales and Chords
- 18. Smart Play – Playing and Editing Arpeggiator Sequences
- 18.1. Playing Arpeggiator Sequences
- 18.2. Using a Sustain Pedal to Control the Arpeggiator
- 18.3. Using Arpeggiator Snapshots on the Keyboard
- 18.4. Editing the Arpeggiator
- 18.5. MAIN Parameters
- 18.6. RHYTHM Parameters
- 18.7. OTHER Parameters
- 18.8. ADVANCED Parameters
- 18.9. RANGE Parameters
- 18.10. HOLD Parameter
- 19. Envelopes

3. Click and drag your mouse horizontally to the position of your liking and release.
→ The Key Zone is resized. Since Key Zones cannot overlap, dragging the border of a Key Zone
simultaneously resizes the neighbouring Key Zone so that both Key Zones stay “in contact”.
When resizing Key Zones the lower border of the leftmost Key Zone as well as the upper border of
the rightmost Key Zone are xed and cannot be dragged. You cannot resize a Key Zone to less
than one key, this is also true for the neighbouring Key Zone that is simultaneously resized.
10.7.6. Disabling Key Zones
Disabling a Key Zone disables the assignments for all included keys: from then on, these keys will
no longer trigger any notes. For example, this can be useful when you want to avoid triggering
unwanted MIDI messages by mistake as you play keys in the neighboring Key Zones, or simply to
have a clean, better organized keybed.
To disable a Key Zone:
1. Select the Key Zone you want to disable.
USIN G TH E MID I AS SIGN M ENT EDI T OR 83