
InModem Quick Start Guide


www.netcomm.com.au Rev.2 - YML609
Page 4 InModem56 V.92
3. Push the Modem card down firmly so
it is seated all the way to the bottom
of the PCI slot.
4. Plug one end of the RJ-11 telephone
cable (supplied with the modem) into
the line in the jack socket on the back
plate of the modem. Plug the other
end of the cable into the Wall jack
socket. If you wish to run a normal
telephone from the same line, plug
your telephone into the Telecom
Extension Socket.
5. Reassemble your computer case.
Connect the power cable and start
your computer. The hardware
installation is complete.
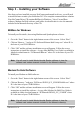
Step 2 - Installing your Modem Driver
Start your computer and, once fully booted, insert the NetComm Driver CD into your
CD-ROM drive. Refer to the appropriate section relating to your operating system to
continue.
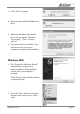
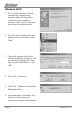
Windows XP
The Windows XP operating system will
automatically install a generic modem
driver after you turn on your computer.
You will then need to install the correct
NetComm modem driver from the
NetComm Driver CD.
1. Go to the “Start” button in the right-
bottom corner of the screen. Select
“All Programs” and then “Run”.
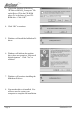
2. Type in the location of the driver
“D:\Drivers\IN5699_4\setup.exe” file
on the Driver CD in the CD-ROM
drive where D:\ is the letter of your
CD-ROM drive. Click “OK”.