MAXPower® 802.11n/g/b USB 2.
Table of Contents Before You Start Network Information 3 Introduction 4 Package Contents 4 Installation for Macintosh 5 Software Installation 5 Wireless Configuration 7 Adding the Utility to Startup Items 9 Installation for Windows 2 3 10 Installation 10 Wireless Configuration 11 Troubleshooting/FAQ 15 Contacting Tech Support 17
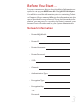
Before You Start… For your convenience, this is a short checklist of information required to set up your MAXPower 802.11n/g/b USB 2.0 Adapter. You will also need this information prior to contacting Technical Support. We recommend filling in the information into the spaces provided for easy reference. If you don’t know the information, you may need to consult your Router’s manual, your Internet Service Provider and/or your System Administrator. Network Information • Router Mfg/Model: • Router IP: . .
Introduction Thank you for purchasing the Newer Technology MAXPower 802.11n/g/b USB 2.0 Adapter! This guide will walk you through the setup process step by step and get you up and running with your new wireless device quickly. Setup of the Newer Technology MAXPower 802.11n/g/b USB 2.0 Adapter is straightforward, but you do need to follow this guide for proper setup. We suggest reading through the whole manual before hooking up the MAXPower 802.11n/g/b USB 2.0 Adapter.
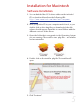
Installation for Macintosh Software Installation 1. You can find the Mac OS X drivers either on the included CD or download them from the following URL: http://www.newertech.com/downloads/maxpower_ usb_n.dmg 2. After you put the CD in your computer and it loads, or you double-click on the .dmg file you downloaded, the disk volume should appear. Open this to reveal folders with the different versions of the drivers. 3. Open the folder that corresponds to the Operating System you are running.
. Click “Install”. 7. You will be prompted for your user name and password, please enter it and hit “OK”. Note: You must have Administrative privileges to install this software on your Mac. 8. When Prompted, close any other open Applications, and click “Continue Installation”.
9. Wait for the Installer to finish, then click the “Restart” button. Your computer will restart. The Wireless Utility software may open at startup. Quit the application and proceed with the installation. Even though the configuration utility may open immediately after installation, you must perform these steps as listed in order for your Adapter to work properly. Wireless Configuration Before configuring: 1. Insert the MAXPower 802.11n/g/b USB 2.0 Adapter into an open USB 2.0 port.
2. Once the Wireless Utility window is active, click on the “Site Survey” tab. You should see your wireless network listed here. If you don’t, click “Rescan”. If your network still doesn’t appear, consult your wireless router’s manual or technical support. 3. Click on the wireless network you want to connect so it is highlighted and click “Add Profile”.
Adding the Utility to Startup Items If the Wireless Utility does not automatically open upon insertion of the wireless adapter, you can set the Wireless Utility to open on startup by performing the following steps. 1. Go to the “Apple” menu and select “System Preferences”. 2. Click on the “Accounts” Preference Pane. 3. Highlight the account you want to add the utility as a startup item and click on the “Login Items” tab. 4. Click the “+” sign at the bottom. 5.
Installation for Windows Installation DO NOT connect the MAXPower 802.11n/g/b USB 2.0 Adapter until you are instructed to do so. Improper insertion may result in unsuccessful installation of the device. 1. Insert the included Install CD. Navigate to the “Windows Driver” folder and run the Installer. 2. Follow the instructions on the Installer Wizard, clicking “Next” when each step is completed. 10 3. After completing the Installer Wizard, click “Finish” and insert the MAXPower 802.11n/g/b USB 2.
Wireless Configuration At this point, you should make sure that your wireless router is turned on and that you have all the information listed on Page 3 of this manual. Once you have done this, you can continue with the installation and configuration. 1. In order to configure your wireless connection, make sure that your MAXPower 802.11n/g/b USB 2.0 Adapter is securely inserted into an empty USB port. 2.
5. By default, the Profile Name is the name of the network you are connecting to. If you wish to use a different name, you can change it now. Once the name is to your liking, click “Next”. 6. Select the “Network Type”, click on the drop-down arrow and select the kind of network you’re using. A “Peer-to-Peer” network is one that connects two “clients” (such as two computers) to one another directly, connecting to no other devices.
As settings for wireless routers can vary, you will want to check your particular router’s manual or technical support for information regarding security settings and wireless configuration. 7. Select the Authentication Mode and Input Type to match the kind of Authentication/Encryption used by your router/ access point. Once set, click “Next”. 8. In the “Key” field, enter your network password (if required), then click “Next”.
9. If you need to manually enter your IP address to access your network, choose the “Enable” option from the dropdown menu, click “Next” and fill in the appropriate information. Otherwise, set it to “Disable” and click “Complete” to finish the account setup. 10. To connect to the network, click on the “Profile Setting” tab. Select the profile you wish to use by clicking on the name, then click the “Connect” button. 11.
Troubleshooting/FAQ PROBLEM: After a restart, the MAXPower 802.11n/g/b USB 2.0 Adapter is not seen. SOLUTION: Unplug and replug the MAXPower 802.11n/g/b USB 2.0 Adapter into a USB port, or do a complete shut down and then reboot instead of just restarting. PROBLEM: Network connection frequently drops. SOLUTION: Some wireless frequencies and channels are more common than others, resulting in interference. Try changing your wireless router’s channel (1-11) and/or frequency.
PROBLEM: The MAXPower 802.11n/g/b USB 2.0 Adapter won’t automatically connect to the Internet on my Mac. SOLUTION: In OS X 10.4.x or earlier: 1. Go to the Network Preference Pane. 2. Click on the “Show” drop-down menu and select “Network Port Configurations”. 3. In the list that shows, find the option for your USB interface and drag it to the top of the list. 4. Click “Apply” and close the Preferences window. In OS X 10.5.x or later: 1. Go to the Network Preference Pane. 2.
PROBLEM: I need to save settings for multiple networks. SOLUTION: You can save multiple profiles for different networks by repeating the same steps for the first connection you created. Once you have saved the profile, you can click on the Profile Manager and select the profile you wish to connect with. Contacting Tech Support You can register your MAXPower 802.11n/g/b USB 2.0 Adapter at NewerTech’s Web site: http://newertech.com/tech_support/ntwty.
Copyrights Copyright © 2008 Newer Technology, Inc. All rights reserved. No part of this publication may be reproduced, stored in a retrieval system, or transmitted in any form or by any means, electronic, mechanical, photocopying, recording or otherwise, without the prior written consent of Newer Technology. Changes The material in this document is for information only and subject to change without notice.
Safety This equipment is designed with the utmost care for the safety of those who install and use it. However, special attention must be paid to the dangers of electric shock and static electricity when working with electrical equipment. All guidelines of this and of the computer manufacture must therefore be allowed at all times to ensure the safe use of the equipment.
NWTMXP2802NU2C ©2010 Newer Technology, Inc.