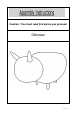
Caution : You must read this before you proceed Ottoman 1 OF 6
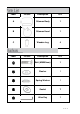
Label Description QTY A Ottoman Body 1 B Ottoman Head 1 C Wooden Leg 4 Description QTY ① Bolt (M8X50mm) 1 ② Washer 1 ③ Spring Washer 1 ④ Gasket 7 ⑤ Allen Key 1 Label Picture Picture 2 OF 6
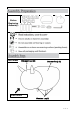
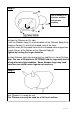
Before Beginning Assembly: Overview Ottoman Head (B) Ottoman Body (A) FRONT FACING Wooden Leg(C) 3 OF 6
Wooden Leg(C) This Ottoman has multiple parts and may require up to 30 minutes to assemble. To give you an overview of the ottoman parts, the above picture is to help you put the various parts into perspective. Please read through the instructions below to familiarise yourself with the parts and steps before assembly. Step 1 Carefully remove the dust cover from the bottom of the Ottoman Body(A) and remove the Ottoman Head(B), Wooden Legs(C) and Hardware, and place them on a clean, non-marring surface.
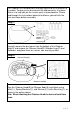
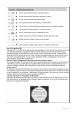
Step 2 A Use of Gasket is to alleviate wobbles and achieve stability B C Position the Ottoman on it's side. Install the Wooden Legs(C) into the bottom of the Ottoman Body(A) by placing a Gasket(④) onto the threaded stem of the Legs. And then insert the threaded stem into the threaded mounting position at each Corner of the Bottom of the Ottoman Body(A). Tighten by turning the Legs clockwise. Position Ottoman right side up and test for stability on a Level Surface.
OF 6