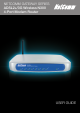
NetComm Gateway Series ADSL2+/3G Wireless N300 4-Port Modem Router USER GUIDE
Preface This manual provides information related to the installation, operation, and application of this device. The individual reading this manual is presumed to have a basic understanding of telecommunications terminology and concepts. If you find the product to be broken or malfunctioning, please contact technical support for immediate service by email at technicalsupport@netcomm.com.
NetComm Gateway Series - ADSL2+/3G Wireless N300 4-Port Modem Router Table of Contents Introduction................................................................................................................................................................................................ 5 Your 3G15Wn – ADSL2+/3G Wireless N300 4-Port Modem Router.................................................................................................................................. 6 Package contents..........
URL filter................................................................................................................................................................................................................... 45 Quality of Service............................................................................................................................................................................................................ 46 Queue configuration..........................................
INTRODUCTION
Introduction Your 3G15Wn – ADSL2+/3G Wireless N300 4-Port Modem Router Congratulations on your purchase of a NetComm 3G15Wn – ADSL2+/3G Wireless N300 4-Port Modem Router. This product is a highperformance ADSL2+ Modem Router combined with a 3G router that provides high-speed wireless N networking and Internet connectivity for your home, office or public space.
PLACEMENT
Placement Placement of your 3G15Wn When Connecting With 3G Just like your mobile phone, a 3G USB Modem’s location will affect its signal strength to the 3G Mobile Base Station (Cell Tower). The data speed achievable from a 3G USB modem is relative to this signal strength, which is affected by many environmental factors.
NetComm Gateway Series - ADSL2+/3G Wireless N300 4-Port Modem Router Choose the “quietest” channel for your wireless network In locations where homes or offices are close together, such as apartment buildings or office complexes, there may be wireless networks nearby that can conflict with your wireless network.
Product Layout
NetComm Gateway Series - ADSL2+/3G Wireless N300 4-Port Modem Router Product Layout Getting to know your 3G15Wn It is recommended that you take a moment to acquaint yourself with the indicator lights, ports and default settings of the 3G15Wn prior to commencing with installation.
Minimum system requirements Different aspects of the 3G15Wn have different requirements, so let’s look at them in turn. We’ll start with your computer, which ought to match the following requirements if you are to enjoy the benefits of a high-speed ADSL connection and use of 3G and Wireless Networking. PC Requirements: • Any computer running Windows 98/2000/Me/XP/Vista/7 or Macintosh OSX • Ethernet or Wireless Network card • CD-ROM drive • Web browser e.g. • Internet Explorer 5.
NetComm Gateway Series - ADSL2+/3G Wireless N300 4-Port Modem Router Default settings LAN (Management) Static IP Address: 192.168.1.1 Subnet Mask: 255.255.255.0 Default Gateway: 192.168.1.1 WAN mode: DHCP WAN (Internet) Wireless SSID: NetComm Wireless Channel: auto Security: WEP, 64bit WEP Key: a1b2c3d4e5 Username: admin Password: admin Interface Access Restore Factory Default Settings Restoring factory defaults will reset the 3G15Wn to its factory default configuration.
Quick Setup 1. Connect the supplied RJ-11 cable to the DSL port on the back of your router to the phone port that supplies your ADSL. 2. And/or, attach a compatible 3G USB modem into the USB port on the back of the router 3. Connect the supplied RJ-45 Ethernet cable from one of the LAN ports on the back of the router to your computer 4. Screw the supplied detachable antenna to the Wi-Fi connector on the back of the router 5.
NetComm Gateway Series - ADSL2+/3G Wireless N300 4-Port Modem Router Connecting With ADSL 1. Select the ADSL only box and click Next 2. Enter the user ID/Password on this screen as supplied by your ISP 3. Click on Next to use these settings 4. You will then be asked to enter additional setup details. Connecting with 3G 1. Select the 3G only box and click Next 2. Your modem will auto detect if it is compatible: This information can be seen at the top of the page 3.
Wireless Quick Setup 1. All the default settigns already appear on the wireless quick setup page 2. You can enable/disable your wireless 3. You can change your wireless SSID. If you do, be sure to remember the new name or write it down so you know what network to connect to 4. You can also select the level of wireless security and change the wireless password 5. Once you have completed entering your wireless settings click Next USB Storage 1.
NetComm Gateway Series - ADSL2+/3G Wireless N300 4-Port Modem Router Passwords 1. On this page you can change the passwords for the different levels of users 2. The default password for all users is the same as the corresponding username 3. Once you have completed setting the passwords click Finish 4.
Web User Interface
NetComm Gateway Series - ADSL2+/3G Wireless N300 4-Port Modem Router Web User Interface What can you do from here? By logging into the web user interface, you are able to configure your 3G15Wn with a wide array of basic and advanced settings. From setting wireless security, to backing up your routers settings, uploading new firmware and setting parental controls, the web user interface is a handy tool for personalizing your device to maximize its potential.
Basic
NetComm Gateway Series - ADSL2+/3G Wireless N300 4-Port Modem Router Basic Quick Setup After you log into the web user interface, you will be taken directly to the Quick Setup page. See the instructions listed above in “Quick Setup” for instruction on how to configure your device for use. Home The web user interface (WUI) is divided into two window panels, the main menu (on the top) and the display screen (on the bottom).
The following table provides further details: Field Description Model Name Model number of your device Board ID The unique number of the board inside your device Software Version The current version of software loaded on your device ADSL Driver Version The current ADSL driver version loaded on your device Bootloader (CFE) Version The version of the bootloader Wireless Driver Version The current version of wireless driver being used by your device Device Info For 3G Network The name of your 3G
3G Settings
3G Settings 3G Interface On this screen you are able to select the 3G USB modem that you wish to use as your Internet connection. The field will auto fill with any compatible 3G USB modem 3G WAN Service From the 3G WAN Service page you are able to setup your 3G connection with advanced settings. Simply press Add to manually configure advanced settings for your 3G connection. You can add as many different configurations as you like.
NetComm Gateway Series - ADSL2+/3G Wireless N300 4-Port Modem Router 3G Backup Config On this page you are able to configure your 3G15Wn to use 3G as a backup to ADSL.
Wireless
NetComm Gateway Series - ADSL2+/3G Wireless N300 4-Port Modem Router Wireless Setup/Basic The Wireless submenu provides access to Wireless Local Area Network (WLAN) configuration settings including: • Wireless network name (SSID) • Channel restrictions (based on country) • Security • Access point or bridging behaviour • Station information This screen allows you to configure basic features of the wireless LAN interface.
Security Security settings are used to prevent unauthorised connection to your network. This can be as basic as a neighbouring user who detects and is able to connect through your wireless network, right through to actual malicious interference or ‘hacking’. Whatever the case, it is a good practice to be aware of and to use wireless network security to safeguard your data and your network.
NetComm Gateway Series - ADSL2+/3G Wireless N300 4-Port Modem Router Click Save/Apply to set the advanced wireless configuration Option Description Band The new amendment allows IEEE 802.11g units to fall back to speeds of 11 Mbps, so IEEE 802.11b and IEEE 802.11g devices can coexist in the same network. The two standards apply to the 2.4 GHz frequency band. IEEE 802.11g creates data-rate parity at 2.4 GHz with the IEEE 802.11a standard, which has a 54 Mbps rate at 5 GHz. (IEEE 802.
MAC filter This screen appears when Media Access Control (MAC) Filter is selected. This option allows access to be restricted based upon the unique 48-bit MAC address. To add a MAC Address filter, click the Add button shown below. To delete a filter, select it from the table below and click the Remove button.
NetComm Gateway Series - ADSL2+/3G Wireless N300 4-Port Modem Router Wireless bridge The following screen appears when selecting Wireless Bridge, and goes into a detailed explanation of how to configure wireless bridge features of the wireless LAN interface. Click Save/Apply to implement new configuration settings. Option Description AP Mode Selecting Wireless Bridge (Wireless Distribution System) disables Access Point (AP) functionality while selecting Access Point enables AP functionality.
Management
NetComm Gateway Series - ADSL2+/3G Wireless N300 4-Port Modem Router Management Device Settings The Device Settings screens allow you to backup, retrieve and restore the default settings of your Router. It also provides a function for you to update your Routers firmware. Backup The following screen appears when Backup is selected. Click the Backup Settings button to save the current configuration settings. You will be prompted to define the location of a backup file to save to your PC.
Update Firmware The following screen appears when selecting Update Firmware. By following this screens steps, you can update your Routers firmware. Manual device upgrades from a locally stored file can also be performed using the following screen. 1: Obtain an updated software image file 2: Enter the path and filename of the firmware image file in the Software File Name field or click the Browse button to locate the image file. 3: Click the Update Software button once to upload and install the file.
NetComm Gateway Series - ADSL2+/3G Wireless N300 4-Port Modem Router TR-069 client WAN Management Protocol (TR-069) allows an Auto-Configuration Server (ACS) to perform auto-configuration, provision, collection, and diagnostics to this device.
SNTP This screen allows you to configure the time settings of your Router. Option Description First NTP timeserver: Select the required server. Second NTP timeserver: Select second timeserver, if required. Time zone offset: Select the local time zone.
NetComm Gateway Series - ADSL2+/3G Wireless N300 4-Port Modem Router Passwords The Passwords option configures your account access password for your Router. Access to the device is limited to the following three user accounts: • admin is to be used for local unrestricted access control • support is to be used for remote maintenance of the device • user is to be used to view information and update device firmware Use the fields illustrated in the screen below to change or create your password.
Advanced
NetComm Gateway Series - ADSL2+/3G Wireless N300 4-Port Modem Router Advanced ATM interface This page allows you to set your DSL connection with advanced configuration options. Select Add to include a new configuration and select Remove to delete the selected configuration.
LAN This screen allows you to configure the Local Area Network (LAN) interface on your Router. See the field descriptions below for more details. Option Description IP Address Enter the IP address for the LAN interface Subnet Mask Enter the subnet mask for the LAN interface Enable IGMP Snooping Enable by ticking the box Standard Mode: In standard mode, multicast traffic will flood to all bridge ports when no client subscribes to a multicast group.
NetComm Gateway Series - ADSL2+/3G Wireless N300 4-Port Modem Router NAT Port Forwarding Port Forwarding allows you to direct incoming traffic from the Internet side (identified by Protocol and External port) to the internal server with a private IP address on the LAN side. The Internal port is required only if the external port needs to be converted to a different port number used by the server on the LAN side. A maximum of 32 entries can be configured. To add a Virtual Server, click the Add button.
To add a Trigger Port, simply click the Add button. The following will be displayed. Option Description Select an Application or User should select the application from the list. Or User can enter the name of their choice. Custom Application Trigger Port Start Enter the starting trigger port number (when you select custom application). When an application is selected, the port ranges are automatically configured.
NetComm Gateway Series - ADSL2+/3G Wireless N300 4-Port Modem Router Security Your Router can be secured with IP Filtering or Parental Control functions. IP Filtering The IP Filtering screen sets filter rules that limit incoming and outgoing IP traffic. Multiple filter rules can be set with at least one limiting condition. All conditions must be fulfilled when individual IP packets pass filter. Outgoing IP Filter The default setting for Outgoing traffic is ACCEPTED.
Incoming IP Filter The default setting for all Incoming traffic is BLOCKED. Under this condition only those incoming IP packets that match the filter rules will be ACCEPTED. To add a filtering rule, click the Add button. The following screen will display. Please refer to the Outgoing IP Filter table for field descriptions. Click Save/Apply to save and activate the filter. ADSL2+/3G Wireless N300 4-Port Modem Router YML15WN 44 www.netcomm.com.
NetComm Gateway Series - ADSL2+/3G Wireless N300 4-Port Modem Router Parental Control The Parental Control feature allows you to take advanced measures to ensure the computers connected to the LAN are used only when and how prescribed Time Restriction This Parental Control allows you to restrict access from a Local Area Network (LAN) to an outside network through the Router on selected days at certain times.
Quality of Service Quality of Service offers a defined level of performance in a data communications system - for example the ability to guarantee that video traffic is given priority over other network traffic to ensure that video streaming is not disrupted by other network requirements. This means that should you be streaming video and someone else in the house starts downloading a big file, the download won’t disrupt the flow of video data.
NetComm Gateway Series - ADSL2+/3G Wireless N300 4-Port Modem Router QoS classification Click Add to configure network traffic classes. This screen creates a traffic class rule to classify the upstream traffic, assign queuing priority and optionally overwrite the IP header TOS byte. A rule consists of a class name and at least one condition below. All of the specified conditions in this classification rule must be satisfied for the rule to take effect. Click Save/Apply to save and activate the rule.
Routing Default Gateway, Static Route, Policy Routing and Dynamic Route settings can be found in the Routing link as illustrated below. Default gateway Select your preferred WAN interface from the drop down box. Static route The Static Route screen displays the configured static routes. Click the Add or Remove buttons to change settings. Click the Add button to display the following screen. Enter Destination Network Address, Subnet Mask, Gateway IP Address and/or WAN Interface.
NetComm Gateway Series - ADSL2+/3G Wireless N300 4-Port Modem Router Policy routing Allows you to add policy rules to certain situations Click Add to display the following screen Dynamic router To activate this option, select the Enabled radio button for Global RIP Mode. To configure an individual interface, select the desired RIP version and operation, followed by placing a check in the Enabled checkbox for that interface. Click Save/Apply to save the configuration and to start or stop dynamic routing.
DNS DNS server This page allows user to enable automatic DNS from the ISP or specify their own DNS server address manually Dynamic DNS The Dynamic DNS service allows a dynamic IP address to be aliased to a static hostname in any of a selection of domains, allowing the router to be more easily accessed from various locations on the internet. Note: The Add/Remove buttons will be displayed only if the router has been assigned an IP address from the remote server.
NetComm Gateway Series - ADSL2+/3G Wireless N300 4-Port Modem Router UPnP Simply check or uncheck the box and press Apply/Save to enable or disable the UPnP protocol DNS proxy To enable DNS Proxy, tick the corresponding checkbox and then enter host and Domain name, as the example shown below. Click Apply/Save to continue. The Host Name and Domain name are combined to form a unique label that is mapped to the router IP address.
USB Storage This page allows you to enable/disable the USB port of the 3G15Wn to be used as a mass storage server Please see Appendix B for more details on setting up your router to work with Storage Server functionality Print Server This page allows you to enable/disable the USB port of the 3G15Wn to be used as a print server Please see Appendix A for more details on setting up your router to work with Print Server functionality ADSL2+/3G Wireless N300 4-Port Modem Router YML15WN 52 www.netcomm.com.
NetComm Gateway Series - ADSL2+/3G Wireless N300 4-Port Modem Router Interface grouping Interface grouping supports multiple ports to PVC and bridge groups. Each group performs as an independent network. To use this feature, you must create mapping groups with appropriate LAN and WAN interfaces using the Add button. The Remove button removes mapping groups, returning the ungrouped interfaces to the default group. Only the default group has an IP interface. To add an Interface Group, click the Add button.
Status
NetComm Gateway Series - ADSL2+/3G Wireless N300 4-Port Modem Router Status The Status menu has the following submenus: • Diagnostics • System Log • 3G network • Statistics • Route • ARP • DHCP Diagnostics The Diagnostics menu provides feedback on the connection status of the device. The individual tests are listed below.
System Log This function allows you to view system events and configure related options. Follow the steps below to enable and view the System Log. 1: Click Configure System Log to continue. 2: Select the system log options (see table below) and click Apply/Save. Option Description Log Indicates whether the system is currently recording events. You can enable or disable event logging. By default, it is disabled.
NetComm Gateway Series - ADSL2+/3G Wireless N300 4-Port Modem Router Statistics These screens provide detailed information for: • Local Area Network (LAN), Wide Area Network (WAN), ATM and ADSL • 3G Interfaces NOTE: These statistics page refresh every 15 seconds.
ATM Field Description In Octets Number of received octets over the interface Out Octets Number of transmitted octets over the interface In Errors Number of cells dropped due to uncorrectable HEC errors In Unknown Number of received cells discarded during cell header validation, including cells with unrecognized VPI/VCI values, and cells with invalid cell header patterns. If cells with undefined PTI values are discarded, they are also counted here.
NetComm Gateway Series - ADSL2+/3G Wireless N300 4-Port Modem Router Consult the table that follows for field descriptions. Field Description Mode Line Coding format (e.g. G.dmt, G.lite, T1.413, ADSL2) Type Channel type (Interleave or Fast) Line Coding Trellis On/Off Status Lists the status of the ADSL link Link Power State Link output power state. SNR Margin (dB) Signal to Noise Ratio (SNR) margin Attenuation (dB) Estimate of average loop attenuation in the downstream direction.
Route Select Route to display the paths the Router has found. Field Description Destination Destination network or destination host Gateway Next hop IP address Subnet Mask Subnet Mask of Destination Flag U: route is up !: reject route G: use gateway H: target is a host R: reinstate route for dynamic routing D: dynamically installed by daemon or redirect M: modified from routing daemon or redirect Metric The ‘distance’ to the target (usually counted in hops).
Appendix
Appendix A: Print Server These steps explain the procedure for enabling the Print Server. 1. Enable Print Server from the Advanced menu in the Web User Interface. Select Enable on-board print server checkbox and enter Printer name and Make and model NOTE: The Printer name can be any text string up to 40 characters. The Make and model can be any text string up to 128 characters. For Windows XP: 2.
NetComm Gateway Series - ADSL2+/3G Wireless N300 4-Port Modem Router 4. Select Network Printer and click Next. 5. Select Connect to a printer on the Internet and enter your printer link. (e.g. http://192.168.1.1/printers/printername) and click Next. NOTE: The printer name must be the same name entered in the web user interface “printer server setting” as in step 1. 6. Click Have Disk and insert the printer driver CD. 7. Select driver file directory on CD-ROM and click OK.
8. Once the printer name appears, click OK. 9. Choose Yes or No for default printer setting and click Next. 10. Click “Finish”. 11. Check the status of printer from Windows Control Panel, printer window. Status should show as Ready. For Mac OSX: 2. Browse to the Apple menu and select System Preferences. In the System Preferences menu click on Print & Fax. 3. With your Printer driver installed, please add your printer from the Printer & Fax menu.
NetComm Gateway Series - ADSL2+/3G Wireless N300 4-Port Modem Router 4. Click + to add your printer from the Print & Fax menu. 5. Select Internet Printing Protocol – IPP from the Protocol drop down list. 6. Type into the Address field “GatewayIPAddress:361” where GatewayIPAddress is the IP address of your Gateway (default: 192.168.1.1). See screenshot below for an example.
Print Server set up is now complete. You will now be able to print from common applications by selecting this printer from the Print dialogue box. 2. Go to the control panel, and select Printers. Once in the Printers page, click the Add a printer button as shown below. 3. Select Add a network, wireless or bluetooth printer. 4. C lick on the radio-button labelled Select a shared printer by name, and type “http://192.168.1.1/printers/PrinterName” in the box below. Click Next.
NetComm Gateway Series - ADSL2+/3G Wireless N300 4-Port Modem Router 6. Choose whether you want this printer to be the default printer, and then click Next. samsung on htp://192.168.1.1:631 7. Click Finish. Your device is now configured and ready for use. htp://192.168.1.1:631 YML15WN ADSL2+/3G Wireless N300 4-Port Modem Router www.netcomm.com.
Appendix B: USB Storage These steps explain the procedure for enabling the USB Storage. 1. Enable USB storage from Web User Interface. Select Enable USB storage checkbox and enter Netbios name and Directory Name Field Description Netbios Name It is the hostname of the PC The default name is “3G15Wn” Directory Name The folder name of “root” directory. The default name is “USB-Storage” For Windows XP: 2. Open a web-browser (such as Internet Explorer, Firefox or Safari) and type in the address.
NetComm Gateway Series - ADSL2+/3G Wireless N300 4-Port Modem Router 4. Click the + button to add this server to the list of Favourites and then click Connect 5. Select the Guest radio button and then click Connect For Windows Vista 1. Open a web-browser (such as Internet Explorer, Firefox or Safari) 2. Type in the address “\\NetbiosName\DirectoryName\” Note: (eg \\3G15Wn\USB-Storage) There is no username and password required to access the USB drive.
Legal & Regulatory Information This manual is copyright. Apart from any fair dealing for the purposes of private study, research, criticism or review, as permitted under the Copyright Act, no part may be reproduced, stored in a retrieval system or transmitted in any form, by any means, be it electronic, mechanical, recording or otherwise, without the prior written permission of NetComm Limited. NetComm Limited accepts no liability or responsibility, for consequences arising from the use of this product.
NetComm Gateway Series - ADSL2+/3G Wireless N300 4-Port Modem Router The warranty is automatically voided if: 1. You, or someone else, use the product, or attempts to use it, other than as specified by NetComm; 2. The fault or defect in your product is the result of a voltage surge subjected to the product either by the way of power supply or communication line, whether caused by thunderstorm activity or any other cause(s); 3.
Product Warranty NetComm products have a standard 12 months warranty from date of purchase. However some products have an extended warranty option, via registering your product online at the NetComm website www.netcomm.com.au. Technical Support If you have any technical difficulties with your product, please refer to the support section of our website. www.netcomm.com.