
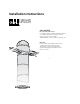
Installation Guide


9
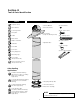
The vertical seam of the reflective tube should point to
the East or West to avoid irregular light patterns in your
room.
TIP
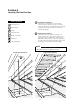
Use a at pry bar to carefully break the seals on
the shingles upslope above the cuthole. Use a claw
hammer to remove nails on the shingles above the
cut hole.
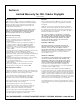
1
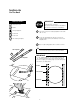
Secure flashing to roof with 2” Flashing Screws and
Washers. For aluminum flashing (both severe weather
& formable), use 9 screws & washers in an evenly
spaced, circular pattern around the 10” or 14” hole.
The circular pattern should be a 21” diameter for the
10” unit and a 24” diameter pattern on the 14” unit.
For injection molded flashing, use 8 screws and
washers in to the preformed holes for the 10” and
14” unit. Seal screw heads with roof sealant.
4
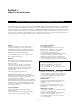
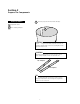
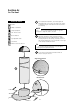
Caulk Gun
Claw Hammer
Flat Pry Bar
Ladder
Phillips Screwdriver
2” Screws
3/4” Washers
Roofing Sealant
Safety Equipment
Roof Flashing
Top Adjustable Tube
TOOLS & PARTS
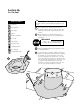
Generously apply roof sealant around bottom of
flashing. Slide top and sides of roof flashing under
top shingles.
2
Slide Top Adjustable Tube into the flashing to check
for proper alignment.
3
For short shaft cathedral style installation
see Section 10. Do not install dome yet.
IMPORTANT
4
2
3
1
1
2
2
4
Sealant
Section-4b
On The Roof