
All-in-One Printer User Manual


Installing upgrades > 155
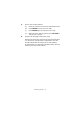
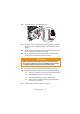
13. Close the access door and slide shut.
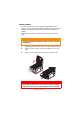
14. Locate the three retaining clips at the bottom of the side
cover into their rectangular holes near the bottom of the
printer.
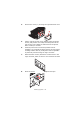
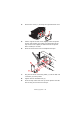
15. Close the top of the side cover up to the printer and refit
the securing screw removed in step 4.
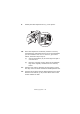
16. Close the front cover and close the top cover, pressing
down firmly at each side to latch it closed.
17. Reconnect the AC power cable and switch the printer on.
18. When the printer is ready, print a menu map as follows:
(a) Press the + button to access the Information Menu.
(b) Press ENTER once for the menu map.
(c) Press ENTER again to print the menu map.
(d) When the menu map is printed, press ON LINE to
exit the menu system.
19. Examine the first page of the menu map.
CAUTION!
After installing additional memory (hard disk drive),
any covers removed or doors opened must be closed
or replaced and secured to prevent risk of fire.