
Instructions / Assembly


3
Before Installation
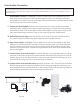
Inspect the System
Remove the system and all the included components from the box. Inspect the system and
the connection ttings to ensure nothing has been damaged during shipment. If any part of
the system has been cracked or broken, do NOT proceed with installation. Contact Olympia
Water Systems for an exchange or further information.
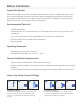
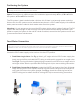
Recommended Tools List
• Variable speed drill
• Carbide drill bits: 1/4” (for waste line), 1/2” (for faucet hole) and 1/8” (for pilot holes, not
mandatory)
• 5/8”, 9/16” open-end wrench or adjustable wrench (for faucet installation)
• Phillips screwdriver (for saddle valve installation)
• Measuring tape
Operating Parameter
• Operating pressure: 50 PSI - 100 PSI
• Feed water temperature: 40° - 100°F (5° - 38°C)
General Installation Requirements
• System must be connected to COLD water source only.
• System must be installed in an indoor location; avoiding extreme temperatures and direct
sunlight.
• Ensure installation location can support the weight of the system when it is full of water.
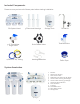
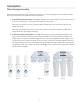
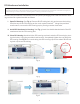
How to Use Quick Connect Fittings
To Attach Tubing
Remove BLUE tubing lock clip. Insert tubing until
it hits the backstop. Pull on insterted tubing to
ensure it is secured and re-attach BLUE tubing
lock clip.
To Release Tubing
Remove BLUE tubing lock clip. Use two ngers
to push in collet to release tubing. While collet is
being held, pull tubing straight out.
1
2
3
1
2
3