
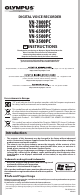
Instruction Manual


10
- -
Other Functions
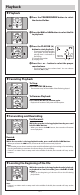
h Index Marks
If index marks are placed, you can quickly find a location you want to listen to in fast forward and
fast rewind and when cuing a file.
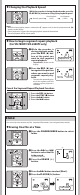
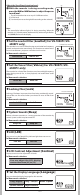
Clearing an Index Mark:
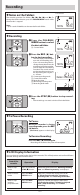
1 While the recorder is
during recording (pause
re c o rd i n g) or p l ay -
back mode, press the
FOLDER/INDEX
button
to set an index mark.
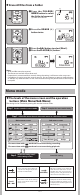
h Formatting the Recorder [
Format
]
If you format the recorder, all files will be removed and all function settings will return to defaults except
date and time settings. Transfer any important files to a computer before formatting the recorder.
Notes:
• It may take up to a minute to nish the initialization. Do not remove the battery or detach the
battery compartment from the recorder during that time. Otherwise data may be damaged.
• Never format the recorder from a PC.
• When the recorder is formatted, all the stored data, including locked les, are erased.
1 Locate the index you
want to clear.
2 Press the 9 or 0
button to select the
index mark to delete.
3 Press the
ER ASE
(s )
button.
Notes:
• Index marks cannot be placed on les created on machines other than Olympus IC recorders, but
temp marks can be placed instead to temporarily remember desired locations.
• Temp marks are temporary markings, so if you move to another le, or connect the recorder to a
computer, they will be automatically erased.
• Up to 16 index and temp marks can be set in a le.
• Index or temp marks cannot be set or erased in a locked le.
Recorder’s Version
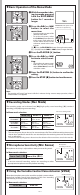
h Viewing System Information
[
System
]
You can check the recorder's information on the menu screen.
Setting an Index Mark:
1 The Sub Menu opens.
2 Press the 9 or 0 to
select [
Format
].
3 Press the
PLAY
/
OK
( `)
button.
• [
^ ]
] and [Cancel] flashes
alternately.
4 Press the 9 button to
select [
Start
].
5 Press the
PLAY
/
OK
( `)
button.
• After the [Data All Cleared]
message is on for 2 seconds,
[Sure? Cancel] will turn on.
6 Press the 9 button again to select [
Start
].
7 Press the
PLAY
/
OK
(`) button.
• Formatting begins and [Format Done] displays when
formatting ends.
Format: Cancel
Format!
Format Done
Version : 1.00
Index 06 Set
Index 02
Index 02 Clear
Sure?: Cancel