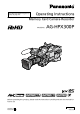
This product is eligible for the P2HD 5 Year Warranty Repair Program. For details, see page 163. Operating Instructions Memory Card Camera-Recorder Model No. AG-HPX300P Before operating this product, please read the instructions carefully and save this manual for future use.
Read this first! indicates safety information. CAUTION RISK OF ELECTRIC SHOCK DO NOT OPEN CAUTION: TO REDUCE THE RISK OF ELECTRIC SHOCK, DO NOT REMOVE COVER (OR BACK). NO USER-SERVICEABLE PARTS INSIDE. REFER TO SERVICING TO QUALIFIED SERVICE PERSONNEL.
indicates safety information. FCC NOTICE (USA) Declaration of Conformity Model Number: AG-HPX300P Trade Name: Panasonic Responsible Party: Panasonic Corporation of North America One Panasonic Way, Secaucus, NJ 07094 Support contact: Panasonic Broadcast & Television Systems Company 1-800-524-1448 This device complies with Part 15 of FCC Rules.
Precautions for Use Caution regarding laser beams The MOS sensor may be damaged if it is exposed to laser light. When using the camera-recorder in locations where laser irradiation equipment is used, be careful not to allow the laser beam to shine directly on the lens. PLEASE NOTE: When preparing to record important events, always shoot some advance test footage, to verify that both pictures and sound are being recorded normally.
Contents Read this first! .................................................................................................................. 2 Precautions for Use ......................................................................................................... 4 Chapter 1 Overview Camera Unit Features ...................................................................................................... 8 Recording and Playback Features ...................................................
Assigning functions to USER buttons ............................................................................ 53 Selecting Audio Input Signals and Adjusting Recording Levels ................................... 54 Selecting Audio Input Signals . .............................................................................. 54 Adjusting Recording Levels . ................................................................................. 54 Selecting Function for the FRONT AUDIO LEVEL Control . .
Chapter 7 Menu Operations Viewfinder and LCD Menus ......................................................................................... 120 Using the menus .................................................................................................. 120 Initializing the menu settings ............................................................................... 121 Setup menu structure ..................................................................................................
Chapter 1 Overview Chapter 1 Overview The AG-HPX300P P2 memory card camera-recorder features a camera unit equipped with a 1/3 inch 2.2 megapixel 3MOS sensor and a recording and playback unit that provides AVC-Intra 100 compression recording as standard to offer HD full pixel and full sampling for superb image quality and high-quality video. It handles multiple HD and SD formats: AVC-Intra, DVCPRO HD, DVCPRO50, DVCPRO and DV compression recording.
Slow, synchro and high speed shutter Scene file dial This dial allows you to instantly retrieve settings that suit shooting conditions. Six preset files are provided, and you can change the file names and their settings as desired. You can also save up to four files to an SD or SDHC memory card (both referred to as “SD memory card” below) and load files from an SD memory card.
Chapter 1 Overview Recording and Playback Features A variety of interfaces U SB 2.0 connector (HOST/DEVICE) A USB 2.0 connection to a computer or other device allows you to use P2 cards in the camera as mass storage. The USB host function makes it possible to save P2 card data to an external hard disk connected via USB 2.0 and clips stored on the hard disk can be viewed and written back to a P2 card.
Other features Clip thumbnail preview The camera records each cut as a clip (file) and automatically attaches a thumbnail image and file information to it. To preview a clip on the LCD monitor or to check clip data, simply choose the clip you want from the list of thumbnails. These thumbnails and the file data can be viewed on a PC (P2 Viewer *1) or processed in a nonlinear editing program.
Chapter 1 Overview Outline of operations The AG-HPX300P records video on P2 cards. Excelling at high transfer speeds, the P2 card enables high vision recording and smooth editing and dubbing. Saving and editing on external devices Using USB DEVICE mode to connect an external device via the USB 2.0 connector (Page 139) The data (file) is transferred for nonlinear editing on your computer or other unit. P2 card Computer USB2.0 (DEVICE) Using USB HOST mode to connect an external device via the USB 2.
Chapter 1 Overview System Configuration Rain cover Soft carrying case SHAN-RC700 AJ-SC900 Hard carrying case Remote control unit *5 AJ-HT901G AJ-RC10G Shotgun microphone (Phantom +48 V) Remote control cable AJ-C10050G AG-MC200G AJ-MC700P Battery *1 Lens *2 (Bayonet type) FUJINON, CANON Tripod adapter AG-HPX300P PROPAC14, TRIMPAC14 HYTRON50/100/140 DIONIC90/160 V-mount type battery plate SHAN-TM700 Video encoder card AJ-YAX800G *4 ENDURA E-7/7S ENDURA E-10/10S NP-L7 Holder plate *6 NP
Chapter 1 Overview Standard accessories Lens *1 Front lens cap *1 *2 Rear lens cap *1 *2 Zoom lever *1 *2 Connector cap *1 *2 Lens hood *1 Lens hood cap *1 *3 Eye cup Shoulder belt FRONT AUDIO LEVEL knob (screw included) Mount cap *4 XLR connector cap *4 BNC cap *4 CD-ROM *1 Manufactured by Fujinon Co., Ltd. *2 This component is part of the lens. *3 This component is part of the lens hood. *4 This component is part of the camera.
Chapter 2 Parts and Their Functions Power Supply and Accessory Mounting Section 1 4 3 15 1 POWER switch Use to turn the power on and off. 2 Battery holder A battery from Anton/Bauer is mounted here. For details, refer to [Mounting the Battery and Setting the Battery Type] (page 86). 3 DC IN (external power input) socket (XLR, 4P) Connect this camera to an external DC power supply. For details, refer to [Use of the external DC power supply] (page 88).
Audio (input) Function Section 7 2 8 6 Chapter 2 Parts and their Functions 1 1 MIC IN (microphone input) jack (XLR, 3-pin) • Connect a microphone (optional accessory) to this jack. • A phantom-powered microphone may be connected. To use a phantom-powered microphone, set the menu option F.MIC POWER to ON in the AUDIO SETUP screen. For details, refer to [Preparing for Audio Input] (page 95).
Audio (output) Function Section 1 2 5 Chapter 2 Parts and their Functions 3 4 6 1 MONITOR SELECT (audio channel) CH1/2, CH3/4 selector switch Use this switch to select the audio channel whose signals are output to the speaker, earphones or AUDIO OUT connectors. CH1/2: Signal output of audio channels 1 and 2. CH3/4: Signal output of audio channels 3 and 4. The channel indications of the audio level meters in the viewfinder and on the LCD monitor show the channels selected with this switch.
Shooting and Recording/Playback Functions Section Chapter 2 Parts and their Functions 1 11 3 4 10 5 6 7 2 Shooting and Recording (camera unit) 1 ND FILTER (filter switching) control Use this control to adjust the amount of light entering the MOS sensor during shooting in strong outdoor lighting. Control Setting Description position 1 OFF Does not use the ND filter. Reduces the amount of light 2 1/4 entering the MOS sensor to 1/4. Reduces the amount of light 3 1/16 entering the MOS sensor to 1/16.
NOTE AUTO KNEE function Usually, when you shoot people or scenery against a strongly lit background and adjust the level to the subject, the background will be totally whited-out, with buildings and other objects blurred. Use of the AUTO KNEE function in situations like these will reproduce the background clearly. The AUTO KNEE function is effective when: • The subject is a person positioned in the shade under a clear sky.
19 18 31 12 Chapter 2 Parts and their Functions 24 28 23 21 25 20 30 29 32 27 22 26 14 16 15 17 13 Shooting and Recording/Playback Function Section (Recorder Unit) 12 REC button Press this button to start recording and press once again to stop it. This button operates in the same way as the VTR button on the lens. 13 SDI OUT CHARACTER switch Use this switch to control the superimposition of character data onto SDI OUT to indicate status or setting menus. ON: Superimposes characters.
• For the latest information not available in the Operating Instructions, visit the P2 Support Sites at the following Web site. https://eww.pavc.panasonic.co.jp/pro-av 21 GENLOCK IN connector This connector inputs a reference signal when the camera unit is gen-locked, or when the time code is externally locked. About SD and SDHC memory cards • The SDHC card is a new standard, established by the SD Card Association in 2006, for memory cards with capacities of 2 GB or more.
Menu/Thumbnail Operation Section Chapter 2 Parts and their Functions 3 7 6 5 4 2 1 1 MENU button • Hold down the button to open a setting menu screen. A second press of the button returns the previous image. • This function is not available in the thumbnail display and during recording. 2 JOG dial button • Use this button to go between setting menus and to select and set items in open setting menus.
Time Code Section 8 1 3 6 5 Chapter 2 Parts and their Functions 4 7 2 1 GENLOCK IN connector (BNC) Use this connector to input a reference signal to genlock the camera unit or externally lock the time code. The subcarrier of the VBS signal output by the VIDEO OUT connector of the camera cannot be externally locked. For details, refer to [Externally Locking the Time Code] (page 62). 2 TC IN connector (BNC) To externally lock the time code, input a reference time code to this connector.
Warning and Status Display Functions Chapter 2 Parts and their Functions 1 3 LCD Monitor 4 1 2 2 1 Back tally lamp When the BACK TALLY switch is set to ON, this lamp behaves in the same way as the front tally lamp. 2 Rear tally lamp When the BACK TALLY switch is set to ON, the rear tally lamp behaves in the same way as the back tally lamp. 3 BACK TALLY switch Use this switch to control the back and rear tally lamps. ON: Enables the back and rear tally lamps.
Viewfinder 1 5 4 2 8 Chapter 2 Parts and their Functions 3 7 6 1 Viewfinder The viewfinder displays the video image in color during recording or playback. It also displays warnings and messages – indicating camera operating status and settings – zebra patterns and markers (safety zone and center markers, etc.). NOTE The menu option EVF COLOR can be set to monochrome in the DISPLAY SETUP screen. 2 TALLY switch Use to control the front tally lamp.
Chapter 3 Recording and Playback Setting Date and Time of Internal Clock The CLOCK SETTING value is recorded in the contents (clip), and affects the sequence of playback of the thumbnails. Before carrying out recording, be sure to check and set CLOCK SETTING and TIME ZONE. Chapter 3 Recording and Playback This shows you how to adjust the calendar to 5:20 PM on April 1, 2009. 1 2 Set the POWER switch to ON. Select TIME ZONE item in OTHER FUNCTIONS, then press the JOG dial button.
4 Select CHANGE at the CLOCK SET item in OTHER FUNCTIONS, then press the JOG dial button. • The CLOCK SET screen appears. OTHER FUNCTIONS Chapter 3 Recording and Playback USER FILE 1394 CONTROL 1394 CMD SEL ACCESS LED ALARM CLOCK SETTING TIME ZONE GL PHASE >>> OFF REC P ON ON RETURN CHANGE HD SDI PUSH MENU TO RETURN 5 Turn the JOG dial button to select YEAR, then press the JOG dial button.
P2 Cards 4 Inserting P2 Cards Chapter 3 Recording and Playback NOTE When using the camera recorder for the first time, be sure to set the time data beforehand. For details, refer to [Setting Date and Time of Internal Clock] (page 26). 1 Turn on the POWER switch. 2 Open the card slot cover. Push the eject button that pops up to the right. • Insert a P2 card into the AG-HPX300P. The P2 CARD ACCESS LED for the appropriate slot indicates the status of the P2 card.
NOTE To Prevent Accidental Erasure of P2 Card Content To prevent the content of a P2 card being accidentally erased, position the write-protect switch on the P2 card at [Protect]. P2 CARD ACCESS LED and status of P2 cards P2 CARD ACCESS LED Stays on in green Status of P2 Card MODE CHECK indication *1 Recording enabled Writing and ACTIVE reading enabled. Writing and reading enabled for current Stays on Selected for recording mode ACTIVE in orange recording (loop, interval or one-shot recording).
P2 card recording times P2 cards available to the AG-HPX300P Chapter 3 Recording and Playback This camera supports the following P2 cards. • AJ-P2C004HG (4 GB) • AJ-P2C008HG (8 GB) • AJ-P2C016AG (16 GB) • AJ-P2C016RG (16 GB) • AJ-P2C032AG (32 GB) • AJ-P2C032RG (32 GB) • AJ-P2C064AG (64 GB) NOTE • Card model numbers and capacities above will become available as of January 2009. Greater capacities and technical innovation may extend the recording time. • This unit cannot use AJ-P2C002SG (2 GB) cards.
Handling P2 Card Recording Chapter 3 Recording and Playback The P2 card is a semiconductor memory card designed for the DVCPRO P2 series, Panasonic’s line of professional video and broadcast equipment. • Since the DVCPRO P2 format and AVC-Intra record data as files, it is ideally suited for computer processing.
Basic Procedures Chapter 3 Recording and Playback This section describes the basic procedure for shooting and recording. Before you embark on a shoot, pre-inspect your system to ensure that it works properly. For directions on inspecting your memory card camerarecorder, see [Inspections Before Shooting] (page 147). Battery Set-up to P2 card Insertion 1 2 Insert a charged battery. Turn the POWER switch to ON to check the battery remaining level in the viewfinder.
Shooting Setting the switches before shooting and recording When a battery and P2 cards are installed, set the switches as detailed below, before starting to use your AG-HPX300P. White/Black Balance Adjustment to Recording Completion Chapter 3 Recording and Playback For shooting, follow the steps below. 1 f e a b c d 3 b a Iris The iris is automatically adjusted when the lens is set to the auto iris mode.
3 4 Point the camera at your subject to adjust the focus, and zoom. To use the electronic shutter, set the shutter speed and shutter mode. Chapter 3 Recording and Playback For more information, see [Setting the Electronic Shutter] (page 52). 5 Press the REC button to start recording. 6 To stop recording, press the REC button. NOTE • Shooting the sun and other very bright subjects may produce a color cast in surrounding areas.
Standard and Native Recording This camera is capable both of native recording, when it records video data at the frame rate used by the camera, and is also capable of standard recording or recording 59.94 frames with a pulldown. In 24P and 30P mode, 59.94i or 59.94P will be recorded with 2:3 and 2:2 pulldown, respectively. The camera can also handle video shot in the 24PA mode (2:3:3:2 advanced pulldown). Note that AVC-Intra does not support pulldown recording.
Variable Frame Rate (VFR) Recording In 720P mode, this camera is capable of frame skipping (undercranking) and high-speed (overcranking) recording. The camera operator can select between native (PN) recording mode and standard (OVER) recording. Chapter 3 Recording and Playback Native VFR Recording 1 2 In the SYSTEM SETUP screen, set the menu option SYSTEM MODE to 720-59.94P and the menu option REC FORMAT to AVC-I 100/24PN.
Using VFR Recording Function Standard speed for film production Standard setting for film production SYSTEM MODE 720 - 59.94P 1080 - 59.94i SYSTEM MODE settings Other settings AVC-I 100/24PN REC FORMAT (AVC-I 50/24PN) (DVCPRO HD/24PN) VFR OFF AVC-I 100/24PN REC FORMAT (AVC-I 50/24PN) (DVCPRO HD/60i) CAMERA MODE *1 24P Recording frame rate 24 frames *1 Only when the menu option REC FORMAT is set to DVCPRO HD/60i in the SYSTEM SETUP screen.
Undercranking effects This effect produces the quick motion often used for showing clouds drifting across the sky, crowds of people swarming past a solitary standing individual, a kung fu demonstration and other performances. For example, selecting a VFR recording frame rate of 12 fps when shooting at a 24P recording format yields a fast-motion effect of 2x normal speed. Chapter 3 Recording and Playback Standard setup for undercranking effects SYSTEM MODE 720-59.
Special Recording Modes SYSTEM MODE 1080 - 59.94i 720 - 59.94P 480 - 59.94i REC FORMAT DVCPRO HD/60i AVC-I 100/60i AVC-I 50/60i DVCPRO HD/60P AVC-I 100/60P AVC-I 50/60P DVCPRO 50/60i DVCPRO/60i DV/60i Other conditions Set CAMERA MODE to 60i or 30P Turn VFR OFF Set CAMERA MODE to 60i or 30P Pre-recording (PRE REC) This function is used to start recording a certain number of seconds (approx. 3 seconds for HD recordings or approx. 7 seconds for SD recordings) before actual recording starts.
Interval recording (INTERVAL REC) This function is used to record 1 frame (1/30 s) at the time interval set in the INTERVAL TIME item. 1 frame recording 1 frame recording 1 frame recording Chapter 3 Recording and Playback (time) One-shot recording (ONE SHOT REC) This function records a single shot at each unit of time which has been set. 1 For details on menu operation, refer to [Using the menus] (page 120).
Loop recording (LOOP REC) 1st card Before starting loop recording No recording 2nd card Recorded Recording start First loop recording Second loop recording A C B B Recording will be made on the areas with no recording consecutively (A, B, then C). When all areas on all cards are recorded, new recording (C) will be made by overwriting the area A.
Shot Marker (SHOT MARK) Recording Function Chapter 3 Recording and Playback This function can be used to distinguish a clip from other clips by adding a thumbnail to each clip. This also makes possible to display or play back the marked clips only. To add shot marks 1 In the SW MODE screen, assign SHOT MARK to a user button (USER MAIN, USER1 or USER2) or the RET button on the lens.
Normal and Variable Speed Playback Normal speed playback Chapter 3 Recording and Playback Press the PLAY/PAUSE button to view playback in the viewfinder and on the LCD monitor in color. Connecting a color video monitor to the VIDEO OUT connector or SDI OUT connector will enable playback of color video. The PLAY/PAUSE button can be used to pause playback. Fast-forward/fast-reverse playback The FF and REW buttons provide 32× and 4× fast playbacks and fast reverse playbacks.
Chapter 4 Adjustments and Settings for Recording Selecting recording signals Chapter 4 Adjustments and Settings for Recording This camera records HD (1080i, 720P) signals using AVC-Intra or DVCPRO HD codecs and use a combination of DVCPRO50, DVCPRO or DV codecs for recording SD (480i) signals. It provides a variety of capture frame rates and recording frame rates (native recording) to suit specific applications. Select recording and recording signal in the setting menus listed below.
List of recording formats and functions The table below lists the recording formats and recording functions that the camera supports. Camera recording modes (When the menu option REC SIGNAL is set to CAMERA) Setting SYSTEM MODE REC FORMAT 1080-59.94i VFR 1080/60i Disabled 60i Disabled Disabled 30P DVCPRO HD/60i 24P 24PA AVC-I 100/60P (AVC-I 50/60P) AVC-I 100/30PN (AVC-I 50/30PN) AVC-I 100/24PN (AVC-I 50/24PN) 720-59.
1394 input recording mode (when the REC SIGNAL option is set to 1394) Setting Recording function SYSTEM MODE REC FORMAT CAMERA MODE VFR 1080-59.94i 720-59.94P Disabled Disabled Disabled Disabled Disabled Disabled FRAME RATE [FRAME] Disabled Disabled Disabled Disabled Disabled Recording format 1080/60i DVCPRO HD 720/60P 480/60i DVCPRO50/60i Chapter 4 Adjustments and Settings for Recording 480-59.
List of recording, playback and output formats Camera recording mode (when the REC SIGNAL option is set to CAMERA) Setting SYSTEM MODE REC FORMAT 1080-59.94i CAMERA MODE VFR Disabled Disabled Disabled 30P 24P 24PA OFF ON OFF AVC-I 100/60P (AVC-I 50/60P) AVC-I 100/30PN (AVC-I 50/30PN) ON OFF AVC-I 100/24PN (AVC-I 50/24PN) ON OFF 720-59.
1394 input recording mode (when the REC SIGNALoption is set to 1394) Setting SDI OUT *2 SYSTEM MODE REC FORMAT CAMERA MODE VFR 1080-59.94i 720-59.94P Disabled Disabled DVCPRO50/60i DVCPRO/60i DV/60i Disabled Disabled Disabled Disabled Disabled Disabled 480-59.94i Chapter 4 Adjustments and Settings for Recording FRAME Recording format *1 RATE Video format Audio [FRAME] Disabled 1080/60i 1080-59.94i 4ch DVCPRO HD Disabled 720/60P 720-59.94P 4ch DVCPRO50 4ch Disabled 480/60i DVCPRO 480-59.
Adjusting the White Balance and Black Balance 3 Place a white pattern at a point where the light conditions match those for the light source of the subject. Then zoom-in on the white pattern so that white colour appears in the screen. • A white object (cloth or wall) may be used instead of a white pattern. The illustration below shows the required size for the white space. Adjusting the White Balance NOTE • Do not point the camera at a high-brightness area.
8 If the subject’s colour temperature is lower than 2300K or higher than 9900K the following message appears: • If the arrow points down ( ) the actual colour temperature is lower than the temperature indicated. If the arrow points up ( ) the actual temperature is higher than the temperature indicated. Chapter 4 Adjustments and Settings for Recording AWB A OK 2.3K When you have no time to adjust the white balance Position the WHITE BAL switch at PRST.
3 The adjustment will take effect in a few seconds and the following message will appear: ABB END • The adjusted value is automatically stored in the memory. Chapter 4 Adjustments and Settings for Recording NOTE • Ensure that the lens connector is connected and the lens iris is CLOSE. • During a black balance adjustment, light is automatically cut off. • ABB NG appears when the lens connector has come loose. • Black balance adjustment is not available during recording.
Setting the Electronic Shutter Setting the Shutter Mode and Speed Chapter 4 Adjustments and Settings for Recording 1 Viewfinder displays relating to the shutter See [Viewfinder Screen Status Displays] (page 65). Placing the Camera-recorder in SYNCHRO SCAN Mode Press the SHUTTER switch positioned at OFF towards ON. To place the camera-recorder in SYNCHRO SCAN mode, follow the steps below.
Assigning functions to USER buttons The USER MAIN, USER1, and USER2 buttons can be assigned user-selected functions. Use the menu options USER MAIN, USER1, and USER2 to assign functions to respective button. Select these items from the setting menu SW MODE screen. SW MODE 0dB 6dB 12dB OFF 1 3.2K Y GET BACKLIGHT PUSH MENU TO RETURN NOTE The default settings are listed below. • USER MAIN: Y GET • USER1: BACK LIGHT • USER2: TEXT MEMO Selectable Functions • REC REVIEW: Assigns REC REVIEW.
Selecting Audio Input Signals and Adjusting Recording Levels Chapter 4 Adjustments and Settings for Recording This AG-HPX300P supports independent four-channel audio recording in any format (HD or SD). When the AUDIO SELECT CH1/CH2 switch is positioned at [AUTO], the recording levels for Audio Channels 1 and 2 are automatically adjusted. To manually adjust the recording levels, position the switch at [MAN].
When operating the AG-HPX300P without a sound recordist, it is recommended that the FRONT AUDIO LEVEL control should be used to adjust the audio level. In advance, check the level meter in the viewfinder screen and use the FRONT AUDIO LEVEL control to adjust the appropriate audio channel to prevent input of excessive audio signals.
Setting Time Data The camera provides time data such as time codes, user bits, time of day (real-time) data, which is recorded on each frame alongside video data. It is also recorded as as data in clip metadata files. Time data overview Chapter 4 Adjustments and Settings for Recording Time code Use the TCG switch to select Rec Run or Free Run mode. • Free Run: The time code advances constantly whether the camera is on or not just like time itself.
Recording time codes and user bits System setting status SYSTEM REC MODE SIGNAL REC FORMAT Recorded TC FRAME RATE 60i, 30P — 24P, 24PA — — — R-RUN/F-RUN*3 DF/NDF 30 frames — R-RUN/F-RUN*5 NDF locked 30 frames — — R-RUN/F-RUN*2 DF/NDF 30 frames — Other than 24 frames — 24 frames — 30 frames — Other than 30 frames — 24 frames — Other than 24 frames DVCPROHD/60i CAMERA 1080 -59.
Setting user bits Entering the User Bits Chapter 4 Adjustments and Settings for Recording Use the setting menu UB MODE on the RECORDING SETUP screen to select the user bits to record in the subcode area. • USER: Records internal user values. To set user values, set the TCG switch to SET to open the setting menu TC PRESET screen. Set values are retained after the power is turned off. See also [Entering the User Bits] (page 58). • TIME: Records the time calculated by the internal clock.
3 Use CURSOR buttons to set the user bits. UB PRESET 0 0 0 0 0 0 0 0 q button: Shifts the target (highlighted) digit to the right. w button: Shifts the target (highlighted) digit to the left. e button: Increases the highlighted number by one. r button: Decreases the highlighted number by one. SET button: Confirms the set user bits. • Pressing the RESET button while setting the user bits will reset any user bit setting to 0.
4 Frame rate: 30P over 60i (2:2) Time code digit 00 01 02 Video Ao Ae Bo Be Co Ce Use the CURSOR buttons to set the time code.
VFR (variable frame rate) time code • At 24PN, recording is performed at 24 frames and output uses a 2:3 pull-down scheme to produce 30 frames. • At a frame rate (capture frame rate) of 24P the speed of recording and the output time code matches actual time, but not at any speed other than 24P. (Example: at 60P recording progresses at 60/24 speed) • Then the camera operates in Rec Run mode and the time code output at start of recording matches the recording time code.
Externally Locking the Time Code The time code generator built into your AG-HPX300P may be locked to an external generator. It is also possible to lock an external time code generator to the internal generator. Example 2: Connecting two or more AGHPX300Ps with one another, with one being used as the reference device.
Setting the user bits when the time code is externally locked To externally lock user bits, set the setting menu UB MODE (RECORDING SETUP screen) to EXT. Regardless of an F-RUN or R-RUN setting of the TCG switch, the time code is slaved to user bit values input to the TC IN connector. For details, refer to [Setting Time Data] (page 56) and [Setting user bits] (page 58).
GENLOCK and time code input/output connection and setup Camera operating conditions Recording format Chapter 4 Adjustments and Settings for Recording 1080i 720P Video and reference signal to be output GENLOCK input externally SDI OUT (1080i) 1080i VIDEO OUT SDI OUT (1080i) SD (480i) VIDEO OUT SDI OUT (720P) 720P VIDEO OUT SDI OUT (720P) VIDEO OUT 480i SDI OUT (480i) VIDEO OUT Camera setup SD (480i) VIDEO OUT, SDI OUT (SD) TC OUT 90H advance 90H advance 120H advance 120H advance 90H dela
Viewfinder Screen Status Displays In addition to video, the viewfinder shows messages indicating camera settings and operating status, center markers, safety zone markers, zebra patterns and other indications. Chapter 4 Adjustments and Settings for Recording Viewfinder Status Indication Layout The illustration below shows the indications (except MODE CHECK) that are displayed in the viewfinder. TC 12 : 34 : 56 : 23 12 I - PAUSE 1 9 9 9 min P 2 L ACK 1394 B 9 0% USER - 1 CAC 1080 i AVC-I100 P 3 .
Screen displays 1 Chapter 4 Adjustments and Settings for Recording 2 3 4 6 7 8 9 10 11 TC 26 25 12 : 34 : 56 : 23 12 I - PAUSE 23 1 9 9 9 min B 9 0% USER - 1 CAC P 2 L ACK 1394 22 21 1080 i AVC-I100 PROXY 5 P 3 .2K 0 dB ND 1 L T . BOX 8 3% ND 1 FEB 2 5 6 0 : 2 4 PN DRS 1 ===== 1/ 1 2 3 . 4 2 = = = C H C H 12 1 Time code displays Each press of the COUNTER button displays (or turns off) the indications listed below.
4 Recording format and system frequency indication • System mode • 1080i • 720P • 480i • Recording format (In 1080i, 720P system mode) • AVC-I 100: AVC-Intra 100 format • AVC-I 50: AVC-Intra 50 format • DVCPRO HD: DVCPRO HD format (in 480i system mode) • DVCPRO50, DVCPRO, DV 5 Information display The following information is displayed depending on the situation.
16 Zoom position display Zoom positions are indicated in a range from Z00 (maximum wide angle) to Z99 (maximum zoom). 17 Recommended ND filter display This indicates the most suitable ND filter to use under current shooting conditions. Chapter 4 Adjustments and Settings for Recording 18 ND filter display • This indicates the selected ND filter. • An ND -- indication means that the ND FILTER switch is incorrectly set (a position other than ND1 to ND4). Check ND FILTER switch position.
Center Information Display The following information displays (for details, refer to page 67) are provided. P2 card recording and playback data indications Errors and warnings Errors and warnings appear when something goes wrong with the camera or a P2 card malfunctions. If the problem cannot be solved by turning off the camera and turning it back on, try replacing the card and if that does not help, it may be necessary to consult your supplier.
Camera status display Chapter 4 Adjustments and Settings for Recording • ABB ABB indicator • ATW ACTIVE Appears when the AUTO W/B BAL switch is set to AWB and ATW is running. • ATW (ATW LOCK) Appears when the WHITE BAL switch is set to B and ATW has been assigned. • AUTO KNEE (ON/OFF) Displayed when changing the AUTO KNEE switch position. • AWB AWB indicator • AWB P3.2K/AWB P5.6K Displays the color temperature assigned to PRST when the WHITE BAL switch is set to PRST.
Checking and displaying shooting status Displays that MODE CHECK brings up Displays that DISPLAY OFF clears DISP/MODE CHK button Displays opened or hidden by settings in the OTHER DISPLAY option –: Not affected, : Opens, ×: Clears ALL PARTIAL OFF – – – – – – – – – Other menus that clear displays –: Not affected No Displays 1 2 3 Is not cleared Is not cleared Is not cleared × × – × Is not cleared – – – – Is not cleared – – – – – – – – Is not cleared
MODE CHECK indication MODE CHECK provides an almost complete set of camera information. Items 1 to 4 below are provided only by MODE CHECK. Chapter 4 Adjustments and Settings for Recording 4 TC 12 : 34 : 56 : 23 12 I - PAUSE 1 9 9 9 min B 9 0 % D I ONC 1 6 0 U S E R - 1 CAC 1394 S L O T 1 : NO T S U P POR T E D 1080 i 1 S L O T 2 : P ROX Y AVC-I100 A B B NG MA I N : S L O T S E L AWB N G 3 2 1 : T E X T MEMO P 3 .2K PROXY 2 : P R E R E C 1 8 dB L T .
Center marker display A center marker is displayed when the menu option MARKER in the DISPLAY SETUP screen is set to ON. The center marker display appears only on the LCD monitor and in the viewfinder. It is not superimposed on signals output via the VIDEO OUT and SDI OUT connectors. Press the user button to which MAG A. LVL has been assigned to display a magnification of the audio level meter (available also when LEVEL METER in the DISPLAY SETUP menu is set to OFF).
Zebra pattern display The AG-HPX300P can display two zebra patterns. Turning the ZEBRA switch on displays the zebra pattern set in the menu in the viewfinder and LCD monitor. A menu setting makes it possible to also display the zebra pattern on video output via the VIDEO OUT connector. Chapter 4 Adjustments and Settings for Recording ZEBRA switch Use the DISPLAY SETUP screen to set the level of zebra pattern display.
Focus assist function Pressing the FOCUS ASSIST button magnifies the image at the center to facilitate focusing. Set the menu option FOCUS BAR to ON in the DISPLAY SET UP screen to display the FOCUS BAR. Chapter 4 Adjustments and Settings for Recording FOCUS ASSIST button NOTE This function magnifies only the image at the center of the LCD monitor and viewfinder. It is not superimposed on signals output via the VIDEO OUT and SDI OUT connectors.
Adjusting and setting the LCD monitor Using the LCD Monitor 1 Chapter 4 Adjustments and Settings for Recording 2 4 Turn on the POWER switch of the AGHPX300P. Use the subscreen in the menu option LCD SETTING in the DISPLAY SETUP screen to adjust screen color level, brightness and contrast. For details on menu operation, refer to [Using the menus] (page 120). • At LCD SETTING of the DISPLAY SETUP screen, select CHANGE. Slide the OPEN button in the arrow A direction to open the LCD monitor.
• When the camera-recorder is very cold, the video image in the LCD monitor will appear slightly darker immediately after the power is turned on. Once the interior of the camerarecorder warms up, the LCD monitor delivers normal brightness.
Adjusting and Setting up the Viewfinder Adjusting Right and Left Viewfinder Position Chapter 4 Adjustments and Settings for Recording 1 2 Loosen the viewfinder left-right positioning rings. Using the Viewfinder 1 2 Slide the viewfinder right and left to find a position that facilitates viewing. DISPLAY SETUP EVF PEAK LEVEL EVF PEAK FREQ EVF SETTING EVF B.
NOTE • Pressing the RESET button when an adjustable value is selected in the setting menu EVF SETTING will return that setting to its factory default. • The LCD monitor will appear darker than usual if the camera recorder is cold when it is turned on. The display will return to its normal brightness as it warms up. Chapter 4 Adjustments and Settings for Recording Emphasizing Image Outlines Emphasizing outlines of images in the viewfinder and on the LCD monitor makes it easier to focus.
Handling setup data Configuration of setup data files Chapter 4 Adjustments and Settings for Recording This camera makes it possible to save a scene file to each of the F1 to F6 positions on the SCENE FILE dial. Use of an SD memory card makes it possible to save up to four of the F1 to F6 files on an SD card for later retrieval. The setting menu values can be stored as a user file in the camera and up to four files can be stored on the SD memory card. The setting data files are configured as shown below.
Formatting, Writing and Reading an SD memory card Setting Data Using an SD memory card By saving up to four files of setup menu settings on an SD or SDHC memory card (optional accessory), you can create a setup card that will allow you to quickly configure camera settings before recording. Handling SD memory cards Open the CARD FUNCTIONS screen from the setting menu to format SD memory cards, write setting data to SD memory cards and to read data stored on an SD memory card.
The card will not be formatted if the following message appears when the JOG dial button is pressed: Chapter 4 Adjustments and Settings for Recording Error message SD CARD FORMAT NG NO CARD (No SD memory card inserted.) SD CARD FORMAT NG ERROR (SD memory card cannot be formatted.) SD CARD FORMAT NG WRITE PROTECT (SD memory card is writeprotected.) SD CARD FORMAT NG CANNOT ACCESS (SD memory card not accessible). Remedy Insert an SD memory card. The card may be defective. Replace the card.
Changing scene file settings 4 Example1: C hange the name of the scene file. 1 • Turning the JOG dial button changes the character display in the following order: space () alphabet (A to Z) numerics (0 to 9) symbols (; : < = > ? @ [ \ ] ^_-./). • If the RESET button is pressed when the filename has been set, the characters are cleared. Turn the scene file dial, then select the scene file to be changed.
2 Saving scene files and other settings on SD memory cards Select SAVE and press the JOG dial button. SCENE FILE Chapter 4 Adjustments and Settings for Recording LOAD SAVE INIT VFR FRAME RATE SYNCRO SCAN DETAIL LEVEL V DETAIL LEVEL DETAIL CORING CHROMA LEVEL RETURN LOAD SAVE INITIAL 0 0 0 0 PUSH MENU TO RETURN 3 Select YES and press the JOG dial button. • To return to the menu level above, press the MENU button.
5 Select WRITE and press the JOG dial button, then select EXECUTE and press the JOG dial button. SCENE FILE(SD CARD) 1 >>> RETURN EXECUTE NO FILE NO FILE NO FILE >>> 1 2 6 Press the cursor button, turn the JOG dial button to move to YES and again press the JOG dial button. • In the following example, TITLE 1 is the filename. • When writing is completed, WRITE OK appears. Use the JOG dial button to select characters, then press the JOG dial button to move to the next character.
Chapter 5 Preparation Power Supply A battery or an external DC power supply can be used as the power supply for the camera-recorder. 2 Insert the battery and slide it in the direction of the arrow. Using a Battery Release lever Chapter 5 Preparation The following is a list of batteries that have been tested and verified to work with the camera.
When using a V-mount type battery Mount the V-mount adapter plate. Insert the plate and slide it as shown below. • To remove the plate, slide the release lever downwards. Chapter 5 Preparation Release lever Setting the battery type • Select the battery type listed under BATTERY SELECT. Select the menu option BATTERY SELECT from the setting menu BATTERY SETUP screen.
Use of the external DC power supply 1 Connect the external DC power supply to the DC IN socket on the unit. Chapter 5 Preparation DC cable DC IN Socket External DC power supply 2 3 Use of external DC power supply Make sure that the output voltage of the external DC power supply meets the rated voltage of the camera before making a connection.
Mounting and Adjusting the Lens 3 Mounting the Lens 1 Lower the lens lever to firmly tighten the lens. Raise the lens clamping lever and remove the mount cap. Lens Clamping Lever Chapter 5 Preparation 4 Secure the cable through the cable clamp, and plug it into the LENS connector. Mount Cap 2 Cable clamp To mount the lens, align the indentation at the top center of the lens mount with the center mark of the lens. Mark LENS Connector 5 Adjust the lens flange back.
Adjusting the Lens Flange Back If images are not clearly focused at both telephoto and wide-angle positions during zoom operations, adjust the flange back (distance from the lens mounting surface to the image formation surface). Once adjusted, the flange back does not need to be re-adjusted as long as the same lens is mounted on the camera. NOTE Chapter 5 Preparation Please also refer to the lens instruction manual for directions on adjustment and locations of individual lens parts.
White Shading Compensation The camera can use DEFAULT (fixed value) and three user adjustable functions (USER1, USER2, USER3) to store white shading compensation data. Select SHADING SELECT in the setting menu LENS SETUP screen to set compensation data. Selecting OFF turns off shading compensation. 1 Select SHADING SELECT in LENS SETUP, then press the JOG dial button. or details on menu operation, refer to [Using the F menus] (page 120).
2 Set the image. Chapter 5 Preparation (1) Shoot a solid white sheet of paper. (2) Set the lens iris to manual and adjust the iris so that a zebra pattern fills the entire viewfinder screen. • When the piece of paper is unevenly lit, the zebra pattern will not cover the entire screen. Adjust as required. • Make sure that the white paper is not exposed to multiple light sources (example, fluorescent lighting or halogen lamps) of different color temperatures.
Checking CAC data number and CAC data during operation 1 2 Loading CAC File From an SD Card 1 Open the LENS SETUP screen. For details on menu operation, refer to [Using the menus] (page 120). Use the JOG dial button to select CAC CARD READ. Then select EXECUTE to open the CAC CARD READ screen. LENS SETUP • The CAC property list appears.
NOTE • The camera can load up to 8 files. When an attempt is made to load a new file while 8 files have already been loaded, “READ NG CAC FILE FULL” appears. To load a new file, delete an existing file before loading the new file. For details, see [Deleting CAC File] (page 96). • “READ NG FORMAT ERROR” indicates the file cannot be used and will not be loaded. Make sure the file is in a format the camera supports and that the file on the SD card is not corrupted.
Preparing for Audio Input Take the following steps to prepare the camera for connecting audio input devices. 4 When Using the Front Microphone Set the AUDIO IN switch to [FRONT] depending on the audio channel to be recorded. The AG-MC200G microphone kit (optional) includes a microphone that can be mounted on the camera. Chapter 5 Preparation 1 Open the microphone holder.
2 Set the AUDIO IN switch to W.L. for the audio channels that will be recorded. Chapter 5 Preparation AUDIO IN Switch • Set the menu option WIRELESS TYPE in the AUDIO SETUP screen to DUAL for a 2-channel wireless receiver. When Using Audio Devices 1 2 3 Connect the audio device to the AUDIO IN jack with the XLR cable. Set the AUDIO IN switch to [REAR] for the channel to which the XLR cable is connected. Set the LINE/MIC/+48V selector switch on the rear panel to [LINE].
Attaching Accessories Mounting the Camera on a Tripod Use an optional (SHAN-TM700) tripod adapter to place the camera on a tripod. 1 Attach the tripod adapter to the tripod. Removing the Camera from the Tripod Adapter While holding the red lever down, move the black lever in the direction of the arrow, and slide the camera backward to remove it.
Attaching the Rain Cover When using the SHAN-RC700 Rain Cover Chapter 5 Preparation Tighten the cord Secure with the surface fastener Secure with the surface fastener Attaching the FRONT AUDIO LEVEL Control Knob If you use the FRONT AUDIO LEVEL control frequently, attach the accessory knob so that it can be easily operated.
DC OUT Connector and External REC Start/Stop Switch Connection The DC OUT connector on the camera can output a 1.5 A current. Connecting an external switch to this connector enables REC Start and Stop control. An LED can be connected and used as a tally lamp, which is convenient when the camera is mounted on a crane during recording. 3: REC Start/Stop switch This pin is connected in parallel with the REC button and the lens VTR button.
Connecting the AJ-RC10G Remote Controller • Some functions can be remote-controlled when the remote control unit AJ-RC10G (optional accessory) is connected to the camera. • When the AJ-RC10G is connected, the camera automatically enters remote control mode after the power switches of both the camera and the AJ-RC10G are turned ON.
Chapter 6 Manipulating Clips with Thumbnails A clip is a data group that includes the images and sounds created from one shooting session, together with additional information such as text memos and meta data. The following manipulations can be performed using the cursor and SET buttons, while checking the images displayed on the LCD monitor: • Playback, delete, copy or restore the clip. • Add or delete a shot mark and a text memo on the clip thumbnail. • Copy part of a clip by using the text memo.
Thumbnail Screen Press the THUMBNAIL button to display the thumbnail screen on the LCD monitor. Pressing the THUMBNAIL button again returns the display to the regular display. When switching is done from the regular screen display to the thumbnail screen display, all the clips will be displayed on the thumbnail screen. Pressing the THUMBNAIL MENU button allows you to navigate the thumbnail menu.
8 Clip Number The numbers set by the camera for all the clips recognized correctly by the P2 card. These numbers are allocated in chronological order, by shooting dates and times. If clips cannot be played because of different recording formats, they are displayed in red. 9 Chapter 6 Manipulating Clips with Thumbnails X Defective Clip Indicator and ? Unknown Clip indicator This marker is displayed for defective clips, which may result from a variety of causes, e.g., powering-down during recording.
Selecting Thumbnails Multiple thumbnails can be randomly selected in the thumbnail screen. 1 Use the cursor buttons to move the pointer (yellow frame) to the desired clip and press the SET button. • The frame around the selected thumbnail changes to a blue frame. Press the SET button again to deselect the clip. Chapter 6 Manipulating Clips with Thumbnails 2 Additional clips can be selected by repeating step 1.
Switching the Thumbnail Display The display can be switched so that only those clips matching the specified conditions are displayed in the thumbnail screen. 1 2 3 Select THUMBNAIL from the thumbnail menu. • Switch the thumbnail display by selecting one of the following items: Press the THUMBNAIL button. • The thumbnail screen appears on the LCD monitor. Press the THUMBNAIL MENU button. • The thumbnail menu opens.
Changing thumbnails It is possible to replace thumbnails with images that include previously attached text memos while images are recorded or played back. 1 Chapter 6 Manipulating Clips with Thumbnails 3 4 5 Select THUMBNAIL TEXT MEMO CLIPS to display thumbnails of the clips with text memos. Place the pointer on the clip of the thumbnail that you intend to change, and then press SET button. Move the pointer to the text memo display on the lower row.
Text Memo During recording or playback, you can add text memos to clips. Text memos can be used to play back clips at some point or break clips into chunks and copy the necessary portions. Playing back a clip at the position where a text memo is recorded 1 Adding a text memo 2 Press the THUMBNAIL MENU button and select THUMBNAIL TEXT MEMO CLIPS from the thumbnail menu. • The clip thumbnails with text memos attached are displayed in the upper section of the LCD monitor.
4 With the pointer located in the lower part, move the pointer to the desired text memo number using the cursor right and left buttons (p/o). Then, press the PLAY/PAUSE button. Chapter 6 Manipulating Clips with Thumbnails • Playback will start from the time code position of the text memo where the pointer is located.
4 The following screen appears. Use the cursor buttons and the SET button to select YES. Reconnection of Incomplete Clips Incomplete clips may be generated when clips recorded on multiple P2 cards (connected clips) are separately copied to different cards. The reconnection function generates one clip (the original, connected clip) from incomplete clips. 1 • The clip is deleted. All selected clips (in blue frames) are deleted by this operation.
3 Press the THUMBNAIL MENU button and select OPERATION COPY from the thumbnail menu. • Select slot 1-2 or SD memory card as the destination. Setting of Clip Meta Data Information such as the name of the person who shot the video, the name of the reporter, the shooting location, or a text memo can be read from the SD memory card, and can be recorded as Clip Meta Data. Reading the SD memory card that contains the Clip Meta Data (metadata upload file).
NOTE NOTE Files edited using software other than P2 Viewer are displayed as “UNKNOWN DATA!”, and may not be read. • This unit only displays printable ASCII characters. GLOBAL CLIP ID: Displays the global clip ID, which indicates the shooting status of the clip. USER CLIP NAME: Displays the clip name specified by the user.*1 VIDEO: Displays [FRAME RATE] (frame rate of the clip), [PULL DOWN], and [ASPECT RATIO].
3 Use the cursor buttons to move the pointer to the item to confirm and press the SET button. • Use this function to check loaded metadata settings. Selecting the USER CLIP NAME recording method Chapter 6 Manipulating Clips with Thumbnails Select META DATA USER CLIP NAME from the thumbnail menu to select the recording method. Two options are available: TYPE1 and TYPE2.
Example of recording (DVCPRO HD) a clip on one P2 card: Recording start Recording pause Recording duration = Approx.7 min Clip 1 COUNT value = 0001 Clip 2 COUNT value = 0002 Approx. 5 min Approx.
Setting of Proxy (optional) Installing the video encoder card (AJ-YAX800G, optional accessory) in P2 card slot 2 makes it possible to set up the proxy recording function. The video encoder card is not recognized when inserted if the power for the unit is turned on. Insert the video encoder card after turning off the power for the unit. Select OPERATION DEVICE SETUP PROXY from the thumbnail menu to specify the setting.
Formatting SD memory cards SD memory cards can also be formatted from the thumbnail screen. With an SD memory card inserted into the unit, perform the following operation: 1 2 Press the THUMBNAIL button. • The thumbnail screen appears on the LCD monitor. • Select “SD CARD” and press the SET button when the screen shown below appears. • Select “EXIT” if formatting is not required. 3 The thumbnail display mode can be customized to suit your preferences. 1 2 Press the THUMBNAIL button.
DATE FORMAT: You can specify the display order for the shooting date as either Year/Month/Day (Y-MD), Month/Day/Year (M-D-Y) or Day/Month/ Year (D-M-Y). The factory setting is Month/Day/Year. This setting is reflected in the recording date shown in the clip property and the shooting date shown when DATE is selected under the item DATA DISPLAY.
REC RATE: The recording frame rate is displayed. (Only displayed for clips recorded using native recording with the VFR function.) 5 Clip Meta Data Displays more detailed data about the clip. Use the cursor buttons to move the pointer, and press the SET button to check the detailed content. For more information on displayed metadata, see [Setting of Clip Meta Data] (page 110).
Contents of P2 Card Status Display Settings DIR ENTRY NG CARD: The directory structure on the P2 card is not supported. For details on P2 card status indications, refer to [2. P2 Card Status (remaining free space)]. From the thumbnail menu, select PROPERTY CARD STATUS. The following screen appears. When “REMAIN” is selected: 1 When “USED” is selected: 2 1 2 3 3 Chapter 6 Manipulating Clips with Thumbnails 5 5 4 4 1 Write-protect Mark The mark appears if the P2 card is write-protected.
DIR ENTRY NG CARD: The directory structure on the P2 card is not supported. For details on P2 card status indications, refer to [2. P2 Card Status (used memory capacity)] SD memory card Status Display The status display enables a confirmation of the SD memory card formatted condition, available memory capacity etc. From the thumbnail menu, select PROPERTY DEVICES SD CARD.
Chapter 7 Menu Operations Viewfinder and LCD Menus Using the menus 2 Use the setup menus to change the settings to suit the scenes you are shooting or what you are recording. • If the thumbnail menu is displayed, press the THUMBNAIL button to clear the display. • The menu items indicated in the blue characters cannot be used. Use the JOG dial button (or the Up and Down cursor buttons) to highlight the function you want to change. MAIN MENU 1.SCENE FINE 2.SYSTEM SETUP 3.SW MODE 4.RECORDING SETUP 5.
5 Use the JOG dial button to change the setting value. SW MODE LOW GAIN MID GAIN HIGH GAIN ATW ATW TYPE W.BAL.PRESET USER MAIN USER1 0dB 6dB 12dB OFF 1 3.2K 5.6K BACK LIGHT Initializing user files and scene files simultaneously You can return the user files and the six scene files to their factory defaults by selecting YES in the menu option MENU INIT in the OTHER FUNCTIONS screen. PUSH MENU TO RETURN 7 To change other settings, repeat steps 4 and 5.
Setup menu structure MAIN MENU SCENE FILE (page 124) SYSTEM SETUP (page 126) SW MODE (page 128) Chapter 7 Menu Operations RECORDING SETUP (page 129) SYSTEM MODE REC SIGNAL REC FORMAT CAMERA MODE SCAN REVERSE ASPECT CONV SETUP PC MODE SELECT PC MODE LOW GAIN MID GAIN HIGH GAIN ATW ATW TYPE W.BAL.
CARD FUNCTIONS (page 136) SCENE FILE USER FILE SD CARD FORMAT LENS SETUP (page 136) OTHER FUNCTIONS (page 137) USER FILE 1394 CONTOROL 1394 CMD SEL ACCESS LED ALARM CLOCK SETTING TIME ZONE GL PHASE H PHASE MENU INIT OPTION MENU*1 (page 138) VERSION MODEL NAME SERIAL NO.
Setup menu list SCENE FILE screen Item LOAD/SAVE/INIT Chapter 7 Menu Operations Setting Notes Loads, saves and initializes settings of the scene file • A change in scene files affects only assigned to the current scene dial position (one F1 the scene file at the current scene dial – F6 scene file). position. LOAD: Loads data stored in camera memory. SAVE: Saves current values in camera memory. INITIAL: Returns settings to their factory defaults.
Item MASTER PED Setting Adjusts the black master pedestal that serves as the video reference. –100 ... +15 *1 ... +100 A. IRIS LEVEL • Not available at 1080/30P or 1080/24P. • The 1/15 and 1/30 shutter speeds are not available in 1080/60i mode. • A change in settings during DRS operation will not change video quality. • A change in settings during DRS operation will not change video quality. ____ indicates the factory setting 125 Chapter 7 Menu Operations Sets the AUTO IRIS target value. –10 .
Item V DETAIL FREQ NAME EDIT Setting Sets vertical detail. THIN: Produces fine detail. MID: Produces less detail and wider edging. THICK: Produces even less detail and the widest edging effect. • Progressive recording made at THIN or MID cause horizontal lines or oblique lines that are almost horizontal to flicker when viewed on a normal monitor TV (60i: Interlace). THIN and MID settings will produce higher resolution video than THICK when shooting progressive footage that will later be edited.
Item REC FORMAT CAMERA MODE ASPECT CONV SETUP PC MODE SELECT PC MODE Notes • Not available when 1080i or 720P is set in SYSTEM MODE and REC SIGNAL is 1394. • Not available in USB DEVICE mode. • Does not appear when SYSTEM MODE is set to 720-59.94P. • Not available in the following conditions. - When the REC SIGNAL option is set to 1394. - Available only when SYSTEM MODE is set to 1080-59.94i and REC FORMAT is set to something other than DVCPROHD/60i.
SW MODE screen Item LOW GAIN MID GAIN HIGH GAIN ATW Chapter 7 Menu Operations ATW TYPE W.BAL.PRESET USER MAIN USER1 USER2 RET SW WFM Setting Sets the gain value assigned to the L position of the GAIN switch. –3dB, 0dB, 3dB, 6dB, 9dB, 12dB Sets the gain value assigned to the M position of the GAIN switch. –3dB, 0dB, 3dB, 6dB, 9dB, 12dB Notes Sets the gain value assigned to the H position of the GAIN switch.
Item AUTO KNEE SW Setting Notes Selects the function of the OUTPUT/AUTO KNEE. • Selecting the 1/15 and 1/30 ON: Setting AUTO KNEE to ON turns on the AUTO shutter speeds in the 1080/30P, KNEE function. 1080/24P1080/60i modes and setting OFF: The AUTO KNEE function is not available even AUTO KNEE to ON will activate the when AUTO KNEE is set to ON. AUTO KNEE function even if DRS has DRS: Setting AUTO KNEE to ON turns on the DRS been set. (Dynamic Range Stretcher) function. (For details, refer to page 9.
AUDIO SETUP screen Item FRONT VR CH1 Chapter 7 Menu Operations Setting Notes Enables/disables Front Audio Level control of CH1 • When the AUDIO SELECT CH1 switch input. is set to AUTO and auto adjustment FRONT: Enables Front Audio Level control of mode is active, the Front Audio Level microphone input to CH1. control is disabled regardless of these W.L.: Enables Front Audio Level control of audio from settings. a wireless receiver input to CH1.
Setting Selects the audio channels to be recorded in the DVCPRO and DV formats. 2CH: Only recorded on CH1 and CH2. 4CH: Records on all four channels. TEST TONE Selects the test signal. NORMAL: Outputs test tones to channels 1, 2, 3 and 4 when the OUTPUT/AUTO KNEE selector switch is set to BARS and the AUDIO IN switch CH1 is set to FRONT. ALWAYS: Outputs test tones to channels 1, 2, 3 and 4 at all times when the OUTPUT/AUTO KNEE selector switch is set to BARS.
OUTPUT SEL screen Item SDI SELECT Chapter 7 Menu Operations Setting Notes Sets the signal format type output from the SDI OUT • Not available when SYSTEM MODE is connector. set to 480-59.94i. Then 480i is output AUTO: Depends on SYSTEM MODE setting. at all times. 1080i*1: Outputs 1080-59.94i also when SYSTEM MODE setting is 720-59.94P. 480i: Output is locked to 480-59.94i regardless of SYSTEM MODE setting. SDI METADATA Sets metadata (UMID) superimposition onto SDI OUT. ON: Superimposes metadata.
Item EVF SETTING EVF B.LIGHT EVF COLOR ZEBRA1 DETECT ZEBRA2 DETECT MARKER SAFETY ZONE FOCUS BAR LCD SETTING SELF SHOOT LCD BACKLIGHT SYNC SCAN DISP DATE/TIME LEVEL METER ZOOM CARD/BATT ____ indicates the factory setting 133 Chapter 7 Menu Operations ZEBRA2 Setting Notes Adjusts viewfinder brightness and contrast on a subscreen. (Subscreen) EVF BRIGHTNESS EVF CONTRAST Adjusts viewfinder backlight brightness.
Item P2CARD REMAIN OTHER DISPLAY MENU BACK Chapter 7 Menu Operations REC COUNTER Setting Determines how remaining P2 card capacity is displayed. TOTAL: Displays value for both cards. ONE-CARD: Indicates the remaining capacity of the card that is being recorded. Sets display of other data. PARTIAL: Displays some of the data. ALL: Displays all data. OFF: Not displayed Select whether to lower the transparency of the background to make menu text easier to read. ON: Lowers background transparency.
Item ENDURA7 NEAR ENDURA10 NEAR ENDURA-D NEAR PAG L95 NEAR BP-GL65/95 NEAR NiCd14 END TYPE A FULL TYPE A NEAR TYPE A END TYPE B FULL TYPE B NEAR TYPE B END NEAR END CANCEL Notes Chapter 7 Menu Operations NiCd14 NEAR Setting Sets the near end voltage for ENDURA7. (Adjustable in 0.1 V units.) 11.0 V ... 13.4 V ... 15.0 V Sets the near end voltage for ENDURA10. (Adjustable in 0.1 V units.) 11.0 V ... 13.4 V ... 15.0 V Sets the near end voltage for ENDURA-D. (Adjustable in 0.1 V units.) 11.
CARD FUNCTIONS screen Item SCENE FILE Chapter 7 Menu Operations Setting Notes Reads/writes scene files from/onto the SD memory card. FILE SELECT: Selects scene files (1 to 4). READ: Reads the selected scene file (1 – 4) settings stored on the SD memory card. WRITE: Saves the current scene file (1 – 4) settings to the SD memory card. TITLE RELOAD: Reloads title list. USER FILE Reads/writes user files (files other than SCENE FILES) from/onto the SD memory card. FILE SELECT: Selects user files (1 to 4).
OTHER FUNCTIONS screen Item USER FILE 1394 CONTROL ACCESS LED ALARM CLOCK SETTING TIME ZONE GL PHASE H PHASE MENU INIT Restores all setting menu values including all scene files F1 to F6 and user files to their factory defaults. Notes • Not available when PC MODE SELECT is set to USB DEVICE and PC MODE is set to ON. • Not available in AVC-Intra mode and DVCPRO HD native mode. • Not available during interval, one-shot and loop recording.
DIAGNOSTIC screen Item VERSION Chapter 7 Menu Operations MODEL NAME SERIAL NO. OPERATION Setting Indicates the version of the firmware used in this camera. A subscreen provides details on which firmware versions are used.
Chapter 8 Connecting to External Devices Functionality Provided by Connections to USB 2.0 Connector Connecting to a computer in USB device mode A USB 2.0 connection to a computer or other device allows you to use P2 cards in the camera as mass storage. Procedures for making connections to a computer 1 Connect a USB cable to the USB 2.0 connector. • A USB 2.0 cable is not supplied with the AG-HPX300P. Use a commercially available USB cable that supports USB 2.0 (a shielded cable with a ferrite core).
3 Terminating USB mode Use one of the following three methods. • Set the camera POWER switch to OFF. • Set the PC MODE option in the SYSTEM SETUP screen to OFF. • Press the USER button to which PC MODE has been assigned. 2 USB host mode This mode allows you to connect the camera to a hard disk drive that supports USB 2.0 to save card data, view thumbnails of the stored clips and write data back to P2 cards. Press the THUMBNAIL button. • The thumbnail screen opens.
FAT formatted hard disk Viewing hard disk drive data Use the following procedures to view data on a hard disk drive connected via USB. 1 2 3 4 Switch to USB host mode. For details, refer to [Switching to USB Host Mode] (page 140). Press the THUMBNAIL button. Open the thumbnail screen. 7 8 9 1 2 3 4 5 6 Press the SET button. Press the EXIT button. 1 PARTITION Use this function to view hard disk drive type. Operations differ depending on hard disk drive type.
6 REMAIN Indicates remaining capacity (units: GB) on the hard disk drive. 9 DATE/TIME Indicates the date and time data was recorded on the partition. 7 Partition number Indicates the number of partitions (in units of P2 cards) on the hard disk drive. 10 SERIAL Indicates the serial number of P2 card that originally recorded the data in the partition. NOTE The screen can show up to 10 partitions.
5 Select OPERATION FORMAT (HDD) in the menu and use a cursor button and the SET button to select YES. • Select YES in the confirmation message that appears again to start hard disk drive formatting. • Handled as a “TYPE S” hard disk drive after formatting. NOTE All data on a hard disk drive is deleted when the disk is formatted. It is not possible to select part of a partition to delete. Writing to hard disk drive 1 3 4 5 6 • A TYPE S hard disk drive can write data in card units.
A TYPE S and P2 STORE hard disk drive allows you to write back data in card units. Format the P2 card to prepare for write back. 1 Switch to the USB host mode. For details, refer to [Switching to USB Host Mode] (page 140). 2 Connect a hard disk drive via USB. 3 4 Chapter 8 Connecting to External Devices 5 6 Insert the P2 card to which data will be written back to.
Connections to the DVCPRO/DV Connector Recording signals input to the DVCPRO/DV connector 1 2 Connect a 1394 cable (DV cable). For details, see [Precautions in 1394 Connections] (page 146). • Make sure that the signal format of the camera and the connected device is the same. • To use HD (1080i, 720P) set the menu option REC FORMAT in the SYSTEM SETUP screen to DVCPRO HD/60i or DVCPRO HD/60P. The AVC-Intra format and DVCPRO HD native recording do not allow input via the IEEE 1394 interface.
Control of external devices through 1394 connection Connecting an external device for backup recording to the DVCPRO/DV connector allows the operator to control start and stop recording from the camera. 1 2 Connect a 1394 cable (DV cable). For details, see [Precautions in 1394 Connections] (page 146). • Set 1394 CONTROL in the setting menu OTHER FUNCTIONS screen to BOTH.
Chapter 9 Maintenance and Inspections Inspections Before Shooting Make sure you check that the system is operating normally before embarking on a shoot. We recommend using a colour video monitor to check the image. Preparing for Inspections 1 2 Inspecting the Camera Unit 1 • Check that the image changes to telephoto and wide angle. Mount a charged battery. Turn the POWER switch to ON to check the battery remaining level in the viewfinder.
Inspecting the Memory Recording Functions Inspecting the Audio Level Automatic Adjustment Make sure you successively carry out the inspections from [Inspecting the P2 Card Recording] to [Inspecting the Earphone and Speaker]. 1 Inspecting the P2 Card Recording 2 1 3 Check on the display inside the viewfinder that the remaining P2 card recording capacity is sufficient. For details, refer to [Screen displays] (page 66).
Inspection for Using an External Microphone Inspection of the clock, time code, and user bits 1 1 2 3 Connect an external microphone to the REAR 1 and REAR 2 connectors. Set the AUDIO IN switch to [REAR]. Set the LINE/MIC/+48V selector switches on the rear panel to [MIC] or [+48V], depending on the power supply type of the external microphone. • MIC: For a microphone with internal power supply. • +48V: For a microphone with external power supply.
Maintenance Charging the internal battery Cleaning Inside the Viewfinder • Do not use thinner or other solvents to remove dirt from the viewfinder. • Wipe the lens with a commercially available lens cleaner. Eyepiece Care If dust adheres to the LCD screen, open the eyepiece to remove it. Eyepiece The internal battery preserves the date and time settings. The appearance of in the viewfinder or LCD monitor indicates that the internal battery is exhausted. Follow the steps below to recharge the battery.
Warning System Warning Description Tables 151 Chapter 9 Maintenance and Inspections If a problem is detected immediately after the power is turned on, or during operation, this will be indicated by the WARNING lamp, lamps inside the viewfinder and a warning tone.
(Continued from the previous page) Priority Warning type LCD or viewfinder indication Tally lamp 8 1394 connection error 9 The last bar in the battery level indication blinks (This Battery Blinks 1 time Blinks 1 time indication appears also nearly empty per second per second when MENU indications have been turned OFF.) P2 card 10 nearly fully recorded Blinks 4 1394 INITIAL ERROR Blinks times per red second Warning lamp Blinks 1 time The P2CARD level indicator per second blinks. during recording.
Warning and Error Display for Thumbnail Operation and USB HOST MODE Item Message CANNOT ACCESS! CANNOT CHANGE! CANNOT COPY! CANNOT DELETE ! CANNOT FORMAT! CANNOT RECONNECT! CANNOT REPAIR! Thumbnails MISSING CLIP! NO CARD! NO COPY TO SAME CARD! NO FILE! NO SD CARD! SAME CLIP IS SELECTED! TOO MANY CLIPS! UNKNOWN CONTENTS FORMAT! UNKNOWN DATA! USER CLIP NAME MODIFIED! WRITE PROTECTED! Measure Restore media and clips to normal state before access. Set SYSTEM MODE according to the clips.
(Continued from the previous page) Item Message CANNOT ACCESS CARD! CANNOT ACCESS TARGET! CANNOT FORMAT! CANNOT RECOGNIZE HDD! CARD IS EMPTY! CANNOT COPY! Description An error occurred during P2 card access. Check P2 card. An error occurred during hard disk access. Check hard disk status and connection. The hard disk cannot be initialized. The destination target cannot be properly recognized. Copying cannot be made because the destination card is in the wrong format. Connect another hard disk drive.
Updating the firmware incorporated into the unit The firmware can be updated using either of the following two methods. 1 Checking the current version of firmware and performing the update using the dedicated tool (P2_Status_ Logger) PASS (P2 Asset Support System) is only available to customers who have completed customer registration with Panasonic.
Chapter 10 Index 1 MENU MENU MENU MENU MENU 1394 AUDIO OUT............................................. 131 1394 CMD SEL................................................. 137 1394 CONFIG................................................... 138 1394 connection............................................... 146 1394 CONTROL............................................... 137 1394 STATUS.................................................... 138 2 MENU 25M REC CH ...........................................
G MENU GAMMA............................................................ 125 GENLOCK.......................................................... 64 MENU GL PHASE........................................................ 137 MENU MENU MENU H N MENU MENU MENU MENU MENU H PHASE.......................................................... 137 HEADROOM..................................................... 131 HIGH GAIN....................................................... 128 Hot Swap Recording..
MENU MENU MENU MENU MENU MENU REC COUNTER................................................ 134 REC FORMAT................................................... 126 REC FUNCTION............................................... 129 REC REVIEW Function....................................... 41 REC REVIEW Function....................................... 41 REC SIGNAL.................................................... 126 Reconnection...................................................
MENU MENU White Shading Compensation............................ 91 wireless receiver................................................. 95 WIRELESS TYPE............................................... 131 WIRELESS WARN............................................. 131 Z MENU MENU MENU MENU Zebra pattern...................................................... 74 ZEBRA1 DETECT............................................. 133 ZEBRA2............................................................
Chapter 11 Specifications Dimensions and specifications Dimensions 441mm (17-3/8 inches) 251mm (9-7/8 inches) 343mm (3-1/2 inches) 150mm (5-7/8 inches) Chapter 11 Specifications 246mm (9-11/16 inches) Specifications General Power supply: DC12 V (11 V to 17 V) Power consumption: 18 W (with the supplied lens, 3.2 LCD monitor) indicates safety information.
Camera Unit Pickup devices: Lens mount: Color separation optical system: ND filter: Gain settings: Shutter speed: Shutter speed (Synchro scan): Shutter speed (slow): Shutter opening angle: Frame rates: Sensitivity: Horizontal resolution: 1/3 inch progressive, 2.2 megapixel, 3MOS sensor 1/3-inch bayonet type Prism system 4 positions (CLEAR, 1/4, 1/16, 1/64) –3/0/+3/+6/+9/+12/+24 dB •6 0i/60p mode: 1/60 (OFF), 1/100, 1/120, 1/250, 1/500, 1/1000, 1/2000 sec.
Digital video Unit Sampling Frequency: Quantizing: Video Compression Format: AVC-Intra 100/DVCPRO HD: Y: 74.1758 MHz, PB/PR: 37.0879 MHz DVCPRO50: Y: 13.5 MHz, PB/PR: 6.75 MHz DVCPRO: Y: 13.5 MHz, PB/PR: 3.375 MHz AVC-Intra 100/AVC-Intra 50: 10bits DVCPRO HD/DVCPRO50/DVCPRO/DV: 8bits AVC-Intra 100/AVC-Intra 50: MPEG-4 AVC/H.
Other Input/Output Unit TC IN: TC OUT: IEEE1394: DC IN: DC OUT: REMOTE: LENS: USB2.0 (DEVICE): USB2.0 (HOST): BNC × 1, 0.5 V p-p to 8 V p-p, 10 kΩ BNC × 1, low impedance, 2.0 V p-p ± 0.5 V p-p 6 pins, digital input/output (compliant with IEEE 1394) XLR × 1, 4 pins, DC 12 V (11.0 V to 17.0 V) 4 pins, DC 12 V (11.0 V to 17.0 V), Maximum rated current: 1.5 A 10 pins 12 pins Type-B, 4 pin USB (compliant with USB ver. 2.0) Type-A, 4 pin USB (compliant with USB ver. 2.0) LCD Monitor Unit LCD monitor: 3.
Connector signal description DC IN 1 2 3 4 REMOTE GND NC NC +12V 1 2 3 4 5 6 7 8 9 10 Panasonic Part No. K1AA104H0038 Manufacturer Part No. HA16RX-4P (SW1) (76) (Hirose Electric Co.) Panasonic Part No. K1AY110JA001 Manufacturer Part No. HR10A-10R-10SC (71) (Hirose Electric Co.) 4 1 2 CAM DATA (H) CAM DATA (C) CAM CONT (H) CAM CONT (C) R/C ON R/C VIDEO OUT R/C VIDEO GND NC UNREG 12V (Max 0.6 A) GND 3 8 7 NOTE Be sure to use correct polarity when using external power supplies.
LENS 1 2 3 4 5 6 7 8 9 10 11 12 RET-SW REC GND IRIS-AUTO IRIS-CONT UNREG+12V (Max 0.4 A) IRIS-POSI IRIS-G-MAX EXT-POSI ZOOM-POSI FOCUS-POSI SPARE Panasonic Part No. K1AY112JA001 Manufacturer Part No. HR10A-10R-12SC (71) (Hirose Electric Co.) 9 8 7 1 2 10 12 11 3 1 2 3 4 5 6 7 8 9 10 11 12 13 14 15 16 4 6 5 Panasonic Part No. K1GB25A00010 Manufacturer Part No. HDBB-25S (05) (Hirose Electric Co.
Information on Disposal in other Countries outside the European Union This symbol is only valid in the European Union. If you wish to discard this product, please contact your local authorities or dealer and ask for the correct method of disposal.