OPERATING INSTRUCTIONS Wireless Display with Magnetic Stripe Reader and Fingerprint Scanner Model No. CF-VDW07CRFM Contents Read Me First ................................. 2 First-time Operation ...................... 6 Starting Up/Shutting Down ......... 11 Touchscreen ................................ 13 Software Keyboard ...................... 16 Battery Power .............................. 18 Setting the Wireless Display ...... 22 Changing the Wireless Display Settings ... 26 Magnetic Stripe Reader ...
Read Me First Information to the User This product and your Health This product, like other radio devices, emits radio frequency electromagnetic energy. The level of energy emitted by this product however is far much less than the electromagnetic energy emitted by wireless devices like for example mobile phones. Because this product operates within the guidelines found in radio frequency safety standards and recommendations, we believe this product is safe for use by consumers.
For U.S.A. Federal Communications Commission Rules. Operation is subject to the following R a d i o F r e q u e n c y I n t e r f e r e n c e two conditions: (1) This device may not cause harmful Statement interference, and Note: This equipment has been tested and (2) This device must accept any interference found to comply with the limits for a Class B received, including interference that may digital device, pursuant to Part 15 of the FCC cause undesired operation. Rules.
Read Me First Precautions (Battery Pack) Care should be exercised with regard to the following in order to avoid the possibility of overheating, fire, or damage. Avoid Heat Do not throw the battery pack into a fire or expose it to excessive heat. Keep Articles Away Do not place the battery pack together with articles such as necklaces or hairpins when carrying or storing. Do Not Disassemble Do not insert sharp objects into the battery pack, expose it to bumps or shocks, deform, disassemble, or modify it.
NOTE The battery pack may become warm during recharging or normal use. This is completely normal. Recharging will not commence outside of the allowable temperature range (0 °C to 45 °C {32°F to 113 °F}) page 18. Once the allowable range requirement is satisfied, charging begins automatically. Note that the recharging time varies based on the usage conditions. (Recharging takes longer than usual when the temperature is 10 °C {50 °F} or less.) If the temperature is low, the operating time is shortened.
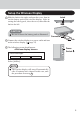
First-time Operation This wireless display features a touchscreen function, which makes computer operation possible by simply touching the surface of the wireless display. Wireless Display........................ 1 AC Adaptor ........... 1 Operating Instructions ............ 1 AC Cord ................1 Battery Pack ......... 1 Model No : CF-AA1623A Stylus .................... 1 Model No : CF-VZSU21 CD-ROM ................1 Soft Cloth..............
Strap Fingerprint Scanner page 30 DC-IN Jack Stylus DC-IN 16V Battery Pack page 20 NOTE Select [Disabled] with the following procedure. [start] - [Control Panel] - [Performance and Maintenance] - [System] - [Hardware] [Device Manager] - [Network adapters] - [PRISM2 IEEE 802.11 PC CARD Adapter] - [Advanced] - [Driver based IBSS] A lithium ion battery that is recyclable powers the product you have purchased.
First-time Operation Install MeiWDS Program/Software Keyboard CAUTION Prepare the CD-ROM, which is attached to the wireless display, and the CD/DVD drive. Install the software to the computer compatible to the wireless LAN. Install MeiWDS program: 1 Place the CD-ROM attached to the wireless display into the CD/DVD drive. 2 Select [start] - [Run], input [x:\meiwds\setup.exe]*1 and select [OK]. Follow the on-screen instructions. 3 Restart the computer.
Setup the Wireless Display 1 Slide the latch to the right, and open the cover, then in- Latch sert the battery pack in the wireless display. After inserting the battery pack, close the cover, then slide the latch to the left. CAUTION Be sure to insert the battery pack as illustrated. Connector 2 Connect the wireless display to a power outlet and turn on the wireless display. ( Tab page 12) 3 The following screen should appear. Power Switch Select network type.
First-time Operation 4 The following screen should appear. Change setting on host PC to the following value, reboot the host PC, then select "Connect" below. Wireless LAN card Network Type : AdHoc SSID : cfvdw07-xxxxx WEP Encryption : disable TCP/IP Class A Class B Class C IP Address : 10.57.148.205 NetMask : 255.0.0.0 MeiWDS AES Encryption : disable Password : wdsp Connect Cancel AES: Advanced Encryption Standard (This screen is a sample.
Starting Up/Shutting Down Starting Up CAUTION Do not maximize the MS-DOS screen. Once maximized, the connection with the wireless display is interrupted and the screen cannot be returned to its original size. 1 Turn off the computer, then connect the port replicator, external display and external keyboard. 2 Turn on the computer and then press Alt + Enter in the MS-DOS mode to return the window to its original size.
Starting Up/Shutting Down 1 Turn on your computer. ( Operating Instructions of the computer) 2 After confirming the “DISPLAY READY” indicator has lit, turn on the wireless display. After has been displayed on the taskbar, turn on the wireless display. Power Indicator Power Switch Press the power switch and hold it down for approximately three seconds until the power indicator turns on before releasing it.
Touchscreen The wireless display is equipped with a touchscreen function allowing you to perform the same operations as the mouse by touching the surface of the display with the stylus. Moving the cursor Clicking Cursor Double-clicking Two quick taps One tap Dragging Touch and hold the object (i. e. file or icon), move your stylus on the surface (dragging the object to the desired location), then release your stylus. NOTE The double-clicking speed can be set in the following procedure.
Touchscreen Right-Clicking 1 Press R-button. 2 R-Button R When “R” is displayed on the rightlower corner One tap NOTE If the R-button is pressed again when setting right-clicking function to enable, the right-clicking function will be set to disable. CAUTION The touchscreen function can not be used in the MS-DOS mode and when using the full screen in [Command Prompt]. Handling the Touchscreen Use the stylus included with the wireless display.
Calibration Run the calibration setup when the cursor and the stylus touches do not appear to agree. 1 Press Menu button. 2 Select [Option]. 3 Select [Calibration]. Touch the five “×” marks on the calibration screen.
Software Keyboard When selecting [ Software Keyboard] on the taskbar or when the character input box of an application is selected, the software keyboard shown below automatically starts up, and characters can be input by using the software keyboard. We recommend leaving the software keyboard as an icon instead of closing the software keyboard when it is not being used. The software keyboard will no longer start up automatically if is selected to close the keyboard.
Changing the Settings You can change the keyboard size, switch the keyboard to the numeric keypad, or change other settings using the system menu. 1 Select (on the top left corner of the software keyboard). 2 Add a check mark to the function you want to use. The software keyboard moves automatically so as not to hide the window currently selected. (It will not move if there is no place that it can move to.
Battery Power Battery Status Use the Battery Indicator to Check on the Battery Status Battery Indicator Orange*1 Battery Status Charging Green*1 Red Fully-charged Battery charge is low (the charge is less than approx. 9% capacity) Blinking red*1 Battery pack or charger may not be working properly. Quickly remove the battery pack and disconnect the AC adaptor, then connect them again. If the problem persists, contact Panasonic Technical Support. Unable to recharge due to violation of temperature limits.
Getting a detailed reading 1 Press Menu button. 2 Select [Battery]. ( page 23) Menu Button NOTE The actual remaining battery capacity and the displayed indication may differ. • The battery indicator light remains red. • The battery remaining displays 99% and the indicator light is orange for a long period of time. • Low battery warning appears after a short period of time. Perform the “Refresh Battery” utility.
Battery Power Replacing the Battery Pack When the charge provided by your battery pack is supplied for only a short period of time, even after fully charging according to the instructions, it may be time to replace your battery pack. The battery pack is a consumable item and therefore will require replacement (CF-VZSU21). CAUTION Do not touch the terminals on the battery pack. The battery pack may no longer function properly if the contacts are dirty or damaged.
Inserting a battery pack 1 Firmly attach the battery pack to the connector. CAUTION Be sure to insert the battery pack as illustrated. Be sure to the battery pack is properly connected to the connector. 2 1 Connector 2 Close the cover. 3 Slide the latch to the left. 3 CAUTION For an improperly attached cover, your battery pack may fall out while you are carrying around your wireless display. Be sure the tab does not get caught when closing the cover.
Setting the Wireless Display You can establish the settings for the wireless display. Press Menu button. The setting menus are displayed. Menu Button General Menu By selecting [General], you can change the mode setting, the backlight setting and the profile setting. Default settings General The saved screen is displayed.
Battery Menu By selecting [Battery], the battery status will be displayed. General Wireless Battery Status Voltage Current Temperature Remain Error Refresh Battery Environment 100% Excellent : : : : : : : : Option Version Full Charge 8154mV 0mA 26.2 °C (79.2 °F) 100% None Execute Normal temperature OK Cancel (This screen is a sample.) Run the refresh battery. When the confirmation message is displayed, select [Yes].
Setting the Wireless Display Option Menu By selecting [Option], you can establish the individual settings for the wireless display. Default settings General Wireless Battery Wireless Connection : Option Setup Power on Password : Change Supervisor Password : Change Touchscreen : Calibration LCD Off Timer : 30 min LCD Off Mode : Normal resume Power Off Timer : 100% Version Excellent Select profile. disable OK Change the settings of the wireless connection in the following procedure.
Version Menu By selecting [Version], the version information will be displayed. General Wireless Battery Option Version Model No. : CF-VDW07CRFM Firmware : Vx.xxLxx Wireless Controller : xx. xx. xx. xx Serial No. : xxxxxxxx 100% Excellent OK Cancel (This screen is a sample.) “x” will change depending on the configuration of the wireless display.
Changing the Wireless Display Settings Wireless Display Setup Utility You can set the wireless display properties as follows. 1 Select [Wireless Display Setup Utility] in the following procedure. [start] - [All Programs] - [Panasonic] 2 Enter the Supervisor Password. The Supervisor Password is not set at the time of the purchase. Press the Menu button, select [Option], then set the Supage 24) pervisor Password. ( 3 Set the wireless display settings, TCP/IP and WEP. You can set them for each profile.
4 At the confirmation screen, select [Next]. The message “These settings will be sent to your display” will be displayed. Select [OK]. 5 in step 3 ( [Set up your PC] screen will be displayed. Enter the Wireless LAN and TCP/IP settings shown on the screen to your computer, then select [Finish]. [Completed] screen will be displayed. Select [Finish].
Changing the Wireless Display Settings MeiWDS Setup Utility 1 Select [MeiWDS Setup Utility] in the following procedure. [start] - [All Programs] - [Panasonic] 2 Enter the Supervisor Password. In the default setting, the Supervisor Password is set to “supervisor”. 3 Set the password and AES Encryption settings. If the setting between the computer and wireless display doesn’t confirm (e.g., the display has changed to another one.), set it again in the following procedure. Set AES Key Length.
Magnetic Stripe Reader How to Use Before swiping the card, place the card so its edge is completely flat against the scanner bed and confirm that the card is vertically straight in the reader. If these two operations are not performed correctly, a read error may occur. When swiping the card, keep it moving at an even pace. If the card pauses or stops, a read error may occur. Keep in mind the reader works better if the card is swiped through the reader quickly.
Fingerprint Scanner How to Use To avoid possible damage to the fingerprint scanner by static electricity or improper finger placement, read the following guidelines. 1 Static Electricity Discharge: Before a scan is taken, have the person whose fingerprint is to be taken touch the closed shutter with a finger to discharge static electricity. 2 When opening the shutter: Slide the shutter open. Do not pull the shutter to open it, as the fingernail may scratch the scanner.
How to Take Sharp Fingerprint Images The sensor used in the fingerprint scanner creates an image based on the way in which the sensor comes in contact with the finger. The image is affected by the condition of the skin on the finger, and by the pressure applied by the finger on the sensor. At low temperatures, the finger tends to be dry, and the image comes out very light, while at higher temperatures the finger tends to be moist, so the image is darker.
Fingerprint Scanner How to Place the finger on the Sensor Place the finger properly on the sensor. Correct finger placement Align the center of the fingerprint with the center of the scanner, and place the finger so as to cover the surface of the fingerprint scanner. Incorrect finger placement Adjust the finger to the correct position. Only the fingertip is in contact with the scanner. Finger position is too far forward. Finger position is too far back. Finger position is too far to the side.
Capturing the Screen If you want to later playback the currently displayed screen, you can save the screen data onto the memory (up to 100 images)*1. *1 The number of the data that can be saved is different according to the image. Press Capture button. The currently displayed screen is saved, and is added at the end of the already-saved images. Capture Button Displaying Saved Images 1 Press Menu button. 2 Select [General] - [OfflineView], then select [OK].
Troubleshooting When a problem occurs, refer to this page. If a problem appears to be related to a software application, read the software related manual. If you still cannot troubleshoot the problem, contact Panasonic Technical Support. No display after powering on Has the computer or wireless display been set to the power-saving mode? To resume operation of your computer from the condition the power of the display is off (for energy conservation purposes), touch the screen.
“Illegal data received” or “Initial image receiving timeout” is displayed “PC’s display mode changed” is displayed Software keyboard has been closed An afterimage appears (i.e., green, red, and blue dots remain on the display) or there are dots not displaying the correct colors Confirm whether the network is working properly or not. Confirm the AES key length setting by the following procedure.
Specifications Model No. LCD CF-VDW07CRFM 8.4 Type (TFT) Type Displayed Colors 256 colors (800 × 600 dots) Touchscreen Magnetic Card Reader Fingerprint Scanner Interface Battery Pack Anti-Reflection, Stylus (included) touch capable Card Standard ISO 7811 track 1, 2, 3 Swipe Speed Resolution 304.8 mm/s to 609.6 mm/s {12”/s to 24”/s} Wireless LAN IEEE802.11b 300 × 300 pixel 500 DPI Li-ion 7.4 V, 1.7 Ah Operating Time* Approx. 1.5 h - 2.5 h Charging Time*1 Power On: Approx. 5.