In-dash 7”Widescreen Color LCD Monitor/DVD Receiver Moniteur vidéo couleur grand-écran à écran à cristaux liquides de 7 pouces/récepteur DVD intégrés en tableau de bord Monitor LCD en color de pantalla panorámica de 7”/receptor y DVD empotrado en el tablero de instrumentos TILT DIMMER CLOSE IN-DASH 7" WIDESCREEN COLOR LCD MONITOR / DVD RECEIVER Model: CQ-VX100U DIMMER DIM CQ-VD5005W TEXT TILT OPEN AV1 IN VOL PUSH SEL POWER MUTE SETUP SOURCE TUNE/TRACK CQ-VX100U Operating Instructions Manue
English Safety Information 1 ■ Read the operating instructions for the unit and all other components of your car audio system carefully before using the system. They contain instructions about how to use the system in a safe and effective manner. Panasonic assumes no responsibility for any problems resulting from failure to observe the instructions given in this manual. Warning This pictograph intends to alert you to the presence of important operating instructions and installation instructions.
Observe the following cautions when using this unit. ❑ Keep the sound volume at an appropriate level. Keep the volume level low enough to be aware of road and traffic conditions while driving. ❑ Do not insert or allow your hand or fingers to be caught in the unit. To prevent injury, do not get your hand or fingers caught in moving parts or in the disc slot. Especially watch out for infants. ❑ This unit is designed for use exclusively in automobiles.
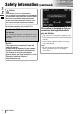
English Safety Information (continued) 3 Caution THIS PRODUCT IS A CLASS I LASER PRODUCT. USE OF CONTROLS OR ADJUSTMENTS OR PERFORMANCE OF PROCEDURES OTHER THAN THOSE SPECIFIED HEREIN MAY RESULT IN HAZARDOUS RADIATION EXPOSURE. DO NOT OPEN COVERS AND DO NOT REPAIR BY YOURSELF. REFER SERVICING TO QUALIFIED PERSONNEL. The following applies only in the U.S.A.
English Notes on Use Liquid Crystal Panel ¡Do not cause impact to the liquid crystal panel. ¡Usage temperature range: 0 °C to 40 °C {32 °F to 104 °F} When the temperature is very cold or very hot, the image may not appear clearly or may move slowly. Also, movement of the image may seem to be out of synchronization or the image quality may decline in such environments. Note that this is not a malfunction or problem.
English Customer Services Directory 5 U.S.A. Obtain Product Information and Operating Assistance; locate your nearest Dealer or Servicenter; purchase Parts and Accessories; or make Customer Service and Literature requests by visiting our Web Site at: http://www.panasonic.com/support or, contact us via the web at: http://www.panasonic.com/contactinfo You may also contact us directly at: 1-800-211-PANA (7262), Monday-Friday 9 am-9 pm; Saturday-Sunday 10 am-7 pm, EST.
Some states do not allow the exclusion or limitation of incidental or consequential damages, or limitations on how long an implied warranty lasts, so the exclusions may not apply to you. U.S.A. PANASONIC CONSUMER ELECTRONICS COMPANY, DIVISION OF PANASONIC CORPORATION OF NORTH AMERICA One Panasonic Way, Secaucus, New Jersey 07094 This warranty gives you specific legal rights and you may also have other rights which vary from state to state.
English Features Panasonic welcomes you to our constantly growing family of electronic products owners. We endeavor to give you the advantages of precise electronic and mechanical engineering, manufactured with carefully selected components, and assembled by people who are proud of the reputation their work has built for our company.
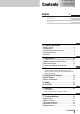
Contents English 2 Français 48 Español 94 ¢ Safety Information .......................... 2 ¢ Notes on Use ................................................... 5 ¢ Components .................................................... 5 ¢ Customer Services Directory......................... 6 ¢ Limited Warranty............................................. 7 ¢ Features ........................................................... 8 ¢ Preparation....................................
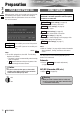
English Preparation 9 First Time Power On Other Settings When the power of this unit is turned on for the first time, the following screen appears. Perform the settings in accordance with the specifications of the car on which this unit is mounted. Please refer to the separate “System Upgrade Guidebook” for how to operate this unit when optional devices are connected.
English Symbols used in this manual Pictographs Disc Marks You can perform some operations of this unit in one or more methods with the touch panel or remote control. This book explains such operations in tabular form as follows. Refer to the following for the pictographs located in the upper part of each table. The following pictographs are used for the descriptions of disc operation.
English Name of Controls and Functions !0 [TILT] (Display Raised) TILT DIMMER CLOSE o [OPEN] (CLOSE) IN-DASH 7" WIDESCREEN COLOR LCD MONITOR / DVD RECEIVER 11 q [DIM] (DIMMER) Display Disc slot w [VOL] (PUSH SEL) CQ-VX100U DIMMER DIM CQ-VD5005W TEXT TILT i AV1 IN OPEN AV1 IN VOL e [MUTE] PUSH SEL TUNE/TRACK POWER MUTE SETUP SOURCE u [u] r [SETUP] t [SOURCE] (POWER) y [s] [d] (TUNE/TRACK) !0 [TILT] (Display Closed) DIMMER q [DIM] (DIMMER) DIM CQ-VX100U TILT OPEN o [OPEN] (CL
This unit is equipped with a removable face plate. Removing this face plate makes the unit totally inoperable. DIMMER DIM CQ-VX100U TILT OPEN English Anti-Theft System AV1 IN VOL POWER PUSH SEL MUTE SETUP TUNE/TRACK SOURCE 12 Removable face plate Remove the Face Plate q Switch off the power of the unit. w Hold the top and bottom of the center part of the face plate and pull it down toward you. e Pull the face plate toward you.
English Touch Panel Operation Overview 13 ❒ Notes on the Touch Panel Before operation ¡Clean the surface of the touch panel. (a page 43) Operation ¡Use only your fingers to operate the touch panel. ¡Do not press the panel forcefully. ¡Do not scratch the panel with fingernails or any hard objects. ¡Do not use a pen or other sharp implements to operate the touch panel. ¡Do not bump the front panel. a Failure to observe the above may damage or break the glass on the surface of the touch panel.
Please refer to the separate “System Upgrade Guidebook” for how to operate this unit when optional devices are connected. English Switching the Display 14 Note: ¡ Refer to the instructions of each source. ¡ To switch Operation Screen on, touch the center of touch panel. (Touch to cancel) ¡ If no operation takes place for more than 10 seconds when Operation Screen is ON, Operation Screen is turned off. Audio Source ❒ CD Touch . Touch . Operation Screen List Screen ❒ MP3 Touch .
English General [VOL] DIM DIMMER [OPEN] [TILT] CQ-VX100U TILT TILT OPEN OPEN 15 AV1 IN VOL PUSH SEL MUTE [MUTE] TUNE/TRACK POWER SOURCE SETUP [SOURCE] (POWER) Preparation: Turn your car’s ignition key to the ACC or ON position. General Operations Operations Power ON : Power OFF : Display Open/Close – [SOURCE] END DVD VTR RADIO CH-C – [SOURCE] – [OPEN] ¡Press once to open. Press again to close. Note: ¡When the display is opened or closed, a loud beep sounds three times.
English General Operations (continued) Operations Volume Note: ¡The sound level for each source is stored in memory. – END DVD w RADIO VTR CH-C q 16 q Up w Down Setting range: 0 to 40, default: 18 Note: ¡ The volume level can be set independently for each source and each disc format. Mute Tilt Angle Mutes the sound. To cancel, press again. – [MUTE] – [TILT] or – Auto – the monitor is opened automatically when turning ON ACC. Manual – the monitor is not opened automatically.
English Before Disc Playback 17 Discs that can be Played Back ❒ Disc Type DISC DVD VCD (Video CD) CD CD-R/RW Recordable ¡DivX files recorded on CD-Rs/RWs and DVD-Rs/RWs are playable. Refer to “Notes on MP3/DivX” for further information. (a page 24) ReWritable ❒ Symbols used on jackets Mark/logo TEXT ❒ About DivX (Examples of such symbols include) (IEC62107) 12 cm Disc Size Video Format NTSC / PAL Audio Format LPCM, MPEG1, MPEG2, Dolby Digital Region No.
English Disc Insert/Eject ■ When a disc is in the player... 18 DIMMER TILT CLOSE TILT OPEN IN-DASH 7" WIDESCREEN COLOR LCD MONITOR / DVD RECEIVER Printed side CQ-VX100U DIMMER Caution CQ-VD5005W TEXT [u] (eject) lights. AV1 IN VOL PUSH SEL ¡When the disc is inserted or ejected, to prevent disc scratches never exert any downward force on the disc. Disc Insert DIM DVD VCD CD MP3 DivX CH-C ¡The mode that supports the disc is selected, and playback starts.
English Disc Player Source Button Source Selection DIMMER q Touch “Source Button”. TILT CLOSE TILT OPEN IN-DASH 7" WIDESCREEN COLOR LCD MONITOR / DVD RECEIVER d w Touch 19 (Disc) on the Source Selection Screen. CQ-VX100U DIMMER Press [SOURCE] to change to the desired mode. To switch Operation Screen ON, touch the center of touch panel.
English Basic Operations Operations Operations Compatible Discs 20 Track/file Selection DVD VCD CD Compatible MP3 DivX Discs DVD Fast Forward/ Fast Reverse Disques DVD VCD compatibles CD MP3 DivX Compatible DVD VCD DivX Discs Next track/file [d] [s] DVD VTR RADIO CH-C END Note: ¡When playing a DVD, there are cases where it is not possible to return to the start of a chapter that spans 2 titles. Fast forward Release to resume playback. Fast reverse [s] Release to resume playback.
English Disc Player (continued) To switch Operation Screen ON, touch the center of touch panel. Chapter/title Selection Operations Operations 21 Showing menu and selecting an item * Note on VCD: For VCD, touch instead of .
English DVD mode display Chapter/title selection Fast forward/fast reverse Touch . Touch . Stop/pause/play DVD menu 22 Repeat play Audio Language/ Angle/ Subtitle Language Return Useful Function Operations Operations Compatible Discs Subtitle Language DivX Audio Language END It is possible to change the subtitle language during play if multiple languages are recorded on the disc. Note: ¡There may be a brief delay before the subtitles appear.
English Notes on MP3/DivX 23 What is MP3/DivX? Display Information (on the Main Unit) MP3*: MP3 (MPEG Audio Layer-3) is the compression format of digital audio. It is developed by MPEG (Motion Picture Experts Group). Using this compression format, you can record the contents of about 10 music CDs on a single CD (This figure refers to data recorded on a 650 MB CD-R or CDRW at a fixed bit rate of 128 kbps and a sampling frequency of 44.1 kHz).
¡ You may encounter trouble in playing MP3/DivX files or displaying the information of MP3/DivX files recorded with certain writing software or CD/DVD recorders. ¡ This unit does not have a play list function. ¡ Although Multi-session recording is supported, the use of Disc-at-Once is recommended. English Recording Recording MP3/DivX MP3/WMA files onfiles a CD/DVD-media on a CD-media ¡ It is recommended not to use a disc holding two or more different format types of files.
English Radio Frequency Source Selection Source Button / Each All indicator q Touch “Source Button”. TILT CLOSE TILT OPEN DIMMER d IN-DASH 7" WIDESCREEN COLOR LCD MONITOR / DVD RECEIVER w Touch 25 (Radio) on the Source Selection Screen. Band selection Tuning *List selection Preset stations CQ-VX100U Auto presetting Press [SOURCE] to change to the desired mode.
English Preset Memory Manual Preset Memory Up to 6 stations can be preset in each band. Select a band and frequency. to – blinks once 26 ¡Touch and hold for more than 2 seconds. ¡The frequency blinks once, and a receiving station is saved in the memory. New stations overwrite existing saved stations. Auto Preset Memory A Preparation: Select Each . (a page 37) (default: Each ) Setup e Radio e FM Setup e Auto Preset e Each / All Each Six stations are automatically preset in each band.
English AV1/AV2 27 Preparation: ¡Connect an optional external device to the AV1/AV2. Source Button Source Selection You can view the images and listen to the sounds from the connected external devices in the AV1/AV2 mode respectively. DIMMER TILT CLOSE TILT OPEN IN-DASH 7" WIDESCREEN COLOR LCD MONITOR / DVD RECEIVER q Touch “Source Button”. d / w Touch (AV1/AV2) on the Source Selection Screen.
English 28 CQ-VX100U 29
English Settings 29 Basic Setting Clock ID-Code Input Memory Clear Other Basic Setting Clock setting ID Code Setting Input Selection Memory clearance Other settings (a page 32) (a page 32) (a page 33) (a page 33) (a page 33) Screen Dimmer Display Aspect Screen Adjusting the brightness Display appearance Display aspect setting (a page 34) (a page 34) (a page 34) Sound SQ3 Bass/Treble Balance/Fader Sub-Woofer Sound SQ3 setting Bass/treble adjustment Balance/fader adjustment Subwoofer adjustment (a p
English ❏ Setup Operation (Example: DVD mode) q w Touch e Touch desired setting. in Operation Screen. (Example: setting screen of Input 30 a page 33) Determines the setting and goes back to the previous menu out of the menu. Determines the setting and gets out of the menu. Note: ¡ The display returns to the previous status if there is no operation for more than 60 seconds after changing to the setting menu.
English Settings (continued) 31 Basic Setting Screen Sound Disc Radio Clock ID-Code Clock setting ID Code Setting Display (Clock display) On : clock display ON (“– –:– –” is displayed before adjusting the clock.) Off : clock display OFF default: Adjust Off (Clock adjustment) } : Forward { : Backward Note: . ¡To start the clock, touch ¡Set the Daylight Saving Time manually.
Input input selection Note: ¡If a non-Panasonic navigation system is connected to this unit, we do not guarantee the operations of the navigation system. AV1 AV1 Skip Skip : no memory clear. The display returns to the previous one. : an external device is connected to AV1. : skips AV1. default: AV1 (AV2 input selection) : an external device is connected to AV2.
English Settings (continued) 33 Basic Setting Screen Sound Disc Radio (Display) Note: ¡The screen setting screen can be also activated by touching Screen when the button is displayed. (a page 14) Aspect Display aspect setting Normal Dimmer Adjusting the brightness 1 2 Darker 3 Full Brighter default: 1 Note: ¡When [DIM] is pressed, the screen brightness is toggled between the set level that is adjusted by the procedure above and the maximum luminance.
Screen Sound Disc English Basic Setting Radio Note: ¡The sound setting screen can be also activated by touching Sound when the button is displayed (a page 14). SQ3 Balance/Fader (Sound level adjustment between right and left speakers) Balance SQ3 setting Six SQ presets are already provided at shipment in this unit.
English Settings (continued) 35 Basic Setting Screen Sound Disc Radio Audio Language DVD audio language setting Note: ¡These adjustments being executed, playback will start from the beginning of a disc. English Français Español Other : English Video Setting Display aspect and DVD software mode DVD Aspect Narrow Wide : plays a video in 4:3 screen. : plays a video in wide screen (16:9). : French default: : other language. Input the language code.
Auto Preset (Down mix setting) : surround element decodable down mix (Lt = Left total, Rt = Right total) Lo/Ro : simple stereo down mix (Lo = Left only, Ro = Right only) default: Off : DR COMP OFF 36 (Auto preset setting) Each : saves the preset stations in each band. All : saves the preset stations in all FM lists regardless of band.
English About DivX VOD Content 37 DivX Video-on-Demand (VOD) content is encrypted for copyright protection. In order to play DivX VOD content on this unit, you first need to register the unit. Follow the on line instructions for purchasing DivX VOD content to enter the unit’s registration code and register the unit. For more information about DivX VOD, visit www.divx.com/vod. Display the unit’s registration code q Touch w Touch w Touch Disc . . DivX Registration .
❑ If You Suspect Something Wrong Check and take steps as described below. If the described suggestions do not solve the problem, it is recommended to take the unit to your nearest authorized Panasonic Servicenter. The product should be serviced only by qualified personnel. Please refer checking and repair to professionals. Panasonic shall not be liable for any accidents arising out of neglect of checking the unit or your own repair after your checking.
English Troubleshooting (continued) 39 ■ Common (continued) Output disabled/distorted video/audio. The conversion cable for AV 1 IN supplied with this unit is not used for the terminal of AV1 IN. aUse the conversion cable for AV 1 IN supplied with this unit for the connection. ■ Display Settings The picture is dark. The picture is whitish. Something is wrong with the picture. The picture is light in color. The screen is not adjusted properly. aMake every adjustment of the screen.
English ■ MP3/DivX No playback or disc ejected The CD-Rs/RWs/DVDRs/RWs that are playable on other devices are not playable on this unit. Sound skipping or noise The disc has unplayable formatted data. aRefer to the description about MP3/DivX for playable formats. 40 The playability of some CD-Rs/RWs/DVD-Rs/RWs may depend on the combination of media, recording software and recorder to be used even if these CDRs/RWs/DVD-Rs/RWs are playable on other devices such as a PC.
English Troubleshooting (continued) 41 ❑ Error Display Messages ■ CD/MP3/DivX/DVD/VCD (Video CD) Display Non Playable Disc Mechanism error File error No Disc Region Code error Possible cause a Possible solution Disc is dirty, or is upside down. aCheck disc. Disc has scratches. aCheck disc. No operation by some cause. aPress [u]. If failure persists, press the reset switch. If normal operation is not restored, call the store where you purchased the unit or the nearest Panasonic Servicenter.
If the suggestions in the charts do not solve the problem, we recommend that you take it to your nearest authorized Panasonic Servicenter. The product should be serviced only by a qualified technician. ❑ Replacing the Fuse Use fuses of the same specified rating (15 A). Using different substitutes or fuses with higher rating, or connecting the product directly without a fuse, could cause fire or damage to this unit. If the replacement fuse fails, contact your nearest Panasonic Servicenter for service.
English Notes on Discs 43 How to hold the disc ¡Do not touch the underside of the disc. ¡Do not scratch the disc. ¡Do not bend disc. ¡When not in use, keep disc in the case. Printed side Do not use discs that fit any of the descriptions given below. Using these discs may damage the discs or cause the unit to malfunction.
In “OTHER” cases... (a page 36) Input the four digit language code pressing the buttons Touch to determine. DVD language menu (a page 36) to . English Language Code List 44 Note: ¡Setting is finished and the display returns to the main menu. .
English Definition of Terms 45 Dolby Digital This fully discrete format divides the music signals into 5.1 channels: Front Left (L), Front Right (R), Centre (C), Left Surround (LS), Right Surround (RS) and Subwoofer (SW: 0.1 channel) for recording and playback. The number of channels that are recorded depends on the software. (1 to 5.1 channels) Manufactured under license from Dolby Laboratories. “Dolby” and the double-D symbol are trademarks of Dolby Laboratories. Confidential unpublished works.
General FM stereo radio ¡Power supply ¡Frequency range ¡Usable sensitivity ¡Stereo separation ¡S/N ratio : 12 V DC (11 V – 16 V), test voltage 14.4 V, negative ground ¡Current consumption : Less than 10 A (during disc playback) ¡Maximum power output : 50 W x 4 ch ¡Power output : 20 W x 4 ch ¡Compatible speaker impedance : 4Ω ¡Video input signal : Composite video signal, 1.0 Vp-p (75 Ω) ¡Audio input sensitivity : 2 Vrms ¡Video output signal : Composite video signal, 1.
Panasonic Consumer Electronics Company, Division of Panasonic Corporation of North America One Panasonic Way, Secaucus, New Jersey 07094 http://www.panasonic.com Panasonic Sales Company, Division of Panasonic Puerto Rico, Inc. (“PSC”) Ave. 65 de Infantería, Km. 9.5 San Gabriel Industrial Park, Carolina, Puerto Rico 00985 http://www.panasonic.com ©2007 Matsushita Electric Industrial Co., Ltd. YFM264C063CA Panasonic Canada Inc. 5770 Ambler Drive, Mississauga, Ontario L4W 2T3 http://www.panasonic.