Operating Instructions Air Conditioner CU-UE9PKE CS-UE12PKE CU-UE12PKE 10-17 Manual de Instrucciones 18-25 Istruzioni di funzionamento 26-33 Manual de Utilização 34-41 Инструкции за работа 42-49 Nous vous remercions d’avoir porté votre choix sur un climatiseur Panasonic. Avant d’utiliser l’appareil, lisez ce mode d’emploi dans son intégralité et conservez-le pour toute référence ultérieure. Instructions d’installation ci-jointes pour un revendeur ou spécialiste agréé.
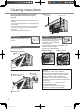
Quick guide Inserting the batteries 2 1 Remove the battery cover 2 Insert AAA or R03 batteries (can be used ~ 1 year) 1 3 Close the cover 3 TIMER setting 2 A 1 SELECT B 1 Press SELECT 3 SET/CANCEL 2 Set the time 3 Confirm Basic operation 1 Select the desired mode AUTO 2 HEAT COOL DRY 1 3 2 Start/stop the operation POWER • Please note that the OFF indication is as follows: To start: To stop: 8m 3 Select the desired temperature • Selection range : 16°C ~ 30°C.
Safety precautions..................................................4-5 How to use.............................................................6-7 Cleaning instructions.................................................8 Troubleshooting ........................................................9 Product Specification...............................................50 Information..............................................................
Safety precautions To prevent personal injury, injury to others or property damage, please comply with the following: Incorrect operation due to failure to follow instructions below may cause harm or damage, the seriousness of which is classified as below: WARNING This sign warns of death or serious injury. CAUTION This sign warns of injury or damage to property. The instructions to be followed are classified by the following symbols: This symbol denotes an action that is PROHIBITED.
Indoor unit and outdoor unit If the supply cord is damaged, it must be replaced by the manufacturer, service agent or similarly qualified persons in order to avoid a hazard. It is strongly recommended to be installed with Earth Leakage Circuit Breaker (ELCB) or Residual Current Device (RCD) to prevent electric shock or fire. To prevent overheating, fire or electric shock: • Insert the power plug properly. • Dust on the power plug should be periodically wiped with a dry cloth.
How to use To turn on or off the unit To set temperature To select fan speed (5 options) (Remote control display) Remote control receiver and indicator POWER TIMER QUIET POWERFUL (GREEN) (ORANGE) (GREEN) (RED) • For AUTO, the indoor fan speed is automatically adjusted according to the operation mode. To enjoy quiet environment • This setting provides a quiet environment by reducing the airflow noise. Press to restore the remote control to default setting. Not used in normal operations.
• During operation mode selection the power indicator blinks. • Unit selects the operation mode according to the indoor intake temperature and remote control temperature. HEAT mode - To enjoy warm air • In heat mode, it may take a while for the unit to warm up. COOL mode - To enjoy cool air • To reduce power consumption during COOL mode, use curtains to screen off sunlight and outdoor heat. DRY mode - To dehumidify the environment • Unit operates at low fan speed to give a gentle cooling operation.
Cleaning instructions To ensure optimal performance of the unit, cleaning has to be carried out at regular intervals. Indoor unit Front panel Aluminium fin • Switch off the power supply and unplug before cleaning. • Do not touch the aluminium fin, sharp parts may cause injury. • Do not use benzine, thinner or scouring powder. • Use only soap ( pH 7) or neutral household detergent. • Do not use water hotter than 40°C. Air filters Indoor unit Air filters Wipe the unit gently with a soft, dry cloth.
Symptom Cause Mist emerges from indoor unit. Water flowing sound during operation. The room has a peculiar odour. • Condensation effect due to cooling process. • Refrigerant flow inside the unit. • This may due to damp smell emitted by the wall, carpet, furniture or clothing. Indoor fan stops occasionally during automatic • This helps to remove the surrounding odours. fan speed setting. Operation is delayed a few minutes after • The delay is a protection to the unit’s compressor. restarting.
Guide rapide Insérer les piles 2 1 Retirer le couvercle de la batterie 2 Placez des piles AAA ou R03 (valables environ 1 an) 1 3 3 Fermez le couvercle Réglage du MINUTEUR 2 A 1 SELECT B 1 Appuyez sur SÉLECTIONNER 3 SET/CANCEL 2 Réglez l’heure 3 Confirmez Fonctionnement de base 1 Sélectionnez le mode de fonctionnement souhaité 1 3 2 AUTO HEAT COOL DRY 2 Mettez l’appareil sous/hors tension POWER • Veuillez noter que l’indication OFF est la suivante : Pour démarrer : Pour arrêter : 8m 3 S
Table des matières Consignes de sécurité........................................12-13 Comment utiliser................................................14-15 Instructions de nettoyage........................................16 Dépannage..............................................................17 Les caractéristiques techniques du produit.............50 Informations.............................................................
Consignes de sécurité Pour éviter des lésions corporelles, des blessures à autrui ou des dommages matériels, veuillez vous conformer aux instructions suivantes : Un fonctionnement incorrect dû au non-respect des instructions ci-dessous peut causer du mal ou des dommages, lesquels sont classés par degré de gravité ci-dessous : Ce symbole signale la présence d’un danger AVERTISSEMENT pouvant provoquer des blessures graves ou mortelles.
AVERTISSEMENT Rouge Noir Vert/Jaune fils couleurs (Standard IEC) sous-tension marron neutre bleu terre vert-jaune La couleur du câblage peut varier en fonction du standard de code de câblage de chaque pays. Ce matériel doit être mis à la terre pour éviter tout choc électrique ou incendie. Évitez les chocs électriques en coupant l’alimentation et en débranchant : - Avant le nettoyage ou l’entretien. - Lors d’une non-utilisation prolongée,ou - En cas de très violents éclairs.
Comment utiliser Pour allumer ou éteindre l’unité Pour régler la température Pour selectionner la vitesse du ventilateur (5 options) (Affichage de la télécommande) Récepteur de la télécommande et voyant POWER TIMER QUIET POWERFUL (VERT) (ORANGE) (VERT) (ROUGE) • Pour AUTO, la vitesse du ventilateur intérieur est automatiquement ajustée en fonction du mode de fonctionnement. Pour obtenir un environnement silencieux • Ce réglage fournit un environnement silencieux en réduisant le bruit du flux d’air.
est TO, uis Pour régler l’heure • Lors de la sélection du mode de fonctionnement, le voyant d’alimentation clignote. • L’unité sélectionne le mode de fonctionnement en fonction de la température intérieure et de la température désirée affichée sur al télécommande. Mode de CHAUFFAGE - Pour un air chaud • En mode chauffage, l’unité peut prendre un certain temps à préchauffer.
Instructions de nettoyage Pour assurer un fonctionnement optimal de l’unité, un nettoyage devra être effectué à intervalles réguliers. Unité intérieure Panneau avant • Éteignez la source d’alimentation et débranchez avant de nettoyer. • Ne touchez pas l’ailette en aluminium, la partie tranchante peut provoquer des blessures. • N’utilisez pas de benzène, de diluant ou de poudre à récurer. • Utilisez uniquement du savon ( pH7) ou un détergent ménager neutre.
Phénomène Cause De la vapeur se dégage de l’unité intérieure. • Il s’agit d’un effet de condensation dû au refroidissement. Lors du fonctionnement, vous entendez un bruit d’eau qui coule. • Fluide frigorigène à l’intérieur de l’appareil. La pièce a une odeur étrange. • Il est possible qu’il s’agisse d’une odeur d’humidité provenant du mur, du tapis, d’un meuble ou d’un vêtement. En mode de réglage automatique de la vitesse du ventilateur, • Ceci contribue à dissiper les odeurs ambiantes.
Guía rápida Colocación de las pilas 2 1 Retire la tapa de las pilas 2 Inserte pilas AAA o R03 (puede ser usado ~ 1 año) 1 3 2 A 1 SELECT 3 Cierre la tapa Ajuste del TEMPORIZADOR B 1 Pulse SELECT 3 SET/CANCEL 2 Ajuste el tiempo 3 Confirme Funcionamiento básico 1 Seleccione el modo deseado 1 3 2 AUTO HEAT COOL DRY 2 Inicie/detenga el funcionamiento POWER • Tenga en cuenta que la indicación OFF es el siguiente: Para empezar: Para detener : 8m 3 Seleccione la temperature deseada • Ran
Contenido Precauciones de seguridad................................20-21 Cómo utilizar......................................................22-23 Instrucciones de limpieza........................................24 Localización de averías...........................................25 Especificación de Producto.....................................50 Información..............................................................55 Accesorios Español • Control remoto • Pilas AAA o R03 × 2 19 F568882-ES.
Precauciones de seguridad Para evitar lesiones personales, daños a otras personas o daños materiales, cumpla con lo siguiente: El uso incorrecto por no seguir las instrucciones pueden causar daños o averías; su gravedad se clasifica con las de la siguiente manera: Esta indicación advierte ADVERTENCIA del posible peligro de muerte o de daños graves. Esta indicación advierte PRECAUCIÓN de los posibles daños o desperfectos materiales.
ADVERTENCIA Fuente de energía Unidad interior y unidad exterior Rojo Negro Verde/Amarillo cables colores (Estándar IEC) masa marrón neutro azul tierra verde-amarillo Los colores de los cables pueden variar de acuerdo al código estándar de cada país. Este equipo debe estar conectado a tierra para evitar descargas eléctricas o incendios. Evitar descargas eléctricas desconectando la fuente de alimentación: - Antes de limpiarlo o repararlo.
Cómo utilizar Para encender o apagar la unidad Para ajustar la temperatura Receptor del control remoto y el indicador POWER TIMER QUIET POWERFUL Para seleccionar la velocidad del ventilador (5 opciones) (Pantalla del control remoto) (VERDE) (NARANJA) (VERDE) (ROJO) • Para AUTO (automático), la velocidad de ventilador de interior es ajustada automáticamente según el modo de operación.
Modo CALOR - Para disfrutar de aire caliente • En modo calor, puede pasar un rato hasta que el equipo se caliente. Modo FRÍO - Para disfrutar de aire frío • Para reducir el consumo de energía durante el modo FRÍO,utilice cortinas para proteger de la luz solar y el calor de fuera. Modo DESHUMIDIFICACIÓN - Para deshumidificar el ambiente • La unidad funciona en la velocidad de ventilador bajo para proporcionar una agradable refrigeración.
Instrucciones de limpieza Para garantizar un rendimiento óptimo de la unidad, la limpieza tiene que ser llevado a cabo a intervalos regulares. Unidad interior Panel frontal Aleta de aluminio • Apague la fuente de alimentación y desenchufe la máquina antes de limpiarla. • No toque la las partes angulosas de aluminio pueden causar heridas. • No utilice benceno, disolvente o limpiador en polvo. • Utilice sólo jabones ( pH7) o detergentes domésticos neutros.
Localización de averías Las siguientes señales no indican un mal funcionamiento. El ventilador interior se para de vez en cuando con la velocidad del ventilador automática. La operación tarda unos minutos después de volver a arrancar. La unidad exterior emite agua o vapor. El equipo funciona automáticamente cuando la alimentación se restablece tras un fallo de corriente. El ventilador interior se para de vez en cuando durante la función de calentamiento.
Guida rapida Inserimento delle batterie 1 Rimuovere il coperchio batteria 2 2 Inserire batterie AAA o R03 (può essere utilizzato per circa 1 anno) 1 3 Chiudere il coperchio 3 Impostazioni TIMER 2 A 1 SELECT B 1 Premere SELEZIONA 3 SET/CANCEL 2 Impostare l’orario 3 Confermare Operazione di base 1 Selezionare la modalità desiderata 1 3 2 AUTO HEAT COOL DRY 2 Avviare/arrestare l’apparecchio POWER • L’indicazione OFF è la seguente: Per iniziare : Per fermare: 8m 3 Selezionare la temperatu
Indice Precauzioni per la sicurezza..............................28-29 Come utilizzarlo..................................................30-31 Istruzioni per la pulizia.............................................32 Soluzione dei problemi............................................33 Specifiche del prodotto............................................50 Informazioni.............................................................55 Accessori Italiano • Telecomando • 2 batterie AAA o R03 27 F568882-IT.
Precauzioni per la sicurezza Per evitare lesioni personali, lesioni ad altri o danni materiali, attenersi a quanto segue: Il funzionamento non corretto a causa di un guasto seguendo le istruzioni qui sotto potrebbe causare lesioni o danni, la cui gravità è classificata come segue: Questo simbolo indica AVVERTENZE un pericolo di morte o lesioni gravi. Questo simbolo indica ATTENZIONE un rischio di lesioni o danni materiali.
AVVERTENZE Unità interna e unità esterna Rosso Nero Verde/giallo cavi fase neutrale terra colori (Standard IEC) marrone blu verde-giallo Il colore dei cavi può variare a seconda dello standard dei codici di una nazione. Il presente apparecchio deve avere la messa a terra per prevenire scosse o incendio. Evitare scosse togliendo la corrente e staccando la spina nei seguenti casi: - Prima di pulire o eseguire la manutenzione.
Come utilizzarlo Per accendere o spegnere l’unità Per impostare la temperatura Ricevitore e indicatore telecomando POWER TIMER QUIET POWERFUL Per selezionare la velocità del ventilatore (5 opzioni) (Display telecomando) (VERDE) (ARANCIONE) (VERDE) (ROSSO) • Per la modalità automatica, la velocità della ventola interna viene regolata automaticamente in base alla modalità operativa.
Per impostare il timer Modalità AUTO - Per la propria comodità • Durante le seleziona l’indicatore di alimentazione lampeggia. Modalità RISCALDAMENTO - Per godere dell’aria calda • In modalità riscaldamento, ci può volere un pò di tempo perché l’unità si riscaldi. Modalità RAFFREDDAMENTO - Per godere dell’aria fresca • Per ridurre il consumo di energia durante la modalità di RAFFREDDAMENTO, utilizzare le tende per riflettere la luce del sole e il calore esterno.
Istruzioni per la pulizia Per assicurare prestazioni ottimali dell’unità, la pulitura deve essere eseguita a intervalli regolari. Unità interna Pannello anteriore Aletta in alluminio • Prima della pulitura, spegnere l’alimentazione e scollegarla. • Non toccare l’aletta in alluminio, le parti affiliate potrebbero causare lesioni. • Non lavare l’apparecchio con benzene, solventi o polveri abrasive. • Impiegare esclusivamente saponi o detergenti neutri per la casa ( pH7).
Soluzione dei problemi Le condizioni seguenti indicano un guasto. La ventola interna si arresta di tanto in tanto quando si imposta la modalità di regolazione automatica della velocità della ventola. Il funzionamento avrà un ritardo di qualche minuto dopo il riavvio. Dall’unità esterna fuoriesce acqua/vapore. L’unità funziona automaticamente quando l’alimentazione riprende dopo un’interruzione di elettricità. La ventola interna si arresta di tanto in tanto quando si imposta la modalità riscaldamento.
Guιa rápido Colocar as baterias 2 1 Remova a tampa da bateria 2 Introduza pilhas AAA ou R03 (pode ser utilizado ~ 1 ano) 1 3 Feche a tampa 3 Configurar TEMPORIZADOR 2 A 1 SELECT B 1 Pressionar em SELECT (Selecionar) 3 SET/CANCEL 2 Configurar a hora 3 Confirmar Funcionamento básico 1 Seleccione o modo de funcionamento pretendido 1 3 2 AUTO HEAT COOL DRY 2 Ligue/Desligue a unidade POWER • Tenha em atenção que a indicação OFF é a seguinte: Para iniciar: Para parar : 8m 3 Programe a temp
Índice Precauções de segurança..................................36-37 Como usar..........................................................38-39 Instruções de limpeza.............................................40 Resolução de problemas.........................................41 Especificação do Produto........................................50 Informação........................................ Tampa traseira Acessórios Português • Controlo Remoto • Baterias AAA ou R03 × 2 35 F568805-PT.
Precauções de segurança Para evitar ferimentos pessoais, ferimentos em terceiros ou danos materiais, por favor, respeite o seguinte: O funcionamento incorreto devido ao não cumprimento das instruções em baixo pode causar prejuízos ou danos, cuja gravidade é classificada em baixo: AVISO Este símbolo indica perigo de morte ou ferimento grave. CUIDADO Este símbolo indica perigo de ferimento ou danos de bens.
AVISO CUIDADO Unidade interior e unidade exterior Terminais Vermelho Preto Verde/Amarelo fios vivo neutro terra cores (Padrão CEI) marrom azul verde-amarelo Cores de fios podem variar-se dependente do padrão de cores de fio de cada país. Este equipamento deve ser ligado com fio de terra para prevenir choques elétricos ou incêndio. Previna os choques elétricos desligando o fornecimento de energia e retirando a ficha da tomada: - Antes da limpeza ou manutenção.
Como usar Ligar e desligar o aparelho Configurar a temperatura Selecionar velocidade do ventilador (5 opções) (Visor do controlo remoto) Receptor e indicador de controlo remoto POWER TIMER QUIET POWERFUL (VERDE) (LARANJA) (VERDE) (VERMELHO) • Para AUTO, a velocidade da ventoinha interior é ajustada automaticamente de acordo com o modo de operação. Para desfrutar de um ambiente silencioso • Esta programação fornece um abiente silecioso reduzindo o barulho da saída de ar.
Para selecionar o modo de operação Para ajustar o temporizador Mode AUTOMÁTICO - Para sua conveniência • Durante a seleção do modo de funcionamento o indicador de potência pisca. • A unidade selecciona o modo de funcionamento de acordo com a temperatura do interior e com a temperatura do controlo remoto. Mode de AQUECIMENTO - Para desfrutar de ar quente • No modo de calor, a unidade pode demorar um pouco a aquecer.
Instruções de limpeza Para assegurar um ótimo desempenho do aparelho, a limpeza deve ser efectuada a intervalos regulares. Unidade interior Painel frontal Alhetas de alumínio • Desligue o fornecimento elétrico e desligue a ficha da tomada antes de limpar. • Não toque nas alhetas de alumínio, a parte afiada pode causar ferimentos. • Não utilize benzina, diluente nem pó de limpeza abrasivo. • Utilize apenas sabões ( pH7) ou detergente de uso doméstico neutro.
Resolução de problemas Os seguintes sintomas não indicam uma avaria do aparelho. Sintoma Sai névoa da unidade interior. Ouve-se o fluxo de água quando a unidade está a funcionar. A sala tem um odor estranho. Causa • Efeito de condensação devido ao processo de arrefecimento. • Fluxo do líquido de refrigeração no interior da unidade. • Pode ser devido a um odor de humidade produzido pela parede, alcatifa, mobília ou vestuário. • Isto ajuda a remover os odores do ambiente.
Бърз справочник Поставяне на батериите 1 Свалете капака за батериите 2 2 Поставете AAA или R03 батерии (могат да се използват приблизително една година) 1 3 3 Затворете капака настройка на ТАЙМЕР 2 A 1 SELECT B 1 Натиснете ИЗБОР 3 SET/CANCEL 2 Настройте часа 3 Потвърдете Основни функции 1 Избор на желания режим на работа AUTO 2 HEAT COOL DRY 1 3 2 Включване/спиране POWER • Имайте предвид, че индикаторът ИЗКЛЮЧЕН работи както следва: За да започнете: За да спрете : 8m 3 Настройка на желан
Съдържание Предпазни мерки............................................. 44-45 Начин на употреба........................................... 46-47 Инструкции за почистване....................................48 Отстраняване на проблеми..................................49 Продуктова спецификация....................................50 Информация...........................Последна страница Аксесоари Български • Дистанционно управление • Батерии AAA или R03 × 2 43 F568882-BU.
Предпазни мерки С цел да предотвратите нараняване на себе си, други хора или нанасяне на материални щети, моля, придържайте се към следните инструкции: Неправилната експлоатация поради неспазването на инструкциите по-долу може да причини нараняване или щети, сериозността на които се степенува както следва: Този знак предупреждава ПРЕДУПРЕЖДЕНИЕ за опасност от смърт или тежки наранявания. Този знак предупреждава за опасност от наранявания или имуществени щети.
Вътрешен и външен модул С цел предотвратяването на опасност, ако захранващият кабел е повреден, трябва да бъде сменен от производителя, обслужващия ви специалист или друго квалифицирано лице. С оглед избягването на повреда или корозия на вътрешното тяло, не използвайте вода, бензин, разредители или абразивен прах за почистването му. Силно препоръчително е да се монтира заземителен автоматичен прекъсвач (ELCB) или устройство за диференциална защита (RCD), за да избегнете токов удар или пожар.
Начин на употреба Включване и изключване на устройството Настройка на температурата За избор на скорост на вентилатора (5 възможности) (Дисплеят на дистанционното управление) Приемник и индикатор на дистанционното управление POWER TIMER QUIET POWERFUL (ЗЕЛЕН) (ОРАНЖЕВ) (ЗЕЛЕН) (ЧЕРВЕН) • При режим AUTO скоростта на вътрешния вентилатор се настройва автоматично според режима на работа. За да се насладите на тишината • Тази настройка осигурява тиха околна среда чрез намаляване на шума на въздушния поток.
в ими на АВТОМАТИЧЕН режим на работа - За ваше удобство • По време на избиране на режима на работа индикаторът мига. • Уредът избира работния режим според вътрешната температура на вентилация и температурата, зададена с дистанционното управление. Режим на ОТОПЛЕНИЕ - За да се наслаждавате на топъл въздух • В режим на отопление може да отнеме известно време, докато уредът загрее.
Инструкции за почистване За да осигурите оптимална експлоатация на устройството, трябва редовно да го почиствате. Вътрешна част Алуминиево ребро Преден панел • Преди почистване изключете електрическото захранване и извадете щепсела. • Не докосвайте алуминиевото ребро, острата част може да причини нараняване. • Не използвайте бензин, разредител или абразивни прахове. • Използвайте само сапуни ( pH7) или неутрални домакински прахове. • Не използвайте вода, по-гореща от 40°C.
Отстраняване на проблеми Следните симптоми при работата на уреда не означават неизправност. Симптом От вътрешната част излиза замъглен въздух. Звук от течаща вода по време на работа. Стаята има странна миризма. Причина • Кондензиране поради процеса на охлаждане. • Охлаждаща течност вътре в уреда. • Това може да е миризмата на влагата, отделяна от стените, килима, мебелите или дрехите. • Това спомага за отстраняване на околните миризми.
Product Specification INDOOR UNIT OUTDOOR UNIT Model CS-UE9PKE CS-UE12PKE CU-UE9PKE CU-UE12PKE COOL HEAT Single, 230V,50Hz Power/Current COOL HEAT Single, 230V,50Hz [kW] 0.700 0.820 1.010 1.120 [A] 3.30 3.80 4.70 5.20 Refrigerant [kg] 0.770 0.860 Cooling Capacity [kW] 2.50 3.50 Heating Capacity [kW] 3.30 4.25 JIS C 9612 [<70 dB(A)] Noise Level Conditions 1m Distance Max.
F568882-en.indd 51 2012-11-13 17:10:06 • Consommation en mode veille ≤ 0,9W (quand mis en veille par télécommande, sauf sous contrôle d’autoprotection). • Consumo di energia in modalità standby ≤ 0,9W (quando spento dal telecomando, tranne con controllo di autoprotezione). • Stand-by stroomverbruik ≤ 0,9W (indien op OFF geschakeld met afstandsbediening, behalve in de modus zelfbescherming). • Consumo energético em Standby (modo inactivo) ≤ 0.
MEMO 52 F568882-en.
MEMO 53 F568882-en.
Information/Informations/Información Informazioni/Informação/Информация English Information for Users on Collection and Disposal of Old Equipment and Used Batteries These symbols on the products, packaging, and/or accompanying documents mean that used electrical and electronic products and batteries should not be mixed with general household waste.
Español Información para Usuarios sobre la Recolección y Eliminación de aparatos viejos y baterías usadas Estos símbolos en los productos, embalajes y/o documentos adjuntos, significan que los aparatos eléctricos y electrónicos y las baterías no deberían ser mezclados con los desechos domésticos.
Português Informações para Utilizadores referentes à Recolha e Eliminação de Equipamentos Velhos e Baterias Estes símbolos nos produtos, embalagens e documentos significam que os produtos eléctricos e electrónicos usados nao podem ser misturados com os resíduos urbanos.